Images with Impact – Contrast in Nature

Explore how haze affects the contrast in distant objects, how humans respond and how that knowledge can be used in your photographs.

Last year I started a series of articles under the general theme of Images with Impact. In it we are discussing things you can do with your images in Lightroom and Photoshop to enhance their impact. When I got to the topic of contrast I came to an abrupt halt. The more I thought about contrast, the more I wanted to begin that discussion with some real examples from nature. But to do that, I needed some photographs that illustrated what I wanted to share with you. And in Southern California, the types of photographs I wanted are only possible in winter. But it’s winter now. And I’ve been able to capture the photographs that I want, so now we’re picking up the series again.

What distinguishes a photograph created by the serious student of photography from one taken by a casual photographer? Many things to be sure. But one thing that stands out is a sense of clarity, a clear quality. The casual photographers’ photographs are just what the camera captures and are often like looking through a bit of haze and I don’t mean that they are out of focus. It’s the light. The effect may be subtle but it is very real. A more accomplished photographers’ photographs have a special quality to them, a quality that engages us, that draws us in and holds our attention. You might describe it as a crisp quality.  (You can click on the photographs to enlarge them.)

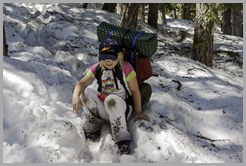
CRW_9603

(My daughter some years ago as we hiked out of a late spring backpacking trip in the local mountains.)

The serious student of photography skillfully applies contrast in the digital darkroom to achieve this look. But before getting in to how this is done, let’s step back and take a look at how we respond to contrast not only in photographs but also in nature.

In the following discussion I will use examples from nature to illustrate the affect contrast has on us. The idea is to understand how it works so that we can more effectively apply this knowledge to our photographs.

Continue reading “Images with Impact – Contrast in Nature”

(330)

Sleeklens Lightroom Workflow Review

Use Lightroom presets and brushes from Sleeklens to enhance your creativity and improve your images.

Sleeklens is a company with a concept that is not new in the Adobe Lightroom world – providing presets to help us in processing our photographs. I’ve always shied away from using presets, just like I rarely if ever use the Auto tone adjustment built into Lightroom. I’ve always felt that I prefer making all the decisions myself rather than letting the computer make them in the case of Lightroom Auto tone or a designer make them in the case of presets.

But I recently received an evaluation copy of one of the Sleeklens presets workflows and have been using them on several photographs I’m working on. Sleeklens has a variety of presets for different purposes. The collection I received is titled ‘Through the Woods Workflow.’

Content

Through the Woods Workflow consists of forty-seven presets and twenty-nine brushes.

Presets

The Presets are global adjustments, affecting the entire image. Once installed they are in their own folder in the Presets area of the Development module screen. The presets are applied just like any other preset – namely, clicking on them.

The presets are organized into seven groups – All in One, Base, Exposure, Color Correction, Tone/Tint, Polish and Vignette. The All in One presets can affect the Basic, Tone Curve, HSL and Split Toning adjustment groups. Base mostly affects the Basic adjustments and occasionally the Tone Curve. One Base preset affects HSL and Split Toning. Exposure sets either Basic or Tone Curve. Color Correction adjustments are applied to HSL. Tone/Tint plays with Vibrance and Split Toning. Polish mostly adjusts Basic. And Vignette sets Post-Crop Vignetting in Effects. One thing that is missing is settings that utilize the new Dehaze adjustment in Effects.

Brushes

The brushes are used with the Adjustment Brush, Graduated Filter or Radial Filter. There are five groups – Basics, Color, Effects, Haze and Light. The brushes are applied by selecting the effect and painting with the Adjustment Brush or creating the Graduated or Radial Filter. Continue reading “Sleeklens Lightroom Workflow Review”

(1144)