Safely remove dust from your digital SLR sensor.
Dust spots. How annoying. They can give a blue sky chickenpox.
Dust spots on your sensor can mean hours of laborious effort removing them one by one in the digital darkroom. But, because they are on the sensor, that most sensitive component of our digital cameras, we are sometimes terrified to attempt removing them. So we either put up with them or we send our cameras out to a repair guy and pay good money to have him remove them.
Oh yeah, our cameras do the dust removal shake thing every time you turn them on and off. But some cameras work better than others. And there are conditions where the camera can shake the sensor as much as it wants but it won’t get rid of all the dust.
As frightening as it seems, removing dust from your sensor doesn’t have to be all that dangerous. As it turns out, there are three levels of dust removal – which are performed in that order. Any one of us can do the first level. And most of us would have enough confidence to do the second. The most stouthearted of us will even attempt the third but that’s not a level that needs to be resorted to very often. So what are these levels? Let’s take a look at them one by one.
Level 1 – Blowing
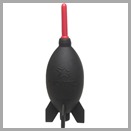
When the camera is turned on there’s a small static charge on the sensor that can attract particles of dust. They are held to the sensor by the static electricity and typically the attraction is fairly weak. So the first level involves  blowing the dust particles off the sensor with a gentle stream of air. The trick is to use the right source for the gentle stream of air. One thing you absolutely do not want to use is canned air. The aerosols contain propellants which can squirt out solvents along with the air. And that’s not very good because the solvents will get on your sensor and create an even worse problem. But there are blowers that are specifically designed just for this purpose. The Giotto Rocket is one excellent example. The thing that makes the Giotto and others like it so special is that it draws the air in from the back and blows it out the front. That way it doesn’t inadvertently pull in a particle of dust that it just dislodged, only to shoot it right back out at the sensor – and at high velocity. Smart.
To blow the dust off your sensor, check your camera’s manual and find the menu option for manual sensor cleaning. Remove the lens from your camera body and activate the option. When you do this, the mirror will flip out of the way and expose the sensor. Hold the camera body so the lens opening is facing down and gently (with emphasis on the word ‘gently’) blow a stream of air against the sensor. I like to direct the air not only to the center of the sensor but the edges and the corners. When you’re done turn off the camera and the mirror will drop back in place. (Of course, if you have a mirrorless camera there is no mirror to flip out of the way. When you take the lens off the sensor is already exposed.) Many digital SLRs will not allow you to do a manual cleaning if the battery does not have enough charge. I think that is so that the camera will not run out of juice before the mirror is put back in its place. This process is pretty easy isn’t it. Nothing touches the sensor but air. Continue reading “Dust, Darn Dust”
(226)
Like this:
Like Loading...


