The most fundamental skill you need in photography is the ability to make the correct exposure. You can have the greatest ‘eye’ but if your images are not correctly exposed you will never be able to make a fine art print. In addition you will take some great photographs only to be frustrated when you try to render them as prints.
There are two exposure gremlins – over exposure 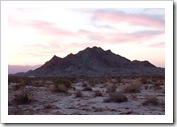 and under exposure. It doesn’t matter if you’re shooting a digital or a film camera, they both are subject to the same problems. But
 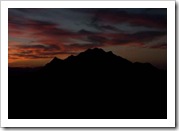 what is constitutes an over exposed or under exposed photograph and more importantly, how can you ensure you’re getting the proper exposure?
Photography is all about light. A camera is simply a device that controls the amount of light that is allowed to shine on the sensor or the frame of film. Exposure is all about letting the right amount of light into your camera. Sounds simple? Well, there are a number of things that make this a bit more complicated, not the least of which is the terminology – f-stop, ISO settings and shutter speed.
There are four things, variables if you will, that control the amount of light that strike your sensor (I’ll use terminology for digital cameras from here on out). These four variables must be manipulated to get the correct exposure. First is the amount of light in your subject. If you’re a landscape photographer this is not something you can usually control. The day can be bright with direct sunlight or overcast. It can be before dawn or midday. If you do studio work then you can control light with your studio lighting. Secondly is the size of the opening in the lens through which the light passes. You can control this yourself or let your camera control it with the built in light meter. Third is the amount of time the sensor is exposed to the light. Again, you can control this variable yourself or let the camera control it. Last is the sensitivity of the sensor. Films also come with different sensitivities to light. This is the one thing you must determine.
Think of Light as Water
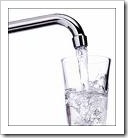 Sometimes I find it helpful to understand exposure and all the terms that go with it by thinking of light as though it is water. I fill glasses of water every day and taking a properly exposed photograph is a lot like filling a container of water. So let’s start with the analogy.
The first thing I do when I want to get a drink of water is select the size of the glass. If I select a larger glass it will take more water to fill and of course a smaller glass will take less. Your digital camera allows you to select the size of the glass which in turn determines how much light is required for a correct exposure. This is you ISO setting. By the way, ISO stands for the International Organization for Standards and refers to the ISO 5800:1987 standard. I know, that’s more than you wanted to know. But let’s get back to the glass of water. When you select a different ISO setting you’re determining the size of the glass of water; that is, the amount of light required to make a proper exposure.
It’s actually fairly simple – if you think backwards. For example, an ISO 100 setting means you’re selecting a large glass. With an ISO 200 setting the glass is smaller. In fact, it holds half the amount of water as the ISO 100 glass. An ISO 400 setting holds half the amount of water as the ISO 200 glass and ¼ the amount of water as the ISO 100 glass. So the practical outcome of this is ISO 100 requires more light to get a proper exposure than ISO 400 – exactly four times more light.
Digital cameras use ISO settings and film is also rated in the same ISO units – 100, 200, 400, etc. The big difference between digital and film is that if you want to change the ISO setting with film you need to change the roll of film. With a digital camera all you need to do is change the setting on your camera.
So you can see that setting the amount of light required to make a correct exposure is the first thing you do. We’ll look into how you choose an ISO setting in a subsequent article.
The second variable to consider is the amount of light in your subject. Now if you shoot available light then the amount of light is not under your control. If you use flash whether it is the flash built into your camera or an external flash then you have more control over the amount of light. For the sake of this discussion let’s forgo the discussion of flash and consider simply available light.
 In our water analogy, available light is just like water pressure. I live in a home where the water pressure changes from day to day and perhaps even at different times in the day. How do I know that? Well, when I water the lawn sometimes the water covers the lawn nicely. But other times it sprays on the windows which annoys my wife.
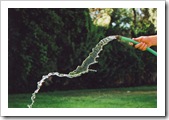 Water pressure, then, is about how much water is available and how quickly. With light, it is the amount of light available in your subject. On a bright, clear day you have a lot of light available. But at dusk or dawn the amount of light is low (and changes by the minute). It’s intuitive that the lower the water pressure the longer it’s going to take to fill your glass. The same holds true of light. The lower the light levels the longer it’s going to take to make a proper exposure.
As a practical matter we measure the amount of light on the subject using a light meter. Most all cameras these days have built in light meters but some photographers use hand held light meters for various reasons. Light meters do a pretty good job of measuring the amount of light on a subject but they don’t always interpret the subject correctly. Hold that thought; we’ll cover that also in a subsequent article
When shooting with available light the amount of light is the one variable that is not under our control.
Let’s move on to the third variable. You know that it takes longer to fill a bigger glass than a smaller one. Likewise, if you select a lower ISO setting it will take a longer time to get a correct exposure than a higher ISO setting. Remember that ISO 400 takes ¼ the amount of light than ISO 100? Well, if it took 1 second to get a correct exposure at ISO 100 it would take you ¼ second to get a correct exposure at ISO 400 (all other things being equal of course).
The variable we’re talking about is shutter speed. It is usually measured in fractions of a second although shutter speed could be seconds, minutes or even hours in extremely low lighting conditions. The longest exposure I’ve taken so far is 10 minutes. That was a night shot of Devils Tower in Wyoming.
Standard speeds come in multiples of 2 just like ISO settings. So, for example, if the fastest shutter speed on your camera is 1/1000 second than longer shutter speeds will be 1/500, 1/250, 1/125, 1/60, 1/30, 1/15, 1/8, etc. This is a good place to introduce the concept of a ‘stop.’ Photographers refer to increasing or decreasing an exposure by ‘one stop,’ ‘two stops, ‘half a stop,’ etc. Stops are actually pretty simple. A change in exposure of one stop either doubles the amount of light (if the exposure was increased by one stop) or reduces the amount of light by half (if the exposure was decreased by one stop). So you can see the series of shutter speeds above are all one stop apart.
It’s worth mentioning that most cameras will set exposure in ½ stop increments. Some will even adjust exposures in 1/3 stop increments. This is to give the photographer finer control over exposure.
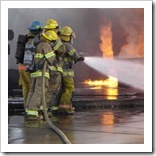
The fourth and final variable is the size of the hose you use to fill your glass of water. If you fill your glass through a straw it will take forever, especially if it’s a big glass. If you fill it from a fire hose it won’t take any time at all. The diameter of the hose you use to fill the glass determines how much water passes through the hose and therefore how long it will take to fill it (assuming of course the water pressure is the same).
A camera can control the amount of light that passes through the lens. Actually, this control is actually in the lens. This is called ‘aperture’ and is measured in f/stops. 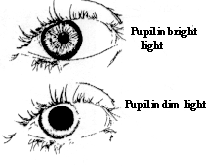 Lenses have a diaphragm that works a lot like the pupil of your eye. You have seen peoples’ eyes in dark rooms. Their pupils are wide open. The same pupils in bright sunlight are little tiny black dots. Our eyes automatically adjust to the amount of light in the subject so that the right amount of light enters our eyes.
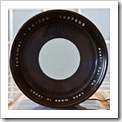
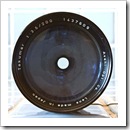 Camera lenses can also adjust the amount of light they allow to pass through. They work much like our eyes work with a diaphragm that can be opened or closed.
The concept of f/stops is probably the most difficult because the numbers are so strange. But the first thing to understand is the numbers work backwards just like ISO numbers. In other words, the smaller the numbers the more light is allowed to pass through.
The problem with f/stops, like I said, is the numbering system. Let’s start at a very high f/stop and work our way down. Remember, high numbers admit small amounts of light. Lenses often go up to f/22 so that’s a good place to start. This may be the smallest the ‘pupil’ can get for your lens. One stop down from f/22 would be f/16. Remember one stop will in this case double the amount of light. One stop down from f/16 will be f/11. Here are the f/stops laid out so you can hopefully see the pattern.
f/22 f/16 f/11 f/8 f/5.6 f/4 f/2.8 f/2 f/1.4 f/1
Most lenses are not capable of going all the way down to f/1 or even f/2.8 for that matter. Lenses usually stop at f/4 or even f/5.6. To let more light in the f/2.8 and lower lenses have to be bigger around. That makes them heavier and a lot more expensive.
Wrapping it Up
So, those are the four variables that need to come together to make a good exposure – the amount of light available on the subject, the ISO setting (amount of light needed to make a correct exposure), the shutter speed (the length of time the light is allowed to enter the camera) and the aperture (the diameter of the opening through which the light passes in the lens).
The next step in mastering exposure is putting these four variables together. There are a lot of creative decisions that enter into the selections you make. There are also a lot of other exposure gremlins out there that conspire against us and that we need to be aware of. These are the topic of the next article.
(2022)

One thought on “All You Ever Wanted to Know about Exposure”