Dust spots. How annoying. They can give a blue sky chickenpox.
Dust spots on your sensor can mean hours of laborious effort removing them one by one in the digital darkroom. But, because they are on the sensor, that most sensitive component of our digital cameras, we are sometimes terrified to attempt removing them. So we either put up with them or we send our cameras out to a repair guy and pay good money to have him remove them.
Oh yeah, our cameras do the dust removal shake thing every time you turn them on and off. But some cameras work better than others. And there are conditions where the camera can shake the sensor as much as it wants but it won’t get rid of all the dust.
As frightening as it seems, removing dust from your sensor doesn’t have to be all that dangerous. As it turns out, there are three levels of dust removal – which are performed in that order. Any one of us can do the first level. And most of us would have enough confidence to do the second. The most stouthearted of us will even attempt the third but that’s not a level that needs to be resorted to very often. So what are these levels? Let’s take a look at them one by one.
Level 1 – Blowing
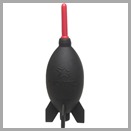
When the camera is turned on there’s a small static charge on the sensor that can attract particles of dust. They are held to the sensor by the static electricity and typically the attraction is fairly weak. So the first level involves  blowing the dust particles off the sensor with a gentle stream of air. The trick is to use the right source for the gentle stream of air. One thing you absolutely do not want to use is canned air. The aerosols contain propellants which can squirt out solvents along with the air. And that’s not very good because the solvents will get on your sensor and create an even worse problem. But there are blowers that are specifically designed just for this purpose. The Giotto Rocket is one excellent example. The thing that makes the Giotto and others like it so special is that it draws the air in from the back and blows it out the front. That way it doesn’t inadvertently pull in a particle of dust that it just dislodged, only to shoot it right back out at the sensor – and at high velocity. Smart.
To blow the dust off your sensor, check your camera’s manual and find the menu option for manual sensor cleaning. Remove the lens from your camera body and activate the option. When you do this, the mirror will flip out of the way and expose the sensor. Hold the camera body so the lens opening is facing down and gently (with emphasis on the word ‘gently’) blow a stream of air against the sensor. I like to direct the air not only to the center of the sensor but the edges and the corners. When you’re done turn off the camera and the mirror will drop back in place. (Of course, if you have a mirrorless camera there is no mirror to flip out of the way. When you take the lens off the sensor is already exposed.) Many digital SLRs will not allow you to do a manual cleaning if the battery does not have enough charge. I think that is so that the camera will not run out of juice before the mirror is put back in its place. This process is pretty easy isn’t it. Nothing touches the sensor but air.
Level 2 – Brushing
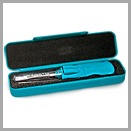
 The next level requires a little bit more confidence. If blowing does not remove all of the dust particles, you need to get a little more serious. This level involves using a special brush to brush the dust particles off of the sensor. One of the most popular brushes for this purpose is sold by Visible Dust. The brush is called the Arctic Butterfly and it’s a very special brush indeed. Its bristles are made of a material that collects a static charge when they are waved through the air. The whole idea is that the static charge on the bristles will attract the dust particles away from the sensor.
So how do you get the static charge on the bristles? Well, that’s where the Arctic Butterfly is really clever. The brush fits into a handle and the handle has a little built-in motor and a battery and a switch. You put the brush in the handle, turn on the switch and the motor spins the brush around. You do that for a few seconds and the brush now has a nice static charge. With your camera in manual cleaning mode all you do now is swipe the brush gently across the sensor, making sure that only the bristles touch the sensor. The dust particles will cling to the brush and your sensor will be free of spots once again.
There are a couple of things to be aware of when using the Arctic Butterfly. First and most important is you always want to keep the brush in the protective plastic holder a comes in. And directly related to that, you never want to touch the brush. In fact, the only things that should ever touch the brush is the sensor and the case it’s stored in. You do not want to get oils from your fingers on the brush because that will contaminate it and in turn the brush will contaminate your sensor. When you’re done cleaning your sensor, spin it to remove any dust it’s picked up and return the brush to its plastic case and stored safely away. The second thing to be aware of is you only need to swipe the dust across the sensor once. It does no good to go over and over the sensor time after time. One swipe is all it needs.
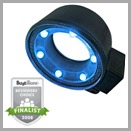
 A handy little thing that you can get from Visible Dust is a sensor cleaning loupe. This is a round device with a magnifying glass and lined with LED lights. It fits over the lens opening to your camera body. You can examine the sensor and actually see the dust spots. This is really handy to use before and after you clean your sensor.
If your sensor still has dust, repeat the Level 2 process one or more times. If the spots are still there then proceed to Level 3. It is very important that you attempt Level 1 and Level 2 before proceeding to Level 3. In this last level you will be swiping a solid swab across the sensor and you want to make sure no loose dust specks remain.
Level 3 – Swabbing
 Okay, you’ve done the level one and the level two cleaning but there are still spots on your sensor. These are probably not dust spots anymore. Most likely they are oil spots. How can that happen you ask? This is more common with new camera bodies. Sometimes the lubricant that is used on the mirror mechanism comes off and little droplets can lands on the sensor. These are not going to come off with a gentle stream of air or the swipe of a brush with static charges. This requires a solvent and this leads to level three. You may decide at this point to not attempt it yourself but sent it off to a professional for cleaning. But with the right equipment and a steady hand you can do it yourself. Visible Dust also sells a wet cleaning kit. This consists of the cleaning solvent and some swabs specifically designed for cleaning sensors. The swabs are made from a special paper that has no lint and absorbs the solvent. They come wrapped in cellophane and are untouched by human hands. To do the wet cleaning, remove the swab from the cellophane, put a few drops of solvent on it and gently wipe it across the surface of your sensor. If you want to make a second pass, turn the swab over and wipe it across the sensor using the other side. That’s it. When you’re done, throw the swab away because you will never use it again.
Again, it’s important to emphasize that you don’t want to swab your sensor until you’ve first completed Levels 1 and 2.
When I’m out photographing and return to my room at night, a standard practice is to use the first method to blow any dust off the sensor that’s accumulated during the day. I do that every night and it saves a lot of grief later. I also bring my Arctic Butterfly brush with me because you just never know when you may need it. But I only do the sensor cleaning in my hotel room. I would never do it in the field, not even in my car with the doors closed and the windows rolled up.
When it comes to dust, prevention is the best way to remove it. Now there’s no way that you can completely prevent dust from getting on your sensor. But you can certainly minimize the chances. Just think of it. If you’re changing lenses and your camera is sitting on your tripod while you remove your lens, walk over to your camera bag, open it, pull out the replacement lens, fiddle with it, stow the original lens, zip up your camera bag, walk back to your camera and finally put the new lens back on the body, what’s your camera doing? It’s collecting dust. The sensor is exposed to the atmosphere, it has a static charge on it because you forgot to turn the camera off, and it’s gathering dust, invisible dust, particles you cannot see but they are there. It makes sense that the longer the lens is off the camera the more dust it’s going to collect. Right? My goal is to change a lens in three seconds and to always turn the camera off beforehand. I prefer to take my camera to the camera bag, get the replacement lens ready and change the lens there. If you prefer to leave your camera on the tripod, then get the replacement lens from your camera bag first, get it ready and with one hand remove the lens and with the other hand put the replacement lens on as quickly as you can. You can do that in three seconds I guarantee.
So that’s the skinny on dust removal or, more appropriately, spot removal. The first level is not difficult at all and something we can all do. The second level is eminently doable as well, just as long as you’re very careful. I’ve done the third level a couple of times and, just like the second level, involves using the right materials and being very careful. But if you make it a habit of blowing off your sensor on a regular basis, preferably every night, the spot removal tool in Lightroom is going to feel like you’ve abandoned it. And you’re going to have more time to make great photographs instead of removing those annoying dust spots.
(226)
