Last night I ran across an example of why we shoot in RAW (not in the RAW – puhleeeze).
Digital SLR cameras and a few point and shoot camera support the RAW file format for our images. RAW is essentially what the sensor captured – unprocessed, uncompressed, unadulterated. It takes a bit to get used to but once you do you’ll not go back to JPEG, the other file format.
One of the benefits of RAW is it gives you a lot more flexibility including recovering from poorly exposed images, especially over exposed. Now, if you’ve read any of my histogram posts (search this blog for Histograms to find them), you know that the single most important thing to avoid as far as exposure is concerned is highlight clipping. But with RAW you have a chance to recover an overexposed image and turn it into something very acceptable. It doesn’t always work but sometimes it does.
 OK, so I was scanning images in Lightroom last night and ran across this one. It’s washed out except for the foreground and there is a tremendous amount of highlight clipping in the upper right hand corner. (I wouldn’t blame you if you stopped reading hear and said, “There’s no way he can do anything with that image. It’s a mess.” Which it is. But humor me and read on.)
By the way, you can click on the images to see them in a larger format.
Don’t believe me? Well here’s the image as it looks in Lightroom with the highlight clipping turned on. (See the triangle that is circled in the upper right corner of the histogram.) It displays all the clipped highlights in red.
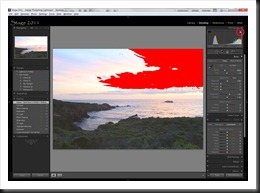 Look at all that red. Looks like the image just might be ruined. The sky is overly bright and the foreground way too dark. And the ocean – nothing special going on there. It’s just totally uninteresting (to say the very least; it would be more accurate to call it UGLY!). I don’t know why I even bothered with it but I did. I must have been in a strange mood or too tired to know any better (it was awfully late). So let’s see what happened.
The first thing I did was use the Exposure adjustment to decrease the overall exposure. The reason is to see if the blown highlights can be recovered. By decreasing Exposure you get pretty much the same effect as decreasing exposure in your camera. Everything gets darker. I decreased it a lot, over 2 1/2 stops (-2.62 to be exact). That’s like stopping your lens down 2 2/3 stops.
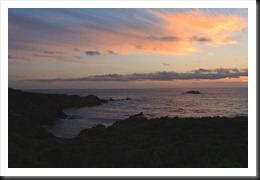 Well, that did a pretty good job. The sky looks like it just might work out. But I’m still concerned with some possible residual clipping in the highlights, particularly the red channel. You can see there’s a lack of detail in the brightest part of the clouds. That’s what’s bothering me. So I turned to the Recovery adjustment right below the Exposure adjustment.
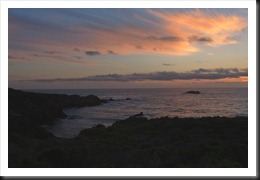 The Recovery adjustment is specifically for recovering highlights. However, if I had tried to use this tool first there was way too much to recover. So using Exposure first got the highlights enough under control so the Recovery tool would be more effective. The result is pretty subtle. Compare the brightest part of the cloud and you’ll see some added definition there. And the red channel clipping in the first image appears to be taken care of.
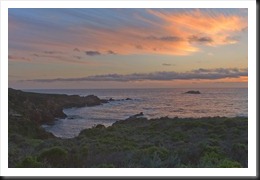 Now it’s time to turn our attention to the near black foreground. I chose the Fill Light adjustment. This tool brightens the dark areas without affecting the bright ones. It works on the lower portion of the histogram. It’s called Fill Light because it’s like using fill flash. I use it a lot in situations like this. You have to be really carefully with it because you can get some grunge effects which some people like but not me. But in this image a lot is called for. I added 75 Fill Light. See how not only the dark foreground was recovered but also the ocean. And the clouds are pretty much unchanged.
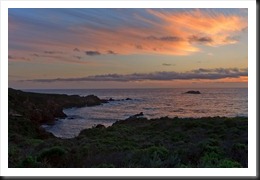 Now we need a black point. That’s some small area in the image that is pure black. The image just doesn’t have any punch; it’s lacking contrast. I set a black point in virtually every image I work on. It forms the tonal foundation of the photograph. And I like to add Blacks before fiddling with Contrast. This one needs a lot of Black, like 55.
Can you believe this is the same image we started with? It’s totally transformed. But we’re not done yet. There’s a lot more we can do.
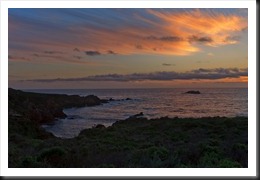 I did some more tweaking with Brightness, Contrast, Exposure (again) and Blacks. The changes are pretty subtle but important. And dawgone, it’s looking good.
Notice how saturated the colors are and I haven’t even touched the HSL adjustment. I like to work with luminosity (or tonality) first to get the image looking good. If I started out with saturation (as is often what I want to do) I’d be way out of control by now. In Lightroom, adjusting luminosity has an effect on color saturation (same in Photoshop but at least there you can control it).
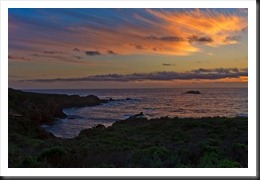 Now for the secret weapon. Actually, there are two. The first is Clarity and the second is Vibrance. Clarity makes the image glow. It does some mid-tone sharpening that doesn’t really sharpen anything but instead adds sparkle to the image. I don’t know how else to describe it. Did I mention it was magic? And Vibrance is a subtle saturation adjustment (if you don’t go overboard) that tends to adjust the less saturated colors. I gave it 75 clarity and 50 Vibrance. You can see a lot better definition in the waves and clouds from the Clarity and richer blues because of the Vibrance.
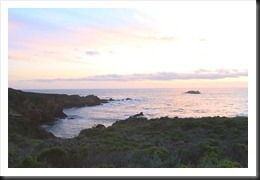
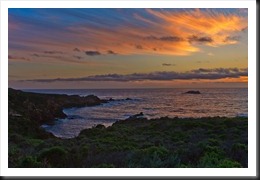 I’m still not totally happy with the foreground so a little more Fill Light please. I punched it up to 90 which put a nice glow on the green foliage. And that’s it. What do you think? Try that with JPEG. Can’t be done. It’s no wonder why serious photographers prefer to shoot in RAW.
Let’s recap. All of the adjustments right up to the very last were on luminosity – Exposure, Recovery, Fill Light, Blacks, Brightness and Contrast. And each adjustment addressed the most glaring problem: first the highlight clipping, next the dark areas, then the black point, then overall contrast and brightness. The only adjustment on saturation came at the very end with a fairly stiff shot of Vibrance.
You might hear someone asking which one is real. Well, to be honest, neither. Definitely the blown out image isn’t even close. And the final image is richer and more intense than the actual sunset. But which one is more believable – definitely the finished one. And what I was feeling is more in line with the finished image. It was indeed a very nice sunset.
Now I wouldn’t suggest overexposing images on purpose. It doesn’t always turn out this well. In fact, this photograph is the exception. But the lesson is if you really like the image but it’s overexposed, give it a shot. Five minutes with Lightroom and you’ll know if you can do anything with it or not.
Give it a try.
We do photography workshops. Come on out and join us. Click here to check us out.
You can also check out our photography. Click here.
(1778)

ralph, thanks for doing this demonstration. After Adobe Bridge (CS3) kept malfunctioning, I decided to buy Lightroom 3, especially because it was $100 less. This tutorial will come in handy for images such as you used. Btw, I really enjoy your blogs. They are friendly, easy to understand and full of info. Yours is one of several I read every post.
Thanks Judy. It means a lot that you find these blog posts useful. If you want to quickly find the lightroom blogs you can search on Lightroom (if you haven’t already).
Hope you find great light. And if you have any questions please don’t hesitate to contact me. Or if there are any topics you would like me to cover please let me know.