Last week I published a post in which I presented a photographic situation and solicited input on what decisions might go into getting the shot. The situation was to photograph the interior of the beautiful Cologne Cathedral in Germany. Here’s a link to the post.
Getting the Shot – Cologne Cathedral
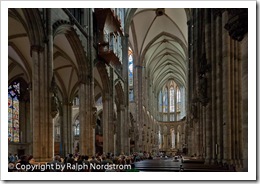
In this post I’d like to share what was going through my mind as I prepared to push the shutter. For starters, here’s the final photograph (click the photograph to enlarge it).
You may recall from the original post that I spoke of two things that go into every work of art – the artists Creative Vocabulary and the Interpretive Decisions he or she makes.
In this instance, which focused on the technical aspects of getting the shot, the Creative Vocabulary consists of the capabilities of the camera and the knowledge to use them. The Interpretive Decisions are those decisions made in the moments that lead up to the instant the shutter is pressed. So let’s step through what was going through my mind as I prepared to capture this image.
Let me start by saying I was shooting a Canon 1Ds Mark III so the camera settings I discuss will be from among those offered by that camera. Your camera may have different terms for the settings or may have different settings in general.
One of the first decisions I made was to push the ISO up to 1600. I did this because it was quite dark, I didn’t have a tripod and wasn’t allowed to use flash. One of the concerns at higher ISOs is noise but the current crop of digital cameras are quite good at minimizing noise. The Mark III has a full frame sensor so it’s going to have lower noise than an APS-C sensor found on most other digital SLRs and way better noise properties than a digicam. Still, I wanted to minimize the noise even more so turned on the High ISO Noise Reduction feature. That function was found in the camera’s menu.
Another reason for shooting with a high ISO was because I was shooting hand held and needed a fast shutter speed. Now, I was using an image stabilized lens, my Canon 24-105 mm f/4.0L. It’s a great lens for hand held situations because it gives you a couple of extra stops of leeway. What does that mean in plain English. Simply this. The rule of thumb for getting sharp hand held images is to use a shutter speed that is at least as fast as your focal length. So if your focal length is 100mm you want to use a shutter speed that is at least 1/100 sec. If your focal length is 200mm your shutter speed needs to be at least 1/200 sec. Adding a image stabilized lens allows you to get away with a slower shutter speed. So if your focal length is 100mm you can get away with 1/50 sec or possibly even 1/25 sec.
My preference is to give myself a little breathing room when it comes to shutter speed. So if my focal length is 100mm with an image stabilized lens, I prefer a shutter speed of 1/100 sec. If I’m not using an image stabilized lens I’d prefer a shutter speed of at least 1/200 sec. That way I just increase my chances of getting a sharp image if I’m not completely steady when I press the shutter.
In this particular shot the focal length was 24mm so I could get away with a shutter speed as slow as 1/10 sec. With a little testing I realized that the interior wasn’t quite as dark as I originally thought and that I could drop the ISO back to 800 and still get an exposure in the 1/60 sec. range.
The next thing that became apparent was that the windows were very bright compared to the rest of the interior. That is to say, the dynamic range was very great. Shooting HDR was not an option because I didn’t have a tripod. But my Mark III has a menu option called Highlight Tone Priority which in effect gives the camera an extra stop of dynamic range. With Highlight Tone Priority turned off my crude testing indicated a dynamic range of 8 stops and with it turned on I can get 9. I also know that if my highlights aren’t blown out I can recover more dynamic range in Lightroom.
To keep the windows from blowing out however, I needed to apply quite a bit of exposure compensation. I ended up with –1 2/3 stops. This skewed the histogram way to the left (shadows) but it wasn’t so bad that I wouldn’t be able to open up the shadows in Lightroom.
As for the f/stop, even with the high ISO I still needed to shoot wide open. But because of the short focal length (24 mm) I didn’t need to worry about depth of field, as long as I didn’t include anything very close to the camera.
I normally shoot aperture priority and didn’t feel a need to change that as long as I paid attention to the shutter speed.
All that was left to do at this point was to compose the image, steady myself, hold my breath and gently press the shutter. Here’s the final result of all the technical decisions. The image was captured at ISO 800, f/4 at 1/60 sec. The focal length was 24 mm. Exposure compensation was –1 2/3 stops. The focal distance was 4.47 m. The histogram, which I always check after every exposure, was heavily skewed to the left as anticipated but there was no shadow or highlight clipping.
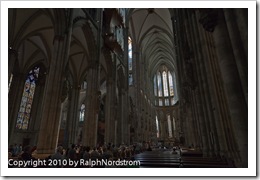
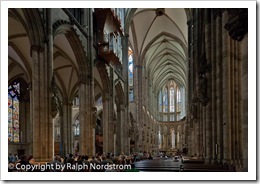
There was a moderate amount of work to do in the post processing but the initial RAW file gave me everything I needed to create a successful photograph. Here’s the before and after so you can see for yourself.
 Before Before |
 After After |
Hopefully this example illustrates how your Creative Vocabulary and the Interpretive Decisions you make come together in the creation of an image. In this post we talked about the technical vocabulary and decisions that are related to capturing a the image. We didn’t talk about the creative aspects of producing a work of art. But with a strong technical foundation you can handle challenging situations and not only get the shot but create a beautiful photograph.
Join me on an upcoming workshop.
To see more of my photographs click here.
(1141)


Ralph, I enjoyed hearing your thinking process in taking that picture. I find that process very helpful as a photography student. I was especially impressed with how you were able to straighten the vertical columns that were distorted with you wide angle lens. I assume that ability comes in Photoshop. Some day I may have to learn that program.
Larry, you’re right about straightening the pillars. It was a photoshop technique. It really works in this cathedral, in part because the cathedral is so high. I’d love to go back to Cologne and sneak inside around sunrise long before the throughs of people show up. The number of people that pass through that magnificent building is in the tens of thousands per day!
Ralph, I read this after I posted my answer to the previous blog and I was surprised at the similarity in the ocnsiderations regarding the fstops, shutter speed and the ISO!And my camera is similar to yours even though you have the BEST camera in the Canon line!(By the way, does the Canon 1Ds have more than 3 stops n exposure bracketing?) I did use the example of HDR but a lot of post processing techniques can bring out the same effects of HDR anyway. Did you use PSCS 5? and LR 3? I am just about to purchase these as a package through my NAPP membership (30% off so NAPP is sure worth the money!)Thank you for posting this, it was interesting and gave me a sense of my own knowledge and I felt better about it!
Sharon Beth
Hi Sharon, we’re in this circle of reading, responding, reading the next and responding again :-). Your 5D MkII has much of the same functionality as my MkIII. Yes, I can get 3 stops of exposure bracketing. I can also get 2, 3, 5 and 7 bracketed exposures. I’ve never gone beyond 5 stops for HDR but actually do 5 shots about 25 or 30% of the time. That would be with +/- 1 1/3 stops.
The situation I presented is NOT a no brainer. There’s a lot to think about.
Thanks so much for contributing your excellent throughts. I hope to hear from you in the future.
Hello Ralph…excellent situation/solution post. Your step by step procedure streamlined the decisions to be made such situations many of us find ourselves in. I do not have the extra in-camera features you were able to use (Canon 30D) yet the basic considerations work quite well with the equipment I have using post processing software to complete the project. I think the key, for me anyway, is remembering to up the ISO in low light settings to help compensate for lack of available light. Appreciate you sharing your in the field techniques!