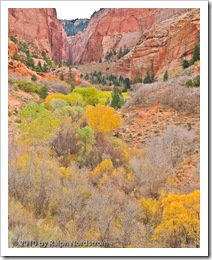
What makes a compelling photograph? Well, there are quite a number of things and one of them is “Black point”. But before proceeding, let’s take a quick step backwards.
Photographs look better if they utilize most of not all of the inherent dynamic range of the medium, be that paper, a computer monitor or some other electronic medium. This is to say that the image has deep shadows, brilliant highlights and the full range of tonalities in between. It’s the difference between a flat image and an exciting one. Here’s a nice flat image.
The first step in utilizing the full dynamic range of the medium is to set a black point. A black point is a very small area (or areas) of the image that is maximum black. You don’t want these areas to be too big or the image will have blocked, muddy, featureless shadows and that’s not a good thing (unless that is your intent).
Photoshop has two tools you can use to set a black point – Levels and Curves. I’m going to skip over Levels and go directly to Curves because it’s the most flexible of the two. Note that you can also set a black point it Lightroom with the Blacks slider. But I prefer setting the black point in Photoshop, again because Curves is a lot more flexible than Blacks in LR.
The adjustment will be done in an adjustment layer and never on the image itself (the Background layer). From the menu, select Layer | New Adjustment Layer | Curves…. The Curves dialog opens.
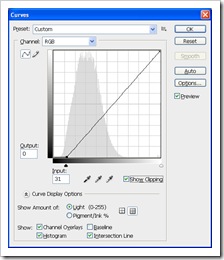 Curves Dialog with Black Point Set
To set the black point first check the Show Clipping check box. When you do your image goes white. Next, drag the black triangle to the right until small black areas appear on the white image. As you drag the black triangle the number in the Input box will change. Here’s what the image looked like when the black points just started to appear.
When you uncheck ‘Show Clipping’ you’ll see the image again, now with the effects of the Curves adjustment applied. Click OK and your image now has a black point. And it also has a lot more contrast.
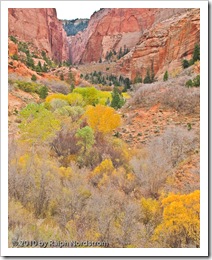 Kolob Canyon Flat Kolob Canyon Flat |
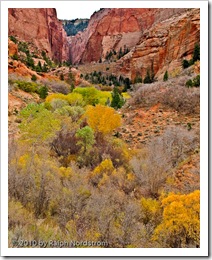 Kolob Canyon with Black Point Kolob Canyon with Black Point |
The difference in this case is dramatic. The image with the black point is a lot more interesting than the flat image we started with.
One of the things that can happen when setting a black point is the whole image becomes a little too dark. The way we used Curves to set the black point darkened the entire image because every part of the curve was pulled lower. Sometimes this results in a pleasing image but more often the image ends up too dark.
Correcting that is easily done in the same Curves adjustment that we used to set the black point. Double click on the Curves adjustment layer to open it again. Hold down your left mouse button (Windows) and run it over the image until you find a light area that you would like to make even lighter. As you do this a little marker will run up and down the curve, showing you the luminance of the area under your cursor. When you identify the area you want to lighten, hold down the CTRL key and click the left mouse button. A fixed marker will be placed on the curve.
Now you can drag that marker higher and brighten the whole image.
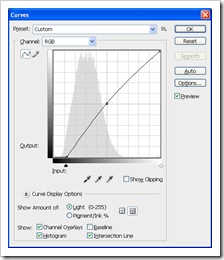 Curves Adjustment with Mid Tone Correction
Notice the dot in the middle of the curve has been pulled up slightly so the curve is no longer a straight line but bowed slightly upwards. This will produce a slight lightening effect on the areas of the image with the same luminosity and the lightening effect will fall off on either side – the darker and lighter sides. Here’s what the image looks like now.
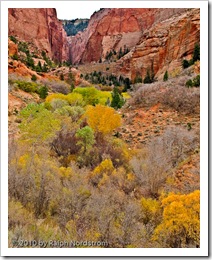 Black Point Black Point |
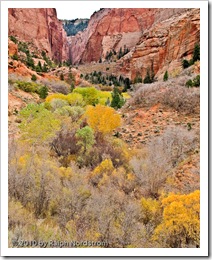 Black Point with Mid Tone Adjustment Black Point with Mid Tone Adjustment |
Adjusting the mid tones in this way doesn’t affect the black point at all nor does it affect the highlights. It just brightens up the middle tonalities.
So that’s it. This usually isn’t the only thing you’ll do in post processing. But this simple use of the Curves adjustment is a powerful first step on the way to creating a compelling image.
To see another example of utilizing the dynamic range of the medium read Lightroom Tutorial – Expose to the Right.
To see more of my photographs click here.
Join me on a photography workshop.
(15729)

