This is the fourth in a series of articles that tour the contents of my camera bag. If you missed any of the previous three articles you can catch up with these links:
Photographic Gear – A Tour of a Photographer’s Camera Bag
Photographic Gear – the Camera Body
In this article I want to discuss filters with you.
An Overview of Filters
Filters are a clear medium that is placed in front of the camera lens. The medium can be glass or, in some cases, a high-quality resin. The purpose of the filter is to enhance the image. Filters are one way in which photographers “get it in the camera,” a point of view that it’s better to get something close to the image you want in the camera so that it doesn’t require so much effort in the darkroom, digital or analog.
History
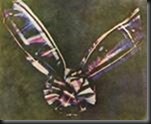
 I was curious when filters were first used and discovered it was back in 1861. Thomas Sutton tried to create a color photograph for physicist James Clark Maxwell by exposing thee black and white negatives, one through a red filter, one through a green and the third through a blue filter. The slides were projected on to a screen using the same color lights for each slide. The three images were superimposed and a color image emerged. It was a clever idea but it met with limited success because emulsions of that day were only sensitive to blue light. When emulsions were developed in the mid-1880s that were sensitive to the entire spectrum of light the technique was used successfully in commercial photography.
Filters have been and are still widely used in film photography. Black and white photographers use yellow, red, green and blue filters to emphasize these colors and de-emphasize others. For example, a red filter on a clear day will produce an exceptionally dark sky because it blocks the blue light. Color film photographers also use a variety of filters what we will talk about below.
Types of Filters
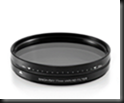
Probably the most commonly used filter by color photographers, digital or film, is the polarizer. This round filter is versatile in that  it can be used in many situations including darkening a blue sky, removing reflections from water and wet leaves, and intensifying foliage colors on cloudy days. It consists of an inner ring that screws to the lens and an outer ring that rotates. You adjust the strength of the filter effect by rotating the outer ring. As for darkening a blue sky, this filter only works at right angles to the sun. When shooting directly into or away from the sun the filter has no effect on the sky at all. For this reason, it has limitations when used on wide-angle lenses. Because the strongest darkening effect is at right angles to the sun, with a wide-angle lens part of the sky will be darkened but other parts of the sky may not. It looks weird.
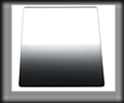
Also widely used by landscape photographers is the graduated neutral density filter. Graduated neutral density, or grad ND filters are rectangular in shape. This was a common technique used to tame high dynamic range  images with film photographers and is still used by many digital photographers. One end of the filter, the dark end, would darken the brighter parts of the image while the clear end would not darken the darker parts. The limitation of this filter is you pretty much need a straight line that separates bright from dark, which means it works really well on ocean sunsets where you have a clear, straight horizon but not at all in dappled sunlight where there are splotches of bright light splashed in patches throughout your image.
There are hard and soft grad NDs. The designation refers to how abruptly the filtered part blends into the unfiltered part. A hard grad has a very abrupt change where with a soft grad the change is more gradual. The example above is a soft grad. Hard grads can often create a line through the image where above the line is dark and below the line is not. If the line crosses a foreground element such as a tree then the part of the tree above the line is darkened and below the line is not. It can sometimes be a problem. Soft grads smooth this out and are a lot easier to use for that reason.
Plain neutral density filters are round and are a different breed. They are used to slow the shutter speed by reducing the amount of light entering the lens. They uniformly darken the entire image. By slowing the shutter speed, you can get blurs in moving objects such as water and even clouds. There are neutral density filters that decrease the light by 2, 3 and even up to 10 stops. Note that sometimes they decrease the light so much that your camera’s light meter no longer functions. So you need switch to manual exposure and calculate the aperture and shutter speed.
There are also variable neutral density filters that can be adjusted to reduce the light continuously from 2 up to 9 or 10 stops. They are very much like polarizer filters in that they have two rings. The outer ring can be rotated to vary the amount of filtration.
Warming filters are used to remove the blue color cast on overcast days or simulate the warm light of golden hour without having to wait for it. Sometimes a warming filter is combined with a polarizer to create a warming polarizer.
Another type of augmented polarizer is the color-enhancing polarizer. It has the opposite effect of a warming polarizer in that it emphasizes blues.
This is just a sampling of the filters that are available.
Many of the filters that are mainstays with color and black and white film photography are no longer needed for digital images because their effects can be reproduced in the digital darkroom.
Another filter that is a topic of discussion is the ultraviolet filter. All it filters is invisible ultraviolet light. Today’s digital sensors already incorporate filters that cut out most of the ultraviolet light. So is an ultraviolet, or UV sensor necessary? And here’s where the discussion gets interesting. Some argue that UV filters should not be used because they don’t improve the image but impose two more surfaces through which light must pass on its journey to the sensor (see the discussion on lenses in the previous article). Others argue that a UV filter protects the front element of the lens from scratches.
I went for some time without UV filters but eventually decided the protection feature was important. But instead of inexpensive UV filters, I chose ones that were in the $120 range. And each lens has its own filter. So it’s not a trivial investment. But when compared with the cost of replacing a scratched front element, now they don’t seem so pricy. And because they are of such high quality the image degradation from the two additional surfaces is negligible.
Quality
One of the things you’ll quickly notice when you go shopping for filters is the extreme range of prices. For example, a polarizer filter can be as inexpensive as $15 or as expensive as $250. Wow! Why such a difference?
High quality filters are made with the same care and precision as professional lenses. The glass that is used is the highest quality. Unlike the elements in our lenses that are carefully ground into shapes that will focus beams of light, the glass used in filters is what is called ‘optically flat.’ Any deviations from perfectly flat are less than 1,000 the width of a human hair. This means that it doesn’t bend the light at all and therefore doesn’t soften the image. Besides being optically flat, the glass used in the high-end filters is comparable to that used by NASA.
A filter adds two more surfaces the light needs to pass through. This adds two more surfaces that can reflect the light. To minimize this, filters are coated just like lens elements to reduce reflected light.
Filters of normal thickness can cause vignetting on wide-angle lenses because even though the filter sticks out in front of the lens just a tiny bit, given the wide-angle of view of some lenses, the filter still gets in the way. That causes vignetting, especially in the corners of the image. Therefore, some filters come in a thin format. And of course, this increases the cost even more.
But it is true that with filters, you get what you pay for. If the sticker shock of top of the line filters is still an impediment to you, just ask yourself, “Do you really want to put a $15 piece of glass in front of your $2000 lens?”
My Filters
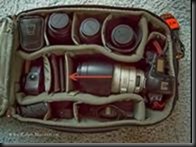
 Most of my filters are in this thin compartment in the center of my camera bag (except for the UV filters which are on the lenses). Let’s see, I have a Color Enhancer Polarizer, a thin neutral circular polarizer and a massive warming polarizer / variable neutral density combo filter – two filters in one. That’s my Tony Sweet filter as I’m pretty sure he requested Bob Singh to make it for him.
The two filters I use the most are the thin format neutral polarizer and the warming polarizer / variable ND combo filter. I’m not too wild about the color enhancer polarizer as it enhances the blues and I prefer to warm my images if anything. But I’m not going to leave it home in case I need it.
Most of the time I use the thin neutral polarizer. With my 24-105mm lens the thin filter reduces the vignetting when I’m shooting wide, especially when mounted on top of the UV filter.
I use the combo filter a lot when photographing moving water, especially during the middle of the day when the sun is bright. I adjust the variable ND part to control the length of the exposure. The less filtration, the shorter the exposure and the less the blur. The greater the filtration, the longer the exposure and the greater the blur. I like to dial in different exposure lengths and in this way capture different amounts of blur. Later, in the digital darkroom, I can select the image with as much or as little blur that best communicates what I want the image to say.
Not shown in the photo above are the two grad ND filters I have. They’re in a pocket in the camera bag cover. I have two soft grads – a 2 stop and a 3 stop. I also have the adapters that are attached to the front of the lens to which the filter holder is attached. The filters then slip into the holder.
But the only time I use them is when I’m demonstrating how they work on a workshop. When I encounter a high dynamic range situation, I automatically switch into HDR mode and bracket three to five exposures. I can then blend them together in the digital darkroom.
So those are the filters that are always with me.
Simulating Filters in the Digital Darkroom
I mentioned above that many photographers use filters to ‘get it in the camera.’ And I can certainly understand this because many photographers don’t enjoy the digital darkroom work as much as I do. So, the less work they must do in the digital darkroom, the better.
I think the digital darkroom is a magical place where unexpected beauty emerges right before my eyes from images that may not appear at first to be overly exciting. For example, adding some contrast can often release hidden treasures. In fact, I actually look forward to the digital darkroom work.
Over the years, I’ve developed a couple of techniques for creating the effects that filters create that I’d like to share with you.
Simulating a Polarizer in Lightroom
One of the first tricks I discovered was how to use Lightroom to create the same effect in a blue sky that a polarizer creates. In the Development module are the set of HSL adjustments. HSL stands for Hue (or color), Saturation (or color purity or intensity) and Luminance (or color brightness).
I use the Luminance adjustment to darken the blue sky. The advantage this has over the circular polarizer becomes apparent when you have a wide-angle shot. The sky is darkened uniformly, not just at right angles to the sun.
However, there are some situations that cannot be compensated for in Lightroom. If you’re using a polarizer to reduce the glare on water so you can see the lake or stream bed, that’s the only way you can do that. Lightroom cannot magically remove the glare. You need to get this one in the camera.
Simulating a Grad ND in Lightroom
Lightroom has a great filter called the Graduated Filter. If I need a grad ND, I actually prefer the Graduated Filter over the real thing because it is more flexible. Now, this technique only works if your exposure is right on and there’s no highlight clipping. Here’s how it works.
Click the Graduated Filter icon at the top of the adjustments. On the image click where you want the filtration to start and while holding down the left mouse button, drag down. You’ll notice that a transition zone forms, defined by three lines – upper, center and lower. The more you drag the broader the transition zone. What’s cool about this is you can make the effect as hard or as soft as you want.
Sometimes the transiting area (the three lines) flip wildly if you don’t drag perfectly straight down. If you drag at a little bit of an angle the transition zone will tilt. This can be very useful if the line dividing bright from dark is not horizontal. But it can also be very frustrating if it is horizontal. To create a perfectly horizontal transition zone, pres the SHIFT key while dragging.
I find this extremely versatile. I can do everything I can do with an actual grad ND and more. So, as long as the exposure supports doing it in Lightroom that’s my preference.
Variable ND and Lightroom
Nothing in Lightroom can reproduce the effects of a variable ND when it comes to blurred water. Sure, you can use negative Clarity to create some dreamy blurred effects in Lightroom but it blurs the entire image. When photographing blurred water, I only want the water to be blurred, not the surroundings. So, in this case it’s best to get it in the camera.
Warming Filters
Lightroom has great hue (color) control in the Temperature and Tint adjustments. The much less effective counterpart in Photoshop is Color Balance. I much prefer to do my hue adjustments in Lightroom,
The Temperature adjustment makes the image bluer if you slide it to the right and more yellow if you slide it to the left. The Tint adjustment makes the image greener when you slide it to the right and more magenta when you slide it to the left.
Lightroom gives you a couple of presets just like your cameras – presets for daylight, open shade, overcast, tungsten, fluorescent and custom. If you want to warm an image you can adjust both Temperature and Tint yourself until you get the desired effect.
Conclusion
Filters are an important addition to your photography tool box; aka, camera bag. The filters you choose will depend on your shooting style. No small part of that is the tolerance you have for the digital darkroom.
In the end, it’s better to have filters in your camera bag that rarely get used then to not have them when you need them.
(190)
