Sleeklens is a company with a concept that is not new in the Adobe Lightroom world – providing presets to help us in processing our photographs. I’ve always shied away from using presets, just like I rarely if ever use the Auto tone adjustment built into Lightroom. I’ve always felt that I prefer making all the decisions myself rather than letting the computer make them in the case of Lightroom Auto tone or a designer make them in the case of presets.
But I recently received an evaluation copy of one of the Sleeklens presets workflows and have been using them on several photographs I’m working on. Sleeklens has a variety of presets for different purposes. The collection I received is titled ‘Through the Woods Workflow.’
Content
Through the Woods Workflow consists of forty-seven presets and twenty-nine brushes.
Presets
The Presets are global adjustments, affecting the entire image. Once installed they are in their own folder in the Presets area of the Development module screen. The presets are applied just like any other preset – namely, clicking on them.
The presets are organized into seven groups – All in One, Base, Exposure, Color Correction, Tone/Tint, Polish and Vignette. The All in One presets can affect the Basic, Tone Curve, HSL and Split Toning adjustment groups. Base mostly affects the Basic adjustments and occasionally the Tone Curve. One Base preset affects HSL and Split Toning. Exposure sets either Basic or Tone Curve. Color Correction adjustments are applied to HSL. Tone/Tint plays with Vibrance and Split Toning. Polish mostly adjusts Basic. And Vignette sets Post-Crop Vignetting in Effects. One thing that is missing is settings that utilize the new Dehaze adjustment in Effects.
Brushes
The brushes are used with the Adjustment Brush, Graduated Filter or Radial Filter. There are five groups – Basics, Color, Effects, Haze and Light. The brushes are applied by selecting the effect and painting with the Adjustment Brush or creating the Graduated or Radial Filter.
Installation
Sleeklens provided a PDF file that contains a video that walks you through installing the Presets. It was very straightforward. They use Lightroom’s built-in features for adding presets.
Installing the brushes was a bit more difficult, starting with the fact that the PDF did not contain a link to their brush video. However, an email to Sleeklens was answered very quickly. They provided a link to another video and I was able to get them installed without further trouble. Lightroom does not have a built-in feature for adding brushes so you need to find the folder where the brushes are stored and copy the provided brush template files. But the video is very clear in the way they walk you through it.
First Impressions
The Presets
The first thing I tried out was the presets. I brought up an image and went through each of the presets. I applied the first preset, observed the results and then hit Ctrl-Z to undo it and move on to the next. I used this approach on several images. The process is very straightforward.
By running through the presets in such a manner I was able to pick out the ones that got me closest to something I liked. In one instance the preset gave me a mood that I hadn’t anticipated that I ended up going with. The cool thing about presets is that they give you combinations of setting that are not in your normal experience or workflow. In other words, they get you out of your box. This is a nice benefit.
I found that the best approach was to find a preset that came close to what I wanted and then look at what adjustments the preset made and take it from there. There generally wasn’t a single preset that got the image where I wanted it to be. But even after applying several presets, fine tuning the adjustments got the image even closer.
As I got more experienced with the presets I found that generally the All In One presets were not as effective as starting with the Basic presets and working up from there. Too many decisions are made in the All In Ones that turn out to be in a direction I don’t normally go. But the High Dynamic Range (not to be confused with the HDR technique or software) in the Basic presets is one I’m finding quite useful. I might follow that by a preset from the succeeding groups – Exposure, Color Correct, Tone/Tine and so on. I ended up not using the Vignette preset because in my workflow I finish all photographs in Photoshop and the vignette is the last thing I do. So I use my own Photoshop action to create the vignette. But for those that do their processing in Lightroom the Vignette presets are very useful.
A technique I found to be quite effective was to apply a preset and then refine the adjustments it made. For example, I might apply High Dynamic Range and then adjust Exposure to bring the overall tonality down. Then apply the next preset and make further adjustments. This technique works very well and often times leads to results that I am very pleased with and probably wouldn’t have arrived at on my own.
There are a great many presets that substantially decrease contrast and brighten the image. They make the image look washed out. I don’t find these useful as effective landscape images require sharp but not overdone contrast. I would like to see more presets that increased contrast and fewer that made the image look flat. Similarly, many of the presets pushed the reds and yellows, suitable for sunsets but not for mid-day. I’d like to see some presets that enhanced the colors without warming them.
But in the end I have found combinations of presets that are producing pleasing results as long as a little fine tuning is done after every preset.
Brushes
For whatever reason, I’ve never been a big fan of the Lightroom Adjustment Brush. I’ve always preferred to do local adjustments in Photoshop. So I was delighted to find how natural it became when using the brushes in Through the Woods Workflow. They are very practical and intuitive. Now I find myself frequently turning to the Adjustment Brush.
Installing the brushes is a bit more complicated than the presets but the instruction al video Sleeklens provides are very clear and easy to follow. Using the brushes was a bit of a trick for me but I quickly figured out how to do it. When you select the Adjustment Brush Tool or either of the Filters the available adjustments drop down. Near the top is a drop-down titled Effect: and the default is Custom. Clicking the up/down arrow to the right of Custom displays the brushes provided by Adobe followed by the Sleeklens brushes. I found that in addition to adjusting the brush size, setting the Feather to 100 and the Flow to between 25 and 50 gave me a great deal of control and finesse. Also fine tuning the other adjustments was sometimes very helpful.
Final Thoughts
I’m not in the habit of using presets and have always avoided them because I felt it was important to make all the creative decisions myself and rely on my own knowledge and technique that has built up over time. However, I find that the Sleeklens presets have opened my eyes to enhanced creative possibilities. What is really important is the ability to make photographs that communicate your vision. Every shooting situation, every image is different and poses different challenges and problems to solve in creating the final photograph. There is no one solution. Sometimes I can get to my creative vision more effectively using my standard workflow but other times Sleeklens gets me to places that I was unable to discover on my own. The advantage of having these presets is that the creators of the presets have tricks that are not in my toolbox and in the end, having these available to me makes for better, more compelling, more communicative images. And in the end, that’s that it’s all about. I will continue to explore what Through the Woods Workflow can do for me.

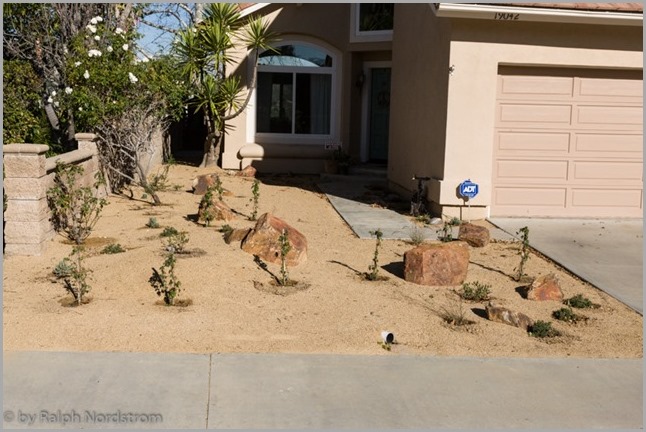
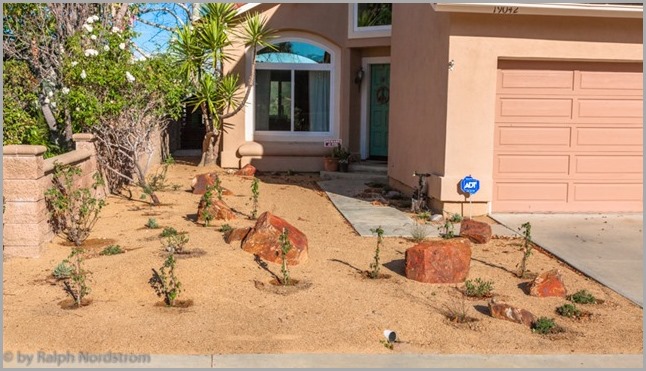
Before |

After
|
I would encourage you to check them out and see for yourself. Their website has videos and tutorials so you can get a sense of what their various Workflows can do for you. Here’s their link for the Through the Woods Workflow. While you’re at it you might want to check out their other workflows.
Through the Woods Workflow – Click Here.
Join me on one of my exciting workshops. Click here for more.
(1144)
