As landscape photographers, we prefer to shoot from a tripod. There are a lot of good reasons for this. Tripods help to ensure a sharp image. They slow you down so you’re more likely to think through your shot. They can also keep you from taking so-so shots; if it’s not worth the effort to set up a tripod it’s not worth taking. And you can dial in very precise compositions.
But when spontaneity is appropriate, tripods simply don’t work. Shooting hand-held gives you the freedom and spontaneity that is required in some situations but it also presents challenges that you don’t even think about when shooting from a tripod. Fortunately, there are several things you can do to overcome these challenges and create great photographs.
1. Shutter Speed

With a tripod we don’t worry about shutter speed. It doesn’t matter if it’s 1/1000 second or 30 seconds. But when shooting hand-held, the right shutter speed is essential for a sharp image. If the camera moves ever so slightly while the shutter is open, you have a blur.
Fortunately, there’s a simple way for you to determine what shutter speed will give you a sharp image and it depends on the focal length of your lens. The formula is simple: 1 / focal length. If your focal length is 60 mm then a shutter speed of 1/60 second or shorter will give you a sharp image. But if your focal length is 100 mm then you need a shutter speed of 1/100 second or shorter.
If you have a crop sensor camera then you need to use the effective focal length. Using a crop sensor Nikon as an example, the conversion factor is 1.5. In other words, if the lens says 100 mm the effective focal length is 100 x 1.5 or 150 mm. So, the shutter speed needs to be 1/150 second or shorter.
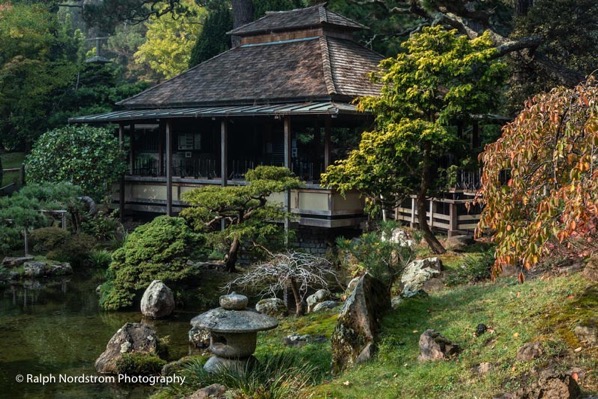
This photograph above was taken at the Japanese Tea Garden in Golden Gate Park, San Francisco. It’s an extraordinary experience, especially early in the morning when the crowds are light. The focal length was 47 mm so a shutter speed of 1/50 second would have been fast enough to get a sharp image. However, with image stabilization I was able to shoot it at 1/25 sec. ISO was bumped to 1600 because of the dark conditions. And an aperture of f/11 ensured enough depth of field for everything to be sharp.
You still want to hold the camera as steady as possible when taking your shot. It’s the combination of a steady camera and an appropriate shutter speed that will give you a sharp image.
2. Image Stabilization
You can get some help from image stabilization. This technology compensates for small camera movements can result in an extra stop or two advantage. So if the focal length is 100 mm, with image stabilization you can safely shoot at 1/50 if you have a one stop advantage or even 1/25 second if your IS advantage is two stops.
Image stabilization goes by a number of names – vibration reduction, anti-shake, SteadyShot, etc. There are two ways manufactures implement it – in the lens or the camera body.
Generally, you want to leave image stabilization off when shooting from a tripod. So, don’t forget to turn it on when shooting hand-held, as long as your lens or camera body supports it.
3. Aperture or ISO

Now that you know what shutter speed you need, you still need to get an optimum exposure. The other two exposure variables are aperture and ISO. But which of these you adjust is far from an arbitrary choice. Adjusting aperture affects depth of field. If you need a deep depth of field, you have to use a small aperture. That’s fine if you’re shooting on a bright day. But if you’re shooting during twilight or in a gloomy cellar, you need to increase your ISO which creates noise.
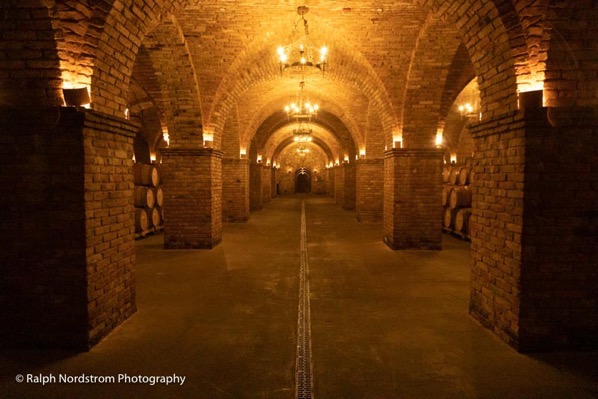
The above photograph was shot in the cellars of Castello de Amorosa winery in Napa Valley. It was so dark I had to shoot at f/5 and ISO 20000. This gave me a shutter speed of 1/80 sec and with image stabilization and a focal length of 24 mm it worked out just fine. But, you either go for the extremely high ISO and live with the noise or you don’t take the shot.
Here’s another tip. Since depth of field is often the primary consideration in landscape photography, if your camera supports it, one solution is to set ISO on Automatic. That way you get the depth of field you need and the camera determines what ISO is needed to get an optimum exposure.
4. Filters
When shooting hand-held you don’t want anything reducing the amount of light that arrives at the sensor. That means filters. Some photographers like to keep a polarizer filter on their lens all the time. But that can reduce your exposure by one or more stops. And you definitely don’t want a neutral density filter on your lens. The only filter that’s ok is a UV filter as it doesn’t affect exposure.
5. Composition

Getting a strong composition is perhaps the hardest part of hand-held landscape photography. This is because borders are so important. The problem is when you check the top of the frame you don’t see the bottom. But when you check the bottom it’s nearly impossible to keep from moving the camera just a tiny bit. The result is now the top can be off. The same thing happens with both sides. So, you end up inadvertently cutting off the tops of steeples and such.
If you are aware of this potential problem you can overcome it by being extra careful. Also, zooming out a little more than you need also helps. Then you can do the final crop in Lightroom. On a tripod you don’t have this problem. And in genres like street photography and similar endeavors, this is not so much of a concern.
When you keep these five tips in mind, you can enjoy the freedom and spontaneity of hand-held photography and return with photographs you will be proud of.
Join me on one of my workshops. Check them out at RalphNordstromPhotographhy.com/workshops.
(190)

Thanks for these tips Ralph, especially on shutter speed needed. I have one suggestion, though, if it makes sense. When talking about shutter speed, I was a bit thrown off by the term “shorter” in reference to the speed. Of course, I eventually got it, but perhaps using the word “slower” in reference to the speed would avoid confusion. “So the shutter speed needs to be 1/100th of a second or slower.” It’s just how MY brain works — perhaps all other readers didn’t have to ponder that a bit, ha ha.
Hi Dannielle,
I struggled with which term to use. The first word that came to mind was ‘faster.’ By ‘shorter,’ I tried to communicate that the shutter would be open for a shorter period of time. In other words, 1/100 sec or 1/200, etc. This is opposed to a longer shutter speed; e.g., 1/50, meaning the shutter is open for a longer period of time.
The other option was to say ‘1/100 sec. or faster.’
Thanks for bring it up. I’m still not sure of the best word to use.
Ralph