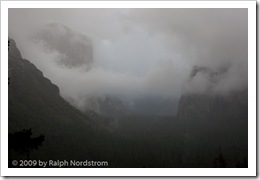
In the first post I talked about photographing Yosemite Valley at sunrise from Tunnel View in a snow storm. I imported the images into Lightroom and reviewed them there. One stood out. See The Making of a Photograph Part 1 – Selection.

The next step is to explore the image for possibilities. I do this in Lightroom, making virtual copies of the image that I can then adjust. I adjust such things as color temperature, exposure, highlights, shadows, fill, contrast, saturation, hue and more. The goal is to see what’s in the image and what it’s capable of expressing. I’m also looking for something that gets me excited.
My experience is that while I usually have an idea of what I want to do with the image often times it also has something it wants to say. So I try a few things to see what emerges.
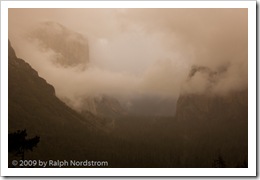
At the time I took the picture there was a faint warm glow in some of the clouds. The sun was up and the clouds must have been thinner in some places. So there was a very pleasing yet subtle play of cool and warm in the clouds. So the first thing I tried was to emphasize the warmth.
The first version ended up really warm. It was nice but lost the coolness of the storm. And it feels more like a sunset than a sunrise. I want to capture that early morning feeling and the cold while still preserving the grandeur and mystery of the moment.
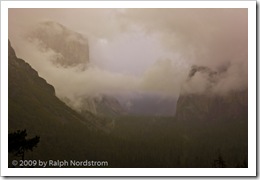
So I tried something else.
This one ended up not as cool as the original image but cool none the less. It has a feeling of motion that the warm image kind of lost; it’s dynamic. It has energy. I like that. However, there were some purples that didn’t seem to fit, especially right above the valley floor.
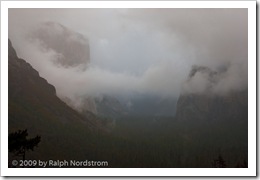
So, try something else. I’m beginning to realize I’m not going to get very close to what I want in Lightroom. I’ll need to take it into Photoshop to finish it. So the objective now is to create an image that has both the cool and subtle warm tones in the clouds, something I’ll be able to work with and develop more in Photoshop. So, here’s what I ended up with.
Color-wise, it’s not much different from the first. The differences are really subtle. Mostly you’ll see that the forest in the foreground is opened up a tiny bit. And while it may be hard to see in this example, there is just enough warmth in some of the clouds to be able to pull it out in Photoshop.
So the next step is to export the image into Photoshop where the rest of the work will be done. There will be two types of adjustments I’ll do there – local and global. Local adjustments will make up the majority. Most of the global adjustments have already been performed in Lightroom although as I become more and more familiar with the image and the direction it wants to go, some additional global adjustments may be called for.
So check back in the following days to see how this progresses.
The journey continues – read Part 3.
Join me on an upcoming workshop.
Become a fan on Facebook and follow along.
(1084)


Henry,
Thanks for the kind words. You have your priorities set right for your summer job. Just being in the valley is a joy. I’d be happy to take a look at your photos and possibly make some suggestions. My email address is on my regular website – http://RalphNordstromPhotography.com. Talk to you soon.
Hey Ralph, Love your amazing photography. I work during the summer in Yosemite Valley as a shuttle bus driver. I spend the entire summer there just so I can do my photography and just finished my fourth summer there. Perhaps I can get your professional opinion on some shots. I don’t do much with them as far as editing on Picasa. But maybe you can send a few words of encouragement if you have the time. Thanks for time.