In the previous tip we discussed adjustments you want to make to your images in Lightroom to prepare them for the HDR process to come.
This next tips covers the step where we get the images out of Lightroom.
Lightroom is a RAW image converter (among other things). It does RAW image conversions extremely well. Other great RAW image converters are available to us – Capture One, Aperture, and DxO to name a just few. These are all highly sophisticated products that do an extraordinary job.
Photomatix also has a built in RAW image converter. You can import RAW files into Photomatix and it will process them. However, Photomatix’s strength is in tone mapping and fusion, not RAW image conversion. So this tip is one that when you understand this, it’s a no brainer.
Never import RAW images into Photomatix. Always convert your RAW images to TIFF files in your RAW image converter and import the TIFF files into Photomatix.
Besides the fact that you get far better RAW image conversion this way, there is another benefit. All the adjustments you made to Blacks and Point Curves in the last tip are incorporated into the TIFF file. They would be lost if you imported the RAW files into Photomatix.
So here’s how to do this. Select the images you want to include.
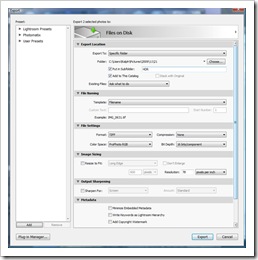
- Choose the Export function, either from the Library mode screen or from the context menu when you right click.
- In the Export dialog, select the folder you want to export the files to. I like to create an HDR folder under the folder that contained the RAW image files. I’d also suggest you add the new files to the Lightroom catalog.
- I like to keep the same file names.
- Select the TIFF format with no compression, ProPhoto RGB color space and 16 bits for your bit depth.
- Don’t resize the image.
- Don’t sharpen the image.
- Don’t add any metadata.
Here’s a typical screen shot.
All that’s left to do is run the export. To make things easier on yourself you can create a preset for these settings.
(862)


One thought on “HDR Tip #3”