Landscape photographers love to photograph moving water – waterfalls, rapids, even water quietly slipping over a rock.
When photographing moving water the primary exposure consideration is shutter speed. A very short shutter speed, say 1/500 sec, can produce the ‘ice sculpture’ look’ in which the water is suspended in shiny, crystal clear forms. This can be very effective and exciting. As the shutter speed is lengthened, say to 1/15 sec, the water begins to blur. First you see little short traces of each of the drops. Then as the exposure lengthens to a half second or more the traces merge together into the beautiful effects we love. Really long exposure of 2 or more seconds produce a misty effect in which nearly all texture in the water is replaced with soft clouds of light.
But how do you get the long exposures you need, especially on a bright sunny day.
Getting Long Exposures
There are several techniques you can use to get the long exposures you’re looking for. Probably the first thing to do is avoid photographing moving water in direct sunlight. You have two things going against you. The first is the high contrast with specular highlights that will end up as pure white blobs in your image. Not nice. The second is the short exposure times that come with bright scenes, making it hard to blur the water.
So the first step is to photograph moving water in open shade or, even better, on an overcast day.
Next, you want to use the lowest ISO setting your camera has. This decreases the sensitivity of your camera’s sensor meaning you need to let more light into your camera to get a correct exposure.
Third, you want to stop your lens all the way down to f/16, f/22 or more if it will go that far. And you’ll be be locking in the f/stop by shooting aperture priority.
All of these steps (open shade or overcast sky, low ISO and high f/stop) have the effect of increasing exposure time.
But what if this is not enough? What if you do all these things and your exposure time still isn’t long enough? The next thing to try is adding filters. A polarizing filter can decrease your exposure another stop or two while removing some of the reflections from the water. Often this will get your exposure time up to where you’re getting the amount of blur you’re looking for.
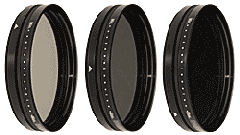 But if you’re still coming up short there’s another filter – the variable neutral density filter (not to be confused with the graduated neutral density filter). This filter allows you to dial in anywhere from two to eight stops of neutral density filtration.
So let’s say that you’ve used these techniques to get your maximum exposure time up to, say, 4 seconds. But is that enough; is it too much? What exposure length will give you the blur effect you’re looking forward?
Getting the Exposure Length You Want
Here’s a trick that Jack Graham shared with me and it works really well. It’s an easy way to vary your shutter speed to get the degree of blurring that looks best.
Let’s say you start with ISO 100, F/22 and a variable neutral density filter set to give you a 4 second exposure. Compose your shot and take it
Next, without changing the f/stop double your ISO. This will give you a 2 second exposure at ISO 200. Take the shot. Repeat this, doubling the ISO each time which will halve your shutter speed. So you get 1 second at ISO 400, 1/2 second at ISO 800, 1/4 second at ISO 1600, 1/8 sec at ISO 3200, etc.
I can hear you now asking ‘What about noise at the high ISOs?” The current crop of digital SLRs have incredible low noise properties at high ISOs. And to add to that they have built in high ISO noise reduction settings that you will find in your camera’s menu. Consult your camera’s manual to find out how to turn it on.
Each of these exposures will produce a totally different effect with the water. Now you can select the exposure that gives you the water texture that you like the most. This technique works very well and I encourage you to give it a try.
The other lesson here is if you like to photograph moving water and don’t have a variable neutral density filter,, consider investing in one.
Examples
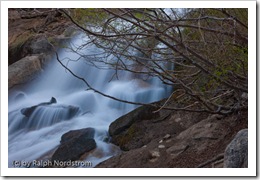
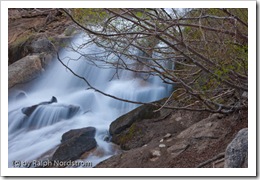
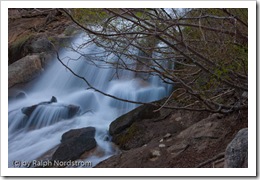
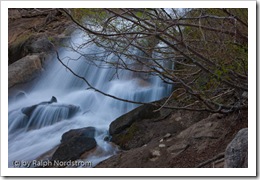
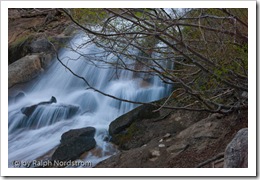
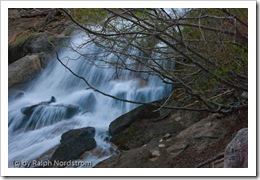
Let’s see how this actually works. The following images were captured at Whitney Portal in the Eastern Sierra Nevada mountains of California during a recent photography workshop.
The advantage of this technique is that it gives you a choice.You can choose the misty, delicate look of the 2.0 second exposure, the powerful, chiseled look of the 1/13 second exposure or any of the steps in between. And by applying this technique in the field you have the luxury of making this key decision back in your digital darkroom where you can closely examine the image on your computer’s monitor.
So, add this technique to your creative vocabulary. You’ll get the look that exactly expresses your interpretation of these beautiful natural wonders.
Join me on an upcoming workshop.
To see more of my photographs click here.
(3032)

Thank you for the tutorial! I can’t wait to try it for myself!