There are many techniques involved in nighttime photography. Star trail photographs are a traditional approach dating back to the film days. If you think about it, that makes sense. With the ISOs commercially available to most of us photographers, shooting the nighttime sky was not an option. We simply didn’t have fast enough film.
With the advent of digital photography we can now push ISOs into the thousands and the noise levels are constantly improving. And we can modify our cameras’ sensors to sensitize them to infrared light, something that the serious and most accomplished nighttime photographers do. This provides us the opportunity to photograph both star trails and the night sky.
In previous articles I’ve discussed techniques for both types of nighttime photography. In the most recent one I describe a technique that can provide both star trails and night sky photographs from a single session. Here’s the link.
Exciting Nighttime Photography in 10 Easy Steps
One aspect I haven’t covered in detail yet is exposure.
Earlier this week there was a beautiful conjunction of the crescent moon and Venus in the early evening sky. So I grabbed my camera, got permission from my neighbor and used their front yard to photograph the moon and Venus over the Los Angeles basin here in Southern California.
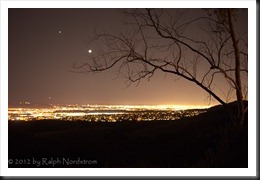
I used my Canon EF 24-70mm f/2.8L USM lens with a pretty wide focal length – 34mm. If you recall from the “10 Easy Steps” post you can stop motion of the stars (and planets and moon) if your exposure length in seconds is 600 / focal length in millimeters. So by this rule I could have exposure lengths of 18 seconds with no apparent movement in the moon or Venus. I set the mode to Manual and the ISO was at 200 I saw that I could get a ‘correct’ exposure at f/2.8 and 13.0 sec., at least according to the light meter. So I set up the shot, focused and captured the first image. (You can click on the images so see the full size version.)
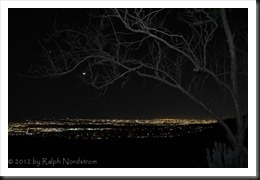
Besides the obvious fact that the nighttime sky over Los Angeles is brown, it is also clear the city lights are overexposed. But more importantly so is the moon. You really can’t make out the crescent.
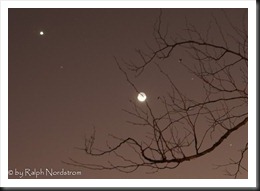
There were also concerns with the focus. I was shooting wide open and was having trouble holding the focus on the foreground tree, the city lights and the moon. So the next thing I tried was to up the ISO and stop down on the aperture. This next shot is at ISO 1600, f/18 at 20.0 sec.
I also ‘underexposed’ this image by two stops. You can see it looks a bit more like nighttime. However, the moon and Venus are still overexposed as you can tell by this detail. The crescent in the moon is a bit more visible but still not satisfactory. And of course at ISO 1600 there’s noise although that can be handled with noise reduction both in the camera and in Lightroom.
This isn’t the result I’m looking for yet but it’s moving in the right direction.
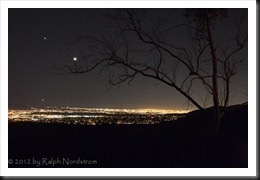
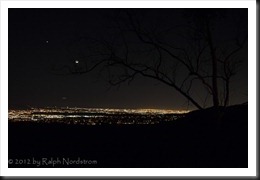
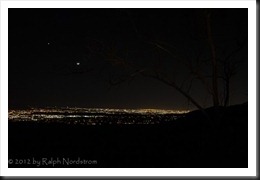
So if ‘underexposing’ two stops is good, underexposing three stops should be even better. And I really don’t need to go to a high ISO to get the shot so I reduced the ISO to 200 and set the exposure to f/8.0 at 8.0 sec. The results are even better.
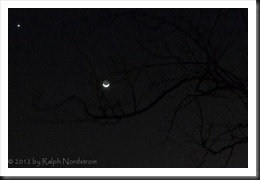
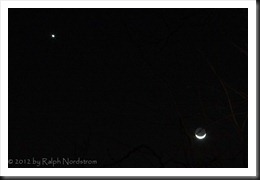
And here’s the detail.
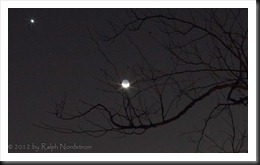
OK, that’s better. And we also have the benefit of the LA city lights being far better exposed. I decided to try one more stop and got this shot at –4 stops from the ‘correct’ exposure. The exposure settings are ISO 100, f/8.0 at 8.0 sec.
This final exposure nails the moon. You can clearly see the crescent illuminated by the sun but the dark part of the moon that is illuminated by bounce light from the earth.
So we found a good exposure. There’s just one more thing to do – have a little fun playing around with light painting.
Lessons Learned
Let’s take a moment to reflect on what’s going on here. There are several important lessons to be learned.
- The first is how our camera’s light meter works. Its job is to make the average brightness or tonality of the image neither bright nor dark but right in the middle. That is referred to as ‘neutral tonality.’ But nighttime scenes need to be rendered as dark. So they need to be underexposed. Normally a couple of stops will do.
- Exposing the bright part of the moon is like exposing a scene on earth in the middle of a bright sunny day. Think about it. The moon is receiving direct sunlight, just like the earth does during the day. So regardless of what your light meter says, the moon should get the same exposure as a sunny day here on earth. In fact, if you had a very precise spot meter you could prove this for yourself. Spot meter the moon (and only the bright part of the moon) and compare that to an average meter reading on a bright sunny day and they will be very close to each other.
Caution
What we’ve seen here applies to photographing the moon at night. But it’s brighter than the planets and much, much brighter than even the brightest stars. So an exposure that works for the moon will not work for stars. You will notice that there aren’t any stars in the images above, due in part to the atmospheric haze that hangs over Los Angeles but mostly to the fact that the moon is so bright.
So the conclusions drawn here apply to photographing the moon at night. You’ll still need to bump the ISO, open up your lens and go for 30 second exposures when photographing the stars. But you may not need to go to your highest ISO and you just might be able to stop down a bit. So the lesson is to test your exposure and find what works best.
We do photography workshops. Come on out and join us. Click here to check us out.
You can also check out our photography. Click here.
(3140)

Hey there! I know this is kind of off topic but I was wondering if you knew
where I could locate a captcha plugin for my comment form?
I’m using the same blog platform as yours and I’m having trouble finding one?
Thanks a lot!
I use Vertical Response for my mailing lists and emails. They have a form for entering contact information which has a captcha option.
Thank You! Glad I checked it out! I will bookmark the site