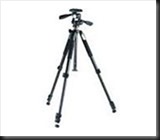
Like many of us I was passionate about photography when I was in college and for a while afterwards. Then the effort seriously building a career started consuming all my time and photography got pushed aside. But I bought a new camera when my daughter was born and that kick started my return to photography. It wasn’t long after that that I started getting back into landscape photography and I went out to purchase a tripod. I didn’t have a lot to spend so I picked up one in the $125 range and said ‘Ouch’ when I put it on my credit card. It was something like this one.
Every time I wanted to use it I had to screw the camera on to the camera mount. It wasn’t very tall so I find myself extending the center post all the time and still I had to hunch over to look through the viewfinder. But it was light weight and I thought all the handles and nobs used to aim and adjust your camera were pretty cool, even if they were a bit awkward.
I got a lot of use out of it – until I set it down at Mt Rushmore, forgot it, and walked off. When I discovered my mistake we want back to check with the rangers to see if anyone had turned it in. Of course it was gone. So we rushed into Rapid City, South Dakota to find a camera store and buy another one for the rest of the trip. I got the same kind.
It took awhile but it eventually became apparent that a $125 tripod just wasn’t going to do the trick. It wasn’t very solid and was pretty awkward to use. So I started reading up on them. I came across the blog article that explained how you can save $2000 on a tripod by spending $2000 on your first tripod. That still seemed like a lot of money. But if that is what it was going to take, …. So, working from the bottom up I started putting together what I needed.
First of all, it should be both light weight and sturdy enough to hold my camera with long telephotos. Aluminum legs were light weight but not sturdy enough so I decided to go with carbon fiber in spite of the cost. Second, it needed to be tall enough for my 6’ 4” body so I needed a tripod that was extra long. Third, it needed to fit in my suitcase when I traveled so I decided on four leg sections instead of three. Fourth, I still wanted a center post in spite of so many professionals much better than me that complain that a center post keeps you from getting really low. And I find there are times when the composition requires the camera to be 6” or a foot higher and the center post allows me to do that. So far I have no regrets for my center post decision. Fifth, I wanted the center post to be ‘leveling.’ In other words it can be adjusted so it is perfectly vertical even when the tripod is sitting on a slope. This is a really handy feature when shooting panoramas. So here’s what I was looking for in the tripod:
- Light weight, sturdy carbon fiber
- Long enough for a tall guy like me
- Four section legs so it will fit in a suit case
- Leveling center post to shoot panoramas and get that extra height when I need it
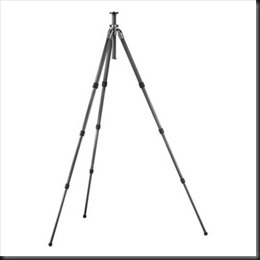
I ended up with the Gitzo TT2540LLVL. It retails for right around one grand. Fortunately I had some help from a friend who was a Bogen salesman at the time (Bogen handles Gitzo’s sales) and got a really good deal. It helps to have friends like that.
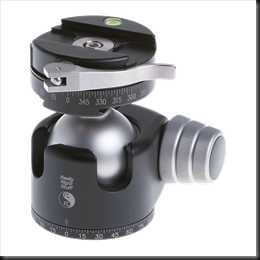
But you’ll notice this is just the tripod and there’s no way to attach a camera. It’s kind of like buying a camera body without a lens. So the question came down to the kind of mount. In checking around it became clear that the three-axis mount I had been using was more for filming but not for landscape photography. What I really needed was a ball head. Since I went with a top of the line tripod I only looked at one top of the line ball head – Really Right Stuff. And I went for their largest ball head thinking that that would accommodate anything that I might throw at it in the future in the way of large, heavy telephoto lenses.
The ball head I chose comes with an Arca-Swiss style quick release and there were two choices in how the quick release worked – a lever or a screw-know clamp. I went with the lever because not only did it provide tactile feedback to let you know if your camera is locked in but you could also see it.
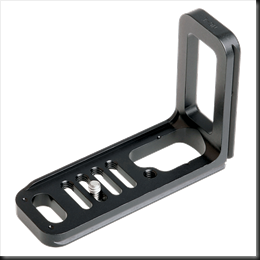
Lastly I needed to fasten the camera to the mount and that required a plate. I went with the L-plate which allows me to switch from landscape to portrait orientation in seconds. I surely love that L-plate.
Really Right Stuff also makes plates that only attach the camera in landscape orientation. Cost of the ball head was $450 and the L-plate another $180.
This stuff isn’t for the faint of heart. But what I ended up with is two extraordinary pieces of equipment – tripod and ball head. They are incredibly well-engineered and when you ask yourself what the three most important pieces of gear are for taking professional quality landscape photographs they will be your camera body, high quality lenses and a top of the line tripod. So I figured it doesn’t make sense to spend thousands of dollars on the first two and then try to skimp on the third. I am so thrilled with my Gitzo tripod and Really Right Stuff ball head that I take great pleasure from them every time I set up for a shot.
I hope you found this article useful. Please feel free to share it with your photographer friends, on Facebook, Twitter and the like.
And we always enjoy hearing from you so please leave a comment with your experience with tripods.
We do photography workshops. Come on out and join us. Click here to check us out.
You can also check out our photography. Click here.
(2042)


