High Dynamic Range or HDR has become a standard and often used tool when I’m in the field. For example, a few weeks ago when I was shooting sunrises in Bryce Canyon we would arrive well before sunrise. Generally I would start shooting when it was light enough to get a good exposure at 30 second, ISO 100 and f/16. That’s a good 20 to 30 minutes before the sun peeks over the horizon. In that wonderful pre-sunrise light the dynamic range is very low, maybe a total of four or five stops. There is no need for HDR because under those circumstances I can get a good 8 and if I want 9 stops of dynamic range from my sensor.
But as soon as the sun is above the horizon all that changes. The dynamic range jumps to at least 8 stops, probably more. (I don’t take the time to scintifically measure the dynamic range because things happen so fast in those first few minutes.) I don’t want to take any chances with that incredible light so I switch to HDR, just for insurance if nothing else.
Recently I’ve started shooting 5 HDR shots, varying the exposure by 1 1/3 stops. Yes, I know that PhotoMatix Pro, the utility I use exclusively to process HDR, recommends 2 stops. But I have it on good authority that something less than 2 stops is more optimum. So I vary the exposure by 1 1/3 stops and adjust the base exposure compensation so that the left end of the most overexposed image histogram falls at least 20% above the minimum. The same goes for the most under exposed image. The right end falls at least 20% below the maximum. In a recent post I explained how I configure the camera shutter and drive to take advantage of mirror lockup. You can read about it in New Shooting Technique.
I do all my HDR processing in PhotoMatix Pro. This tool permits a fantastic amount of control. That’s the good news. The bad news is that it permits a daunting amount of control. So it can take a while to get this high performance thoroughbred under control. But once you get it you have a powerful, expressive tool.
One of the things you must take into account when shooting HDR is the extent to which your subject is moving. Ideally you want a subject that is stationary – totally stationary. You don’t want leaves blowing; you don’t want people walking through your shot; you want everything to stay put. You can usually achieve this by being patient, sometimes very patient.
On the morning in question, however, the clouds caught the pink early dawn glow against a baby blue sky. A test shot indicated the dynamic range was to great so I opted for three shots at +/- 1 1/3 stops. The light was still very dim and the total time for the three exposures took anywhere from 25 to 30 seconds. This introduced the serious possibility of cloud movement in that period of time, something that could prove significant even though I was using a wide angle lens. Additionally, there was only time for two series of shots before the light began to fade. Talk about things happening getting a bit hectic at sunrise.
So back in the digital darkroom I was eager to see how these images turned out. I ran the two sets of images through PhotoMatix Pro 3.1 in batch mode. (I have to use batch mode because of the size of my raw images – around 25 MB. But batch mode is a lot more convenient because you can set up the process and let it run – all night if you have a lot of image to process.)
When processing a set of images in Photomatix Pro the first thing it does is create an HDR file. This is a file with 32 bits per pixel, sufficient to capture the most extreme dynamic range. Normally the files we work on are 16 bits per pixel and for good reason. At 32 bits per pixel our monitors are incapable of displaying the image. In fact, when Photomatix Pro creates the HDR image and it is displayed on the screen it looks horrible.
So the second step is called ‘Tone Mapping.’ In this step the 32 bit image is mapped down to 16 bits. But I’ve gotten way head of myself and a bit off the point.
When generating the 32 bit HDR file Photomatix Pro gives you a number of options, one of them being ‘Align source images.’ This is great if you happen to be shooting hand held HDR, something Uwe Steinmueller refers to as ‘Capture More Light.’ Each shot will be off by just a little and Photomatix Pro will attempt to line up the images for you. It does a good job of it too.
Another option is ‘Attempt to reduce ghosting artifacts.’ These occur when something moves in your scene between shots. This may be leaves blowing or people walking through. When this happens one image may record the leaf, for example, in one location and the next image may record it in a slightly different location. When the images are merged you get a little ghost around the leaf. Photomatix Pro does a pretty decent job of handling this too.
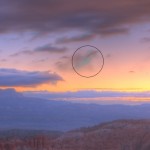
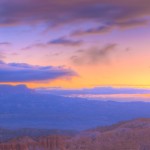
I wasn’t sure if I should use ‘Align source images’ or ‘Attempt to reduce ghosting artifacts’ on my dawn photographs so I turned them both on. The results were not successful. You can see for yourself. There are strange shape in the sky.

(566)

