Photographing Death Valley National Park

Enjoy some of the photographic wonders of Death Valley National Park on an exciting photography workshop.

People sometimes ask me if there’s anything to photograph in Death Valley.  At 5,262 square miles of desert and mountains, it’s one of the largest national parks.  The valley itself is 140 miles long.  Think of it.  It takes three hours to drive from one end to the other.  And surely, in all that space there should be something to photograph.  And yet, most of it is desert.  In fact, the valley itself is the hottest, driest place on earth. It’s also the lowest spot in North America at 282 feet below sea level.  So what’s to photograph?

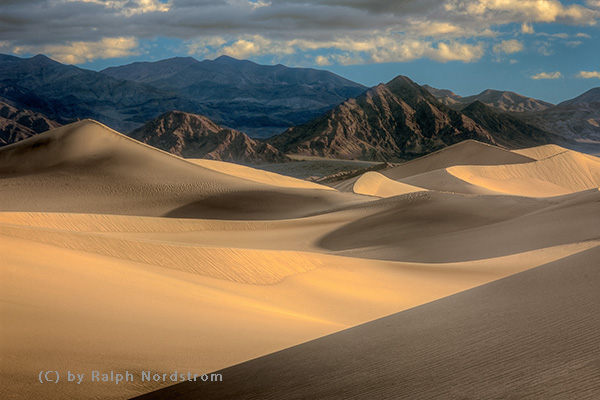
Mesquite Flats Dunes

Death valley dunes 2011

Being a desert you might expect sand dunes and you would be right.  The Mesquite Flats Dunes are in the middle of the valley near Stovepipe Wells.  While not excessively high, they cover a large area and provide wonderful photographic opportunities at both sunrise and sunset.  I prefer sunrise which means heading out across the desert while it’s still dark to arrive at the dunes just as it’s starting to get light.  I go to a place that’s not heavily visited.  It’s an exciting experience.

Zabriskie Point

Zabriskie point pano 140211

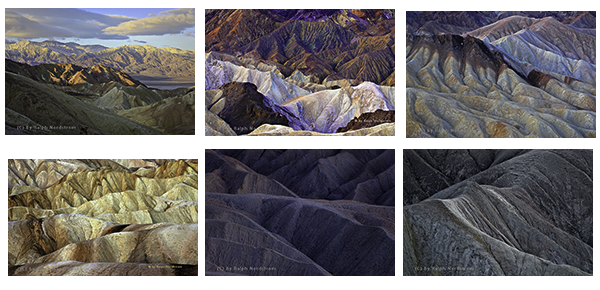
Zabriskie Point is one of the most visited places in Death Valley.  It attracts photographers and tourists alike.  At first it looks like an inhospitable badlands with not much to offer the photographer except a lot of tan wilderness.  But at the right time of day these ‘bad’ lands become extraordinarily beautiful.

Zabriskie collage

It’s all a matter of being there at the right time.

Continue reading “Photographing Death Valley National Park”

(223)

Why Do I Need an HDR App when Lightroom Has It?

Lightroom is good for basic HDR but for full creative control, HDR applications have an important role to play.

I was recently in the redwoods of Northern California.  One of the groves I love is the Lady Bird Johnson Grove in Prairie Creek State Park.  In it is a Western hemlock growing next to a massive redwood.  The hemlock’s roots spread out across the ground, making an interesting and photo-worthy pattern.  I’ve photographed it a number of times in the past but never liked what I got.

This year was different.  I finally saw a composition that excited me.  The sky was overcast and a bright mist hung in the forest.  I knew I was going to have a dynamic range problem so I shot HDR – 5 shots bracketed 1 1/3 stops.

I knew I was going to have a dynamic range problem so I shot HDR….

I was eager to see what it looked like so when I got back to my hotel room I ran it through the Lightroom HDR.  One thing about the Lightroom HDR feature is that it is convenient, quick and creates a DNG file.  But its drawback is that you don’t have a lot of control.  Besides alignment and de-ghosting, you have the Auto function, the same Auto found in the Basic group in Lightroom.  That’s it.

I ran my five files through Lightroom HDR, but the results were disappointing.  The foreground was rendered well but the forest in the background was blown out.   I tried my best to recover what I could, but it was too far gone.  Another year gone by and I still don’t have this photograph.
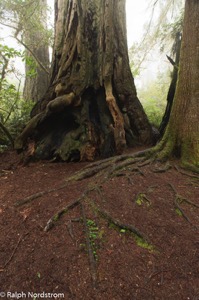
Redwoods 180522 SM37414 HDR

It wasn’t until sometime later that I was browsing my redwood images and came across this shot.  I decided to have another go at it but this time using my tried and true Photomatix Pro 6.0.  I’ve been using Photomatix Pro since version 1 and it has always produced for me.  Photomatix Pro is extremely versatile, giving the photographer a wide range of expressions from natural to surreal.  And with over 40 presets, it’s easy to find one that is very close to what you’re looking for.  I always prefer the more natural look.

An image that I thought was lost came back to life with Photomatix Pro.

I imported the five files, selected one of the more natural presents and what a difference.  An image that I thought was lost came back to life with Photomatix Pro.  Not only was the foreground beautifully rendered but so was the background.  A few small tweaks and the photograph was ready for the rest of the workflow.
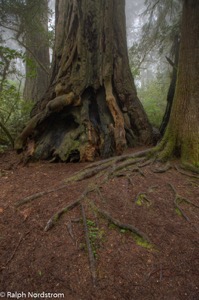
Redwoods 180522 SM37414 5 6 7 8 Enhancer

I finished my normal workflow by completing the Lightroom adjustments once Photomatix Pro had imported the TIFF file back into the Lightroom catalog.  That was followed by the fine tuning I always do in Photoshop.

I thought you might like to see the HDR outputs from Lightroom and Photomatix Pro along with the finished photograph side-by-side.
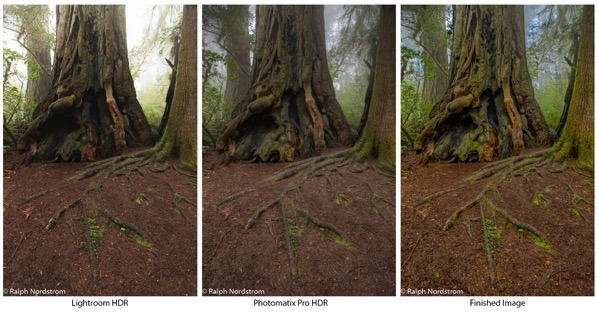
Redwoods hdr comparison

Lightroom HDR still has a role to play for me.  When I’ve just uploaded my files from a shoot and am browsing through them to select the ones I want to work on, I find the Lightroom HDR very handy to get a sense of if I’ve captured the dynamic range or not.  But if I later decide I want to print the image and add it to my portfolio I’ll redo the HDR blending in Photomatix Pro where I have so much more control.  Lightroom HDR doesn’t come close to providing the artistic control that I need.  Photomatix Pro continues to fill that gap and remains an essential tool in my HDR workflow.

You can see for yourself and give Photomatix Pro a spin by downloading a trial version from their website.

(34)

What Would Happen if Your Hard Drive Failed?

Explore the various ways to back up your important data from a simple solution to a comprehensive one.

Have you ever asked yourself what would happen to your picture files if your hard drive failed?  I ask this question because a week ago, I lost a hard drive.

When I was just getting started, I would have lost everything.  I had a desktop computer with a single internal hard drive and everything was on it.

Backup 1

So what did I do?  I went out and invested in an external drive.  Now I could at least back up my important files.  That would include more than just the photo files but it definitely included them.  The advantage was that now I had two copies of my important files and it was unlikely that both the desktop hard drive and the external drive would fail at the same time.  But there was a downside….

Continue reading “What Would Happen if Your Hard Drive Failed?”

(126)

Photography Class on Mt San Jacinto

I recently taught a photography class for the Mt San Jacinto Natural History Association.  At an elevation of 10,834 feet, San Jacinto is the second highest peak in Southern California.  The Natural History Association operates in conjunction with the Mt San Jacinto State Park and has a rich program of mountain activities.  I was fortunate to be invited to teach the first-ever photography class for the association.

The class would consist of lectures and demonstrations, and be conducted in one of the meeting rooms in the mountain station of the Palm Springs Ariel Tram.  We would have a morning and afternoon shoot in nearby Long Valley,

In preparing for the class, I anticipated that there would be a large cross-section of experience and abilities, with gear ranging from smart photos to high-end digital cameras,  And that proved to be true.  So rather than getting into the technical aspects of photography, the emphasis was on the creative.  This normally consists of talking about light and composition which we took a bit of time to cover.  But the main emphasis was On Seeing.

I wasn’t sure what there was to actually See in Long Valley.  It was always something to pass through on the way to more exciting places like Round Valley or the summit,  So, to find worthwhile things to photograph, our quest became to find and capture the essence, the soul of Long Valley.

And here’s what we found…

Continue reading “Photography Class on Mt San Jacinto”

(105)

The 2018 Gems of Oregon Workshop

Join me as we relive the experiences, challenges and excitement of the 2018 Gems of Oregon photography workshop.

The Gems of Oregon workshop was different this year.  I was feeling apprehensive as the date approached.  With eight major wild fires burning in the area, the conditions were going to be challenging to say the least.  Smoke-filled air not only makes photography difficult but poses a health risk.  I was paying particularly close attention to air quality warnings in the areas we would be traveling through and photographing in.  Some areas looked fine but others posed a problem, especially for the workshop’s final days.

We met Wednesday afternoon as planned in Crescent City on the Northern California coast.  The air was clear and fresh.  With a very productive orientation and instructional session, we were off to a good start.  Thursday we were to journey up the spectacular southern Oregon coast and we were ready.  The weather forecast was favorable and there were no air quality warnings.

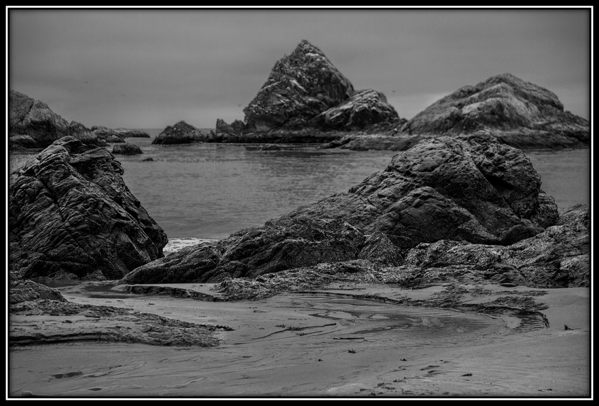
It was still overcast when we made our first stop at Harris Beach in Blanding, OR.  The overcast made black and white photography especially fitting.

Harris Beach, Brookings, OR

Figure 1: The thing that stopped me for this photograph was the stream running into the ocean.  I would have prefered the stream to be more prominent but that put the rest of the image out of balance.  So this is what I ended up with.

Continue reading “The 2018 Gems of Oregon Workshop”

(129)