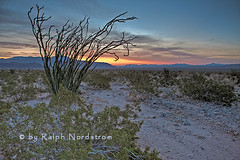
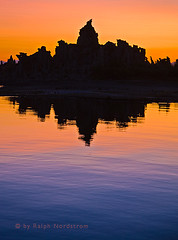
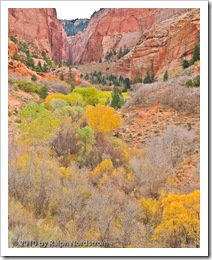
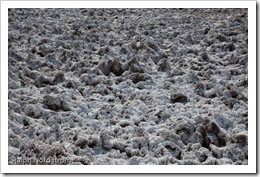
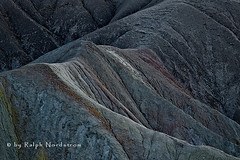
When I’m asked how I get such intense landscape photographs I respond that it all begins with the fundamentals, the photo foundation. Given that you have the other elements of a great photograph – a terrific subject and fantastic light – you are still not guaranteed a compelling image if it doesn’t have a solid foundation.
What is the photo foundation? It’s two things – a proper exposure and the correct focus. These are so basic we never talk about them much but, if you’re like me, you’ve had to walk away from a potentially great image because one or both of these were not carefully attended to in the field.
This post discusses focus.
Focus
Sharp images are the goal of most landscape photographers. We have two options when it comes to focusing – autofocus and manual focus.
Autofocus
Cameras use multiple built in focus points to focus the lens. When you depress the shutter half way, the processor in the camera determines which of these focus points to use and which to ignore. It then focuses the lens. The processors are extremely sophisticated and generally do a very good job.
But not all the time. Sometimes they choose the wrong focus points. Fortunately, most digital cameras allow you to tell the camera what focus point to use.
One thing to take into consideration when using auto focus is the fact that the focus may be off ever so slightly. This can be corrected by sending your camera and lenses to your manufacturer’s service center and having them calibrate your body to your lenses.
Manual Focus
With early film cameras manual focus was the only way to go. Various devices were used to help the photographer get a sharp focus including prisms and split images.
But without these devices it’s difficult to manually focus while looking through the view finder of a digital camera. But with the development of Live View (the ability to see your image before you capture it) on digital SLRs, manual focus is now the most precise way to focus. Here’s how.
Display the image on you LCD screen using live view. Select the object you want to focus on and zoom in on it. Focus the lens (make sure it is set to manual focus) and zoom back out. Take your picture. It’s as easy as that.
Hyper Focal Distance
Above we’re referred several times to selecting the object you want to focus on. But how do you do that?
The goal is to have the nearest and farthest objects both in focus. This requires two things – depth of field and focusing at the hyper focal distance. What’s that? Well, simply put, at any given depth of field it is the distance that will have objects at infinity just in focus. You don’t want to focus on the objects at infinity because that will place your foreground objects out of focus. And you don’t want to focus on your foreground objects because infinity will be out of focus. You want to focus somewhere in between. But where?
Generally speaking, given that your depth of field is adequate to cover both foreground and background, you want to focus 1/3 the distance between your closest foreground object and infinity. That’s because the depth of field is much shallower in front of the focal distance than it is behind.
You can actually print charts off the internet or by little circular slide rules that give you the depth of field and the hyper focal distance for any aperture – focal length combination. I know photographers that carry a tape measure in their camera bags to precisely determine the hyper focal distance.
But there’s an easier way. On your live view screen or through your view finder, select an object that is 1/3 of the way up from the bottom of the frame and focus on it. Then shoot at f/22 and you got it. However, if you are concerned about the effects of diffraction then maybe the circular slide rule calculator would be a good idea, if nothing more than to give you extra piece of mind.
Selective Focus
The opposite of a large depth of field is selective focus. The goal is to have a very limited part of the image in focus and the rest out of focus. To do this you minimize the depth of field by shooting with a wide open lens; that is, maximum aperture. Longer focal length lenses have a shorter depth of field so one technique you might try is moving away from the subject and shooting wide open with a longer focal length lens.
When you’re using selective focus it’s critical that you get a very sharp focus on your subject. In a flower that may be the pistils and stamens. I wildlife, it’s the eyes.
Hand Held Photography
It’s worth mentioning hand held photography. Most of the time landscape photographers will use a tripod to get the greatest sharpness in their images. But there’s a freedom and spontaneity that comes with hand held photography. And it’s still possible to get sharp images although not as sharp as you can get from your tripod.
The trick is to match the shutter speed with your focal length. The formula is very simple. The shutter speed should be 1 divided by the focal length or faster. For example, if your focal length is 50mm then you can get a sharp image if your shutter speed is at least 1/50. If your focal length is 200mm then you need to use a shutter speed of 1/200 or shorter.
You also want to do everything else to steady your camera like tucking your left elbow into your chest to give the camera a solid platform with your body.
Focus Summary
In summary, to get the sharpness you desire, first determine what object you want to focus on. Determine the aperture and focal length settings that will give you the depth of field you want whether it’s hyper focal distance or selective focus. Then focus. If you’re using autofocus, select the focus point that is on the object you decided to focus on. If you’re using manual focus, use live view to zoom in on the focus object.
Well focused, sharp images will provide your photographs with a strong photo foundation.
(973)
Like this:
Like Loading...

