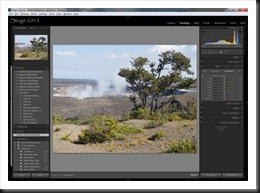
Lightroom Tutorial – Polarizer Filter

How do simulate the effect of a polarizer filter in Lightroom.

A Polarizer filter is generally the first filter a landscape photographer buys.  It is so versatile.  It can darken blue skies, reduce harsh reflections and intensify colors.  Many photographers put polarizers on their lenses and never take them off.

But this is a Lightroom tutorial.  So why in the world am I talking about polarizer filters?  Well, it’s because I have a trick I’d like to share with you, one that I’ve never seen discussed anywhere else.  It’s what you can do in Lightroom to create the polarizer effect without a polarizer.  In fact, it can be better than the real thing, especially if you are shooting with a wide angle lens.  Because, the angle of view can be so great that part of the sky will be affected by the polarizer and the rest will not.  So it looks pretty unnatural when the sky in part of your image is dark and the rest is washed out.

So, what’s the trick?  Well, consider this image taken on a recent trip to Hawaii.  I shot it with my Canon G11 and I don’t even own a polarizer filter for it.  It’s a photograph of the ongoing eruption in a crater in the Kilauea caldera.  In the bottom of the crater is a lake of lava.  The smoke you see is a plume of noxious gas.

polarizer_1

(Click on the image for a larger view)

Continue reading “Lightroom Tutorial – Polarizer Filter”

(19527)

Lightroom Tutorial – Importing Photographs

Get post processing started by importing your photographs into Lightroom.

An important part of post processing is importing your photographs into Lightroom.  The goal is to copy the files from your camera or laptop and store them on your desktop computer.  At the same time you also want to make a backup of all of your files.

You might be interested in the configuration of my desktop computer.  It has about 5 terabytes of storage.  This is where the image files will be stored.  I also have several terabytes of external storage – external hard drives.  This is where the backup copies go.

In this example I’ll be copying files directly from the camera.  The plan is to copy the files as they are to the backup storage.  But the files I store on the desktop storage will be converted to DNG format.  More on that in another post.

So with the big picture in mind, let’s get into the details.

Continue reading “Lightroom Tutorial – Importing Photographs”

(3451)

The Making of a Photograph – Pond, Owens Valley 2011

Follow along in the making of a photograph as we go from kneeling in the mud to the final print on paper.

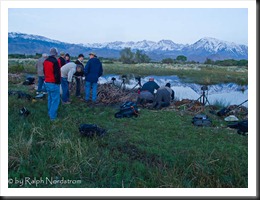
It all started with kneeling in the mud.

I was with David Muench, Jerry Dodrill and twelve other eager photographers on a Mountain Light Gallery workshop in May.  We lined up along the bank of the pond just outside Bishop, California and aimed our cameras at magnificent Mt Tom, the dominant peak in the Eastern Sierra crest in this area.

eastern_sierra_110506_IMG_6143

I’d like to take you through the process of making a photograph from the images I captured that morning.

Continue reading “The Making of a Photograph – Pond, Owens Valley 2011”

(1743)

Lightroom Tutorial – Camera Specific Presets

I’m a landscape photographer who likes to do it all himself.  I don’t want my camera making decisions for me.  That’s one reason why I shoot RAW.   And I don’t want Lightroom doing it either.  Lightroom has default presets that it applies to your photographs when you import them.

To make things interesting, I shoot with two cameras (three if you count my iPhone).  My main camera is a Canon 1Ds Mark III and my don’t-leave-home-without-it camera is a Canon G11.  These cameras have widely different characteristics to say the least.  Lightroom applies the same default preset to files from both cameras when they are imported.

Wouldn’t it be nice if you could set up separate presets for each camera and set them up the way you like them.  Well, that’s exactly what you can do.  In fact, you can go a step farther than just undoing the Lightroom defaults.  If there’s something you always do to every file you can create presets specific to each of your cameras and apply all the adjustments you want.

Continue reading “Lightroom Tutorial – Camera Specific Presets”

(4102)

Photography Tutorial – Getting the Shot

Last week I published a post in which I presented a photographic situation and solicited input on what decisions might go into getting the shot.  The situation was to photograph the interior of the beautiful Cologne Cathedral in Germany.  Here’s a link to the post.

Getting the Shot – Cologne Cathedral

In this post I’d like to share what was going through my mind as I prepared to push the shutter.  For starters, here’s the final photograph (click the photograph to enlarge it).

_A1P6721-Edit Cologne Cathedral

You may recall from the original post that I spoke of two things that go into every work of art – the artists Creative Vocabulary and the Interpretive Decisions he or she makes.

In this instance, which focused on the technical aspects of getting the shot, the Creative Vocabulary consists of the capabilities of the camera and the knowledge to use them.  The Interpretive Decisions are those decisions made in the moments that lead up to the instant the shutter is pressed.  So let’s step through what was going through my mind as I prepared to capture this image.

Continue reading “Photography Tutorial – Getting the Shot”

(1141)

Photography Tutorial – Getting the Shot

I have what I think is a fun idea that can lead to an interesting discussion.  Let me explain.

I often think of art in general and photography in particular as involving two very important elements – creative vocabulary and interpretive decisions.  Creative vocabulary is the knowledge, skills and techniques we use as artists and just like our verbal vocabulary, we use the ‘words’ in our creative vocabulary to express ourselves.  As we grow as artists our creative vocabulary grows and we are able to more fully and richly communicate our thoughts and feelings.

Interpretive decisions recognizes the fact that each of us has a unique world view and a unique thing to say.  When creating a work of art we make numerous decisions, decisions that shape the way we interpret our subject and thereby communicate what it is we have to say about it.

So, this leads to my fun idea.

Continue reading “Photography Tutorial – Getting the Shot”

(1300)

Photo Foundations – Focus

When I’m asked how I get such intense landscape photographs I respond that it all begins with the fundamentals, the photo foundation.  Given that you have the other elements of a great photograph – a terrific subject and fantastic light – you are still not guaranteed a compelling image if it doesn’t have a solid foundation.

What is the photo foundation?  It’s two things – a proper exposure and the correct focus.  These are so basic we never talk about them much but, if you’re like me, you’ve had to walk away from a potentially great image because one or both of these were not carefully attended to in the field.

This post discusses focus.

Focus


Sharp images are the goal of most landscape photographers.  We have two options when it comes to focusing – autofocus and manual focus.

Autofocus


Cameras use multiple built in focus points to focus the lens.  When you depress the shutter half way, the processor in the camera determines which of these focus points to use and which to ignore.  It then focuses the lens.  The processors are extremely sophisticated and generally do a very good job.

But not all the time.  Sometimes they choose the wrong focus points.  Fortunately, most digital cameras allow you to tell the camera what focus point to use.

One thing to take into consideration when using auto focus is the fact that the focus may be off ever so slightly.  This can be corrected by sending your camera and lenses to your manufacturer’s service center and having them calibrate your body to your lenses.

Manual Focus


With early film cameras manual focus was the only way to go.  Various devices were used to help the photographer get a sharp focus including prisms and split images.

But without these devices it’s difficult to manually focus while looking through the view finder of a digital camera.  But with the development of Live View (the ability to see your image before you capture it) on digital SLRs, manual focus is now the most precise way to focus.  Here’s how.

Display the image on you LCD screen using live view.  Select the object you want to focus on and zoom in on it.  Focus the lens (make sure it is set to manual focus) and zoom back out.  Take your picture.  It’s as easy as that.

Hyper Focal Distance


Above we’re referred several times to selecting the object you want to focus on.  But how do you do that?

The goal is to have the nearest and farthest objects both in focus.  This requires two things – depth of field and focusing at the hyper focal distance.  What’s that?  Well, simply put, at any given depth of field it is the distance that will have objects at infinity just in focus.  You don’t want to focus on the objects at infinity because that will place your foreground objects out of focus.  And you don’t want to focus on your foreground objects because infinity will be out of focus.  You want to focus somewhere in between.  But where?

Generally speaking, given that your depth of field is adequate to cover both foreground and background, you want to focus 1/3 the distance between your closest foreground object and infinity.  That’s because the depth of field is much shallower in front of the focal distance than it is behind.

You can actually print charts off the internet or by little circular slide rules that give you the depth of field and the hyper focal distance for any aperture – focal length combination.  I know photographers that carry a tape measure in their camera bags to precisely determine the hyper focal distance.

But there’s an easier way.  On your live view screen or through your view finder, select an object that is 1/3 of the way up from the bottom of the frame and focus on it.  Then shoot at f/22 and you got it.  However, if you are concerned about the effects of diffraction then maybe the circular slide rule calculator would be a good idea, if nothing more than to give you extra piece of mind.

Selective Focus


The opposite of a large depth of field is selective focus.  The goal is to have a very limited part of the image in focus and the rest out of focus.  To do this you minimize the depth of field by shooting with a wide open lens; that is, maximum aperture.  Longer focal length lenses have a shorter depth of field so one technique you might try is moving away from the subject and shooting wide open with a longer focal length lens.

When you’re using selective focus it’s critical that you get a very sharp focus on your subject.  In a flower that may be the pistils and stamens.  I wildlife, it’s the eyes.

Hand Held Photography


It’s worth mentioning hand held photography.  Most of the time landscape photographers will use a tripod to get the greatest sharpness in their images.  But there’s a freedom and spontaneity that comes with hand held photography.  And it’s still possible to get sharp images although not as sharp as you can get from your tripod.

The trick is to match the shutter speed with your focal length.  The formula is very simple.  The shutter speed should be 1 divided by the  focal length or faster.  For example, if your focal length is 50mm then you can get a sharp image if your shutter  speed is at least 1/50.  If your focal length is 200mm then you need to use a shutter speed of 1/200 or shorter.

You also want to do everything else to steady your camera like tucking your left elbow into your chest to give the camera a solid platform with your body.

Focus Summary


In summary, to get the sharpness you desire, first determine what object you want to focus on.  Determine the aperture and focal length settings that will give you the depth of field you want whether it’s hyper focal distance or selective focus.  Then focus.  If you’re using autofocus, select the focus point that is on the object you decided to focus on.  If you’re using manual focus, use live view to zoom in on the focus object.

Well focused, sharp images will provide your photographs with a strong photo foundation.

(946)