Photographing in a Wine Cellar

How to get good photographs from photographing hand-held in dark conditions.

I was at a fabulous winery in Napa Valley, California.  (If you’re a wine lover like I am, you don’t need me to tell you that Napa Valley is in California so my apologies.)  The winery was Castello de Amorosa – the Castle of Love.  It is a replica of a medieval Italian castle.

Now let me clarify a misperception about the castle.  A rumor is going around that the castle was dismantled in Italy and reassembled in Napa Valley.  Not true.  Some pieces of the castle were brought over from Italy but the bulk of it is local stones.  Nevertheless, it’s a beautiful and authentic replica of the real thing.  It has a great room, chapel, a torture chamber, and honest to goodness wine cellars lined with hundreds of barrels of aging wine, which, by the way, is quite good.  (Don’t look for this wine in markets or gourmet restaurants however.  The only place it is sold is at the winery.  But if you would like to tour it, give me a call and I’ll meet you there.)

I was with a group, participants in the workshop I was leading, and we got a private tour.  We all had our cameras at the ready and were photographing just about everything, even the torture chamber (especially the torture chamber?).  The wine cellars were very dark, however, and the aisles extended for hundreds of feet.  There were dim light bulbs sparsely scattered the length of the aisles.  Some of the barrels had labels on them.  Celebrities frequently bought an entire barrel of aging wine, so these barrels were set aside for them.

I was eager to photograph the wine cellars but there was an exposure problem to solve.  I don’t have a tripod, I’m shooting hand-held, so I can’t rely on a lengthy shutter speeds for a good exposures.  So, each side of the exposure triangle posed a challenge and required a solution.  Let’s start with shutter speed.

What shutter speed should I use for handheld shooting?  Well, that depends on the focal length of the lens.  After all, the rule of thumb for sharp handheld images is 1/focal length.  OK, I knew that.  The lens I was using was my go-to 24mm to 105mm lens.  I didn’t want to have to change my shutter speed every time I zoomed to a different focal length, so I chose a speed of 1/120 sec that covers all the zooms up to and including the longest.  Now that’s really fast for a dark environment.  But hold on.  The lens has image stabilization which is good for 1 to 2 stops.  In other words, I can increase the exposure time by 1 to 2 stops and still get a sharp image.  So, being the cautious guy I am, I chose 1/60 sec.

But wait, I normally shoot Aperture Priority where the camera chooses the shutter speed.  Gotta switch to Manual.  OK, that’s done, and I set the shutter speed to 1/60 sec.

The next decision to make is the aperture.  If I shoot wide open, which for this lens is f/4.5, I don’t get the depth of field I need for shooting down the long dim aisles.  Now the depth of field will vary with the focal length so if I’m shooting at 24mm then I can use a fairly wide-open aperture but if I’m shooting at 105mm I need to stop way down, say f/11.  Once again, I didn’t want to have to change the aperture for every shot, so I went with f/11.

But a relatively fast shutter speed and a smaller aperture severely reduces the amount of light that passes through the lens and falls on the sensor.  That leads to the final decision.  What ISO should I use?  And not having eyes that work like light meters, I don’t have a clue.  Furthermore, something has to change from one lighting condition to another.  And since I’m setting and forgetting shutter speed and aperture, that adjustment falls on ISO.  Let the camera set the ISO.  Fortunately, my camera has Auto ISO, so I switched from ISO 100 to Auto.  And I’m all set.

Since the cellar is much darker than a sunny day at noon, the camera selected the higher ISOs and in the really dark places, maxed out the ISO.  As a result, many of the photographs have lots and lots of noise.  At the time I took these photographs, Lightroom’s noise reduction was state of the art, but state of the art then was not very good.  But that has all changed as a result of the AI tsunami and how everyone is going bonkers over it.  Lightroom now employs AI in their noise reduction function and it’s like magic.  The only thing is it can take a long time to do its magic, sometimes as much as 10 minutes and even more.  Oh well, it’s a small price to pay for a dramatically improved image.

So, here’s the camera’s setup.

  • Manual camera mode
  • Shutter speed = 1/max focal length but compensated for taking the lens’ or camera body’s image stabilization (vibration reduction for you Nikon folks) into account
  • F/stop that gives the desired depth of field for your longest focal length, such as, f/11.
  • Auto ISO

In the digital darkroom, Lightroom now has the power to deal effectively with the noise that the highest ISOs will invariably generate.  You may want to use third party noise reduction tools such as Topaz DeNoise AI which is faster than Lightroom and works as well with light to moderate noise.  But it’s more expensive than Lightroom, given that you’re already paying $10/month to use it.

OK, so that’s it as far as the photography aspect of Castello de Amoroso goes.  We ended up in the tasting room of course and I bought a rather expensive bottle of cabernet – 3 figures.  It was so good I couldn’t resist.  When I got home, we prepared a very special meal and opened the bottle.  Both wife and daughter said it was the best wine they had ever tasted.  I must confess, it was awfully good!

(63)

JPEG or RAW

Which file format is better – JPEG or RAW. Well, it depends….

Our digital cameras give us a choice of two file formats in which our images are stored – JPEG and RAW.  In fact, some digital cameras only store images in JPEG format.  What’s the difference and is one preferred over the other?  Let’s take a look at each.

But before we begin, I was curious what JPEG stands for, so I looked it up.  It’s pretty weird – Joint Photographic Experts Group.  Strange indeed.  But. be that as it may, JPEG is widely used.  Practically every image you see on the web is JPEG although you occasionally see other formats.  If you use a lab to print your photographs, there’s a good chance they will ask you to send them JPEG files.

Continue reading “JPEG or RAW”

(93)

Making a Photograph – A New Approach to Tonality Adjustments

Watch as a photograph of an icon of Zion National Park is made.

For some time now I’ve been using and teaching a process of working on photographs in Lightroom. It consists of basically four steps: manual adjustments, tonality adjustments, hue adjustments and finally saturation adjustments. Quite some time ago I had the brilliant idea of converting the image to black and white before doing the tonality adjustments. The technique I used was the B & W tab in Lightroom’s HSL group.  Once the tonality adjustments were done, the image would be converted back to color and the process continue.

It didn’t work out because when I converted the image back to color, the colors were so oversaturated and unnatural that the image looked horrible. It was just easier to do the tonality adjustments on the color image. So I quickly gave up on that technique. But the other day I was reading an article in Popular Photography magazine that rekindled this idea. It took a different approach. It turned the image to black and white by setting the Saturation adjustment to -100. Now the author did this in the middle of the process but I thought that if I applied this to my process and did that at the start it just might work. So I was eager to give it a try. Let’s try it with this image of the Watchman in Zion National Park.

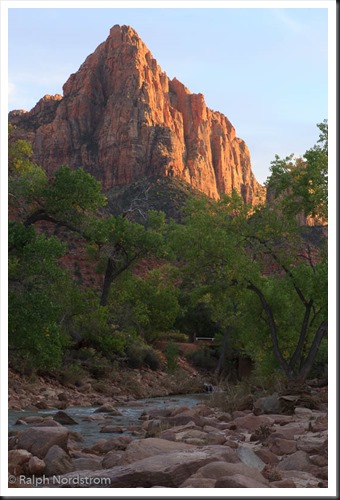
utah_141010__SM32783 This is the original raw file. I haven’t done anything to it yet. It doesn’t need any mechanical adjustments. These consist of removing spots, straightening the image, maybe some noise reduction and the final crop. But since none of these are required we can move on to the tonality adjustments.


Continue reading “Making a Photograph – A New Approach to Tonality Adjustments”

(4925)

Creating Images with Impact – Black Point

Add Impact to your Images by setting a black point. Here’s the how and why.

In this series of blog posts were talking about how to create Images with Impact. You know what I’m talking about. These are those images that really grab our attention, that capture our imaginations. There’s something special about them and it doesn’t have to be a mystery how they are created. There are a few simple techniques that you can use in Lightroom and Photoshop to add impact to your images. Now if you don’t use Photoshop, you can still do everything were talking about in Lightroom.

In the first article we talked about utilizing the full dynamic range of your medium. This is something Ansel Adams taught in his books and classes that was an essential element of his stunning landscape photographs. As he developed his technique which became known as the Zone System, the primary goal was to use the full dynamic range of his medium which, in his case, was the black and white print.

So we talked about that technique first because it is the most appropriate place to start. I do want to add that in color photography or color prints not every print benefits from a white point but virtually all prints benefit from a black point – which is what we want to talk about in this article.

IMG_0012-2

What exactly is a black point? It is small portions of the print that are pure black. If you’re printing on paper than these are small portions that are the blackest black that the combination of paper and ink can achieve. As a side note, different combinations of paper and ink achieve different levels of blackness. But regardless of the combination you use, the blackest black that can be achieved is your black point.

You want to keep the black point areas very, very small because they have no detail. And generally speaking we like to see detail in our shadows, another guideline that I picked up from studying Ansel Adams. But you don’t want to eliminate black points, that is, in most cases. There are a few exceptions to this rule that I will talk about later.

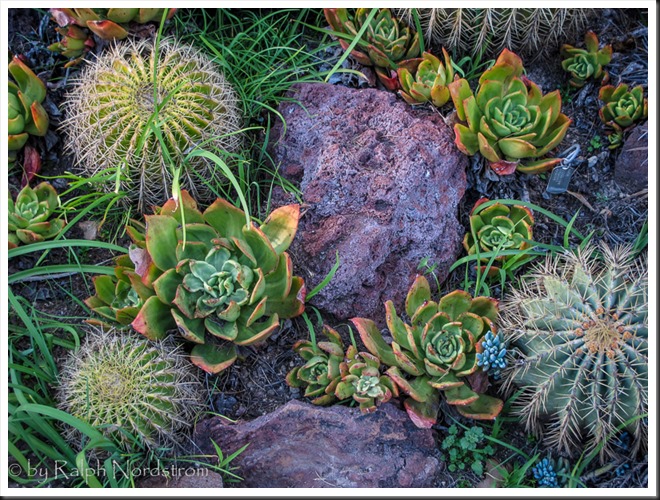
Let’s take a look at the before and after images of our photograph. I shot this at the Huntington Library in South Pasadena a few weeks ago. It’s in their incredible cactus garden – endlessly fascinating.

Continue reading “Creating Images with Impact – Black Point”

(8327)

Creating Images with Impact – Dynamic Range of the Medium

The pros create dramatic photographs, images with impact. You can add impact to your images too using these simple Lightroom techniques.

We’ve all seen those photographs that stop us in our tracks, that inspire us, that speak to us. Some photographs seem to have a special power, a special presence. Often times we hear ourselves saying, “Wow.” They have qualities that make them stand apart from other photographs. These are images with impact.

The masters of landscape photography seem to have the ability to capture a special quality of light in their photographs. It doesn’t matter whether they use film or shoot digital, their images stand out.

There are certain things about these images that do more than just appeal to us – we are drawn into to them. They capture our imaginations, stir our interests and perhaps show us moments in nature we could only hope to experience. We want to linger with them, explore them, take them in, get lost in them.

Without a doubt these photographs have compositions that are very strong, are bathed in fantastic light and have technical qualities of exposure and sharpness that are perfect. These are all decisions that the artist makes in the field, decisions that are critical to a strong image.

In the days of film, a good portion of the magic was done in the darkroom. That’s where their genius really became apparent. And it hasn’t changed today. We don’t actually have dark rooms to work in, closed rooms with the strange array of mysterious orders and the soft, dim yellow lighting. Today we have powerful software running on even more powerful computers. But really, how is that different from what the film Masters did in the darkroom? I don’t believe it is. I can’t think of anything that’s been done with “Photoshopped” photographs that hasn’t already been done in the darkroom. It’s probably a lot easier to do it in Photoshop but in the end, both the chemical darkroom and the electronic darkroom serve the same end, that being creating those “Wow” images.

In this series of posts I want to spend more time considering some techniques you can apply in the darkroom that will add impact to your images.

Use the Full Dynamic Range of Your Medium

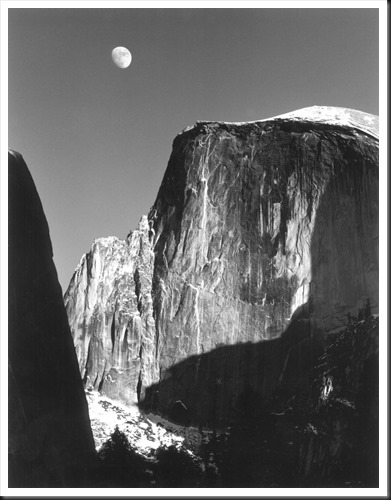
The first darkroom technique I would like to discuss is the importance of using the full dynamic range of your medium. This is not something new. When Ansel Adams developed the zone system it was precisely for this purpose – to use the full dynamic range of the black and white negative and ultimately the black and white print. But what exactly does it mean to use the full dynamic range of the medium. Let me illustrate with an Ansel Adams image I have loved for many years, one I’m privileged to be able to live with in my home – “Moon and Half Dome.”

Adams-moon-and-half-dome-1960

In this exquisite photograph if you are able to examine an original closely you will notice that the shadow on the left may look like it is totally black but actually there is subtle detail. However, there are some very small areas that are pure black. Also, the moon and the bright parts of Half Dome may look like they are pure white but a closer look will reveal detail in these areas also. This photograph takes full advantage of the full dynamic range of the paper, from the blackest black to the whitest white.

Continue reading “Creating Images with Impact – Dynamic Range of the Medium”

(4731)

How to Photograph the Coastal Redwoods

The Coastal Redwoods of Northern California have a beauty that is inspiring. But capturing them in a photograph is much harder than it may seem. Come with me to explore ways to capture their grandeur.

California is blessed with two species of redwoods, the Giant Sequoia (Sequoia giganteum) of the Sierra Nevada Mountains and the Coastal Redwoods (Sequoia semperverins) along the California coast from the Oregon border to 150 miles south of San Francisco.  These awe-inspiring trees are both a joy and a challenge to photograph.  I recently spent a week in Crescent City in Northern California photographing the Coastal Redwoods and leading a photography workshop there.  I’d like to pass along some of the techniques we employed to capture photographs that do these majestic trees justice in breathtaking but often very difficult light.

Continue reading “How to Photograph the Coastal Redwoods”

(7366)

Mastering Exposure – Expose to the Right

Expose to the Right – put it to the test by creating and comparing actual images.

Over the years there has been a lot of interest in the concept of ‘Expose to the right.’  This is something that is commonly done in digital photography where you intentionally overexpose an image.  The idea is that in digital images there is more information to work with in the brighter tonalities than there is in the darker.  And this will give you more to work with in the darkroom (Lightroom and Photoshop) which will result in a better image.

I’ve written several posts on this topic and if the concept is new to you please read these.  I’m not going to go into the theory here; that is spelled out in these posts.

Lightroom Tutorial – Expose to the Right

Expose to the right – Revisited

Now, I understand the theory.  I’m a computer guy; I had better understand it.  But I’ve always wondered if the promise of a better image actually worked out in real life.  So I did a test during our recent workshop to Big Sur.

Continue reading “Mastering Exposure – Expose to the Right”

(2292)

Lightroom Tutorial – Workflow Made Easy

Simplify your Lightroom workflow with these easy steps.

Lightroom is a great tool. It’s quick and easy to use – once you get the hang of it. But sometimes mastering the workflow, the steps you go through to take a raw file to a ‘final’ image, can be a bit daunting.

Let me say up front that Lightroom is an important part of my workflow but it’s not the only part.  Every photograph I work on starts in Lightroom but is completed in Photoshop.  Nevertheless, Lightroom gets a photograph to about 80% of the final product.  I know many people who use Lightroom exclusively and Photoshop only in rare circumstances if at all.

So back to the workflow.  Can it really be made easy?  Yes it can.  There are four major steps (not counting import – see Lightroom Tutorial – Importing Photographs):

  1. Mechanical adjustments like dust spot removal and cropping
  2. Tonality adjustments
  3. Hue adjustments
  4. Saturation adjustments

Let’s skip the first step and start with the second.  The example will be in Lightroom 4.

Continue reading “Lightroom Tutorial – Workflow Made Easy”

(7129)

The Making of a Photograph – Clearing Storm, West Temple 2012

A clearing storm in beautiful Zion Naitonal Park contributes to an exciting photogrpah of the West Temple. Read how this photograph was created.

As I drive across the Mojave Desert late one Thursday night not long ago, heading north on I-15, I have a sense of harmony, of unity with the night, the highway, my car.  The pavement ahead eases into the beam of my headlights, grows brighter as it draws closer and then slips back into darkness as it slides underneath.  Nights like this are a joy.  I’m in a groove, a state of calm serenity and anticipation.  Tomorrow I’ll be returning to Zion National Park, something I always look forward to.  I didn’t notice the faint flashes of light.

Powerful thunderstorms were roiling over eastern California and southern Nevada that night, The dark clouds glowed with flickers of light and precious water dropped on the parched desert.  it was a huge storm and I was chasing it.  Approaching the state line the casino lights of Prim were reflected, bright and shimmering, on what is normally a dry lake bed.  A half hour later as Las Vegas finally came into view, the glitz and glamor of the gaudy hotels was dwarfed by the grandeur of bolts of lightning streaking for miles across the turbulent sky.

The following morning workers were cleaning up after the storm but it hadn’t fully passed.  Storm clouds still blanketed the sky for the remainder of the journey to Zion.  A detour to Kolob Terrace to check the aspens was, I suppose, inevitable.  The falling snow up in the high country was a surprise.  And a delight.  Sunrise the next morning was looking promising.

The best location in Zion that gets the full sunrise treatment is West Temple.  I’ve photographed it many times but never got anything that I was excited about.  The most popular location to shoot from is the ‘patio’ behind the museum but on this morning I chose a less visited one – the 2nd switchback on Tunnel Road.  The expectation of clearing storm clouds, the choice of shooting locations – everything worked out just right.

west_temple_clearing_storm_121013

Continue reading “The Making of a Photograph – Clearing Storm, West Temple 2012”

(1881)

Lightroom Tutorial – Polarizer Filter

How do simulate the effect of a polarizer filter in Lightroom.

A Polarizer filter is generally the first filter a landscape photographer buys.  It is so versatile.  It can darken blue skies, reduce harsh reflections and intensify colors.  Many photographers put polarizers on their lenses and never take them off.

But this is a Lightroom tutorial.  So why in the world am I talking about polarizer filters?  Well, it’s because I have a trick I’d like to share with you, one that I’ve never seen discussed anywhere else.  It’s what you can do in Lightroom to create the polarizer effect without a polarizer.  In fact, it can be better than the real thing, especially if you are shooting with a wide angle lens.  Because, the angle of view can be so great that part of the sky will be affected by the polarizer and the rest will not.  So it looks pretty unnatural when the sky in part of your image is dark and the rest is washed out.

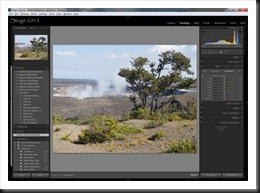
So, what’s the trick?  Well, consider this image taken on a recent trip to Hawaii.  I shot it with my Canon G11 and I don’t even own a polarizer filter for it.  It’s a photograph of the ongoing eruption in a crater in the Kilauea caldera.  In the bottom of the crater is a lake of lava.  The smoke you see is a plume of noxious gas.

polarizer_1

(Click on the image for a larger view)

Continue reading “Lightroom Tutorial – Polarizer Filter”

(19527)