Making a Photograph – A New Approach to Tonality Adjustments

Watch as a photograph of an icon of Zion National Park is made.

For some time now I’ve been using and teaching a process of working on photographs in Lightroom. It consists of basically four steps: manual adjustments, tonality adjustments, hue adjustments and finally saturation adjustments. Quite some time ago I had the brilliant idea of converting the image to black and white before doing the tonality adjustments. The technique I used was the B & W tab in Lightroom’s HSL group.  Once the tonality adjustments were done, the image would be converted back to color and the process continue.

It didn’t work out because when I converted the image back to color, the colors were so oversaturated and unnatural that the image looked horrible. It was just easier to do the tonality adjustments on the color image. So I quickly gave up on that technique. But the other day I was reading an article in Popular Photography magazine that rekindled this idea. It took a different approach. It turned the image to black and white by setting the Saturation adjustment to -100. Now the author did this in the middle of the process but I thought that if I applied this to my process and did that at the start it just might work. So I was eager to give it a try. Let’s try it with this image of the Watchman in Zion National Park.
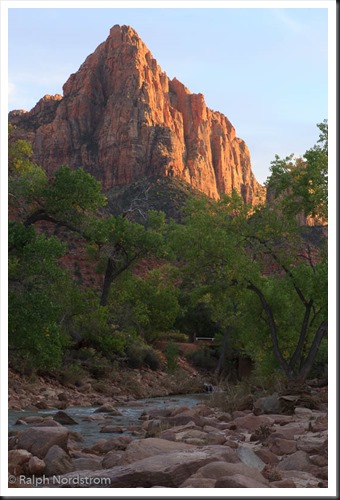
utah_141010__SM32783 This is the original raw file. I haven’t done anything to it yet. It doesn’t need any mechanical adjustments. These consist of removing spots, straightening the image, maybe some noise reduction and the final crop. But since none of these are required we can move on to the tonality adjustments.


Continue reading “Making a Photograph – A New Approach to Tonality Adjustments”

(4925)

Photo Tips – Getting Great Exposures the Easy Way

Always shooting in Automatic mode? Here’s an easy way to improve your photographs without having to bother with all the technical details.

If you’re a person who’s interested in just taking pictures and don’t want to be bothered with all the technical details, you are probably photographing with your camera set to automatic mode. Often times automatic mode is indicated by a green box. Probably the handiest feature of automatic mode is that the camera makes all the decisions for you. All you have to think about is getting the people you’re photographing in the frame and pressing the shutter. The camera does everything else.

But the problem is that the camera doesn’t always get it right. Often times it will overexpose parts of the image making them look washed out. But there’s a simple way to avoid this without mastering all the complicated technical details of shooting in manual mode. And that is P mode.

Using P Mode

The P and P mode stands for Programmed Automatic. In P mode the camera allows you to make some of the decisions while it makes the rest. You get to choose whether or not to use flash, and set the ISO, exposure compensation and white balance. The camera sets the f-stop and shutter speed.

Let’s take these controls one by one. Let’s start with flash. You can decide whether you want to use flash or not. If you’re shooting in bright daylight or even on a cloudy day you probably don’t need flash. But if it’s a little darker you can always choose to turn the flash on. If you don’t know how to turn your flash on or off you’ll need to consult your camera’s manual.

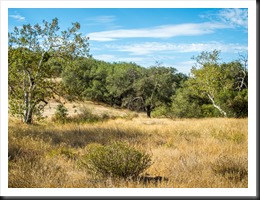
home_140907_IMG_9704-6 Continue reading “Photo Tips – Getting Great Exposures the Easy Way”

(1996)

Mastering Composition – What?

Asking yourself, ‘What am I photographing?’ can lead to stronger images that communicate the excitement and inspiration you feel.

Composition is one of the four pillars of a strong landscape photograph (See Making a Photograph – The Four Pillars).  There are many approaches to mastering composition and certainly countless excellent books on the topic.  Many books discuss the elements of design and how they relate to composition – line, shape, form, texture, pattern and color.  Others go into the various rules of composition – rule of thirds, golden rule, leading lines, near / far, layers, frames, etc.

All of these rules or principles are very analytical and, I think, are necessary and useful building blocks.  Often creating a strong composition is very much of a problem-solving endeavor.  But in the end I believe the goal of the composition is to support what the artist wants to communicate through the image.  And this comes more from compositions that just feel right, not ones that are mechanically created from the rules.  That’s not to say that one is not aware of these principles as the composition is being worked out.  Rather these principles are like words in a sentence.  They are carefully chosen so that the sentence as a whole communicates the author’s message.  There are several techniques that lead us to this goal.  And one of them is to ask yourself, ‘’”What am I photographing?”

Continue reading “Mastering Composition – What?”

(1695)

Mastering Light – Warm and Cool

In which we explore the color of light coming from different sources.

Light has several properties that are important to landscape photographers including quality, direction and color.

It is important to understand that different times of day and weather conditions will produce light of different colors.  Also, when you add artificial light sources the range of colors expands.

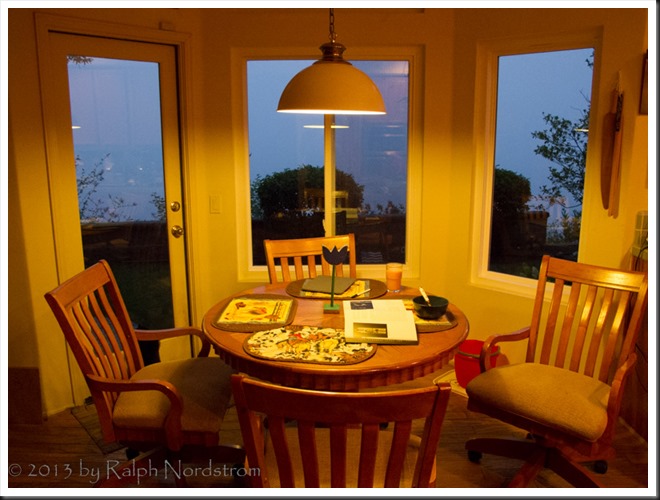
Our brains play tricks on us when it comes to color.  During twilight we don’t see that the light is a soft, delicate blue.  In fact, we don’t perceive any color cast at all.  But the camera is not fooled.  It sees what is actually there.  Take this image that I call ‘Breakfast’ as an example.

light-warm_and_cool

When drastically different light sources are set next to each other than our eyes can clearly see the difference in the colors.  In this photograph the interior of our home is illuminated by tungsten lights which give off a very warm color.  That’s why our homes feel so warm and cozy at night – because of the warm light emitted by tungsten lights.  (That will change as we replace the tungsten lights with CFLs or LED lights.)  Outside we have a foggy morning at twilight.  The sun is about 10 minutes away from rising.  And it’s clear the color of the outside light is blue.

If I was standing outside away from the warm tungsten light, my mind would trick me into thinking the light was not blue, just a neutral gray.  But the camera is not fooled.

So then why are we so easily fooled?  Because of perception.  Our brains receive input from all of our senses including our eyes.  And without us even being aware of it, this input is translated into something we are familiar with, concepts and generalizations we have learned from all the accumulated experiences of our lives.  And our brain overrides (manipulates if you will) the actual blue color of the outdoor light and we perceive it as neutral.

Our perceptions help us with everyday living.  They help to bring order to our lives from the endless bombardment of stimuli.  But perception interferes with the photographic process of seeing.  As far as day-to-day life is concerned we don’t need to see that the outdoor light is blue.  But as photographers, cultivating the ability to see beyond our perceptions opens up the world to us in ways we normally can’t even imagine.  And isn’t this what photography is all about?


Join the conversation, share your experiences, leave a comment.  We love to hear from you.  And if you know of someone else who might enjoy this article, please share it.

We do photography workshops.  Come on out and join us.  Click here to check us out.

You can also check out our photography.  Click here.

(1396)

Color Management Made Simple – Color Space

Color Management is very important if you want to get prints that look as good as the images on your display. And understanding color space is fundamental to understanding color management.

Color Management is a very complex topic.  And it’s possible to get bogged down in a lot of technical details.  But it’s extremely important, especially if you want to print your photographs.  And it can be broken down into a few simple concepts.

On my workshops I often get asked questions about color management and the topic is huge and a bit technical to get into the details.  So I thought I’d give an overview of the topic in a few blog posts.  Who knows, maybe I’ll create a presentation that can be used during  a workshop.

Color Space

Let’s start with color space which is the whole reason we need color management.

A color space is all the colors that can be rendered using a given technology.  Think if it this way.  You all enjoyed coloring with crayons when you were young. And I don’t know  about you but I was always envious of my friends that had the big giant boxes of crayons with 120 different colors.  They had every color under the sun.

crayons_120cnt

We can think of the 120 crayon box as being the color space of the real world with every color under the sun.

Continue reading “Color Management Made Simple – Color Space”

(3667)

A Conversation about Fine Art

Listen in on a conversation about the nature of fine art photography.

What’s on your mind?

I’ve been thinking about ‘fine art.’

You’ve got to be kidding. I mean there are PhDs that study this sort of thing, masters of the arts that won’t touch the topic. What makes you think you can think about ‘fine art?’

I don’t know. I just wonder about it. I’m trying to be an artist and I wonder what it all means, if I’m truly an artist or if I’m getting any closer.

Ok, you’re a photographer, aren’t you? So you must be thinking about fine art photography. You must be nuts! Nobody agrees on what fine art photography is.

Yea, fine art photography, that’s it. What do you think? Do you have any ideas of what it really is? I mean I’ve heard people say that if you want your photography to be art all you have to do is to call it art and it is so. ‘My photographs are fine art.’ Lord knows you hear that enough. But that seems a bit too simplistic, a bit too easy. It seems like it should be more than that.  I mean, can you snap a picture, run down to Costco to get a large print and call it art?


Continue reading “A Conversation about Fine Art”

(1126)

Lightroom Tutorial – Workflow Made Easy

Simplify your Lightroom workflow with these easy steps.

Lightroom is a great tool. It’s quick and easy to use – once you get the hang of it. But sometimes mastering the workflow, the steps you go through to take a raw file to a ‘final’ image, can be a bit daunting.

Let me say up front that Lightroom is an important part of my workflow but it’s not the only part.  Every photograph I work on starts in Lightroom but is completed in Photoshop.  Nevertheless, Lightroom gets a photograph to about 80% of the final product.  I know many people who use Lightroom exclusively and Photoshop only in rare circumstances if at all.

So back to the workflow.  Can it really be made easy?  Yes it can.  There are four major steps (not counting import – see Lightroom Tutorial – Importing Photographs):

  1. Mechanical adjustments like dust spot removal and cropping
  2. Tonality adjustments
  3. Hue adjustments
  4. Saturation adjustments

Let’s skip the first step and start with the second.  The example will be in Lightroom 4.

Continue reading “Lightroom Tutorial – Workflow Made Easy”

(7129)

Making a Photograph – The Four Pillars

Explore the four things that make a great landscape photograph – Fantastic Light, Strong Composition, Appropriate Sharpness and Optimum Exposure.

I’ve been giving a lot of thought recently to what goes in to making a great landscape photograph. It turns out there are four things, four pillars if you will.  Four, that’s a good number.  There are the four legs of a table or the four wheels of a car.  And not to forget the four sacred directions of the Native Americans.

In landscape photography the four pillars are evenly divided between the aesthetics and the technical.  So what are they?  The two aesthetic pillars are Fantastic Light and Strong Composition.  No surprise there.  The two technical pillars are Appropriate Sharpness and Optimum Exposure.  No surprise there either.  If just one of those pillars is missing, well, the table collapses, the image suffers.

Let’s look at them one by one….

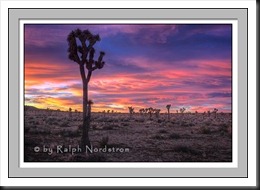
joshua_tree_spring_sunrise_2011
Joshua Tree Spring Sunrise (2011)
(click on the images to enlarge them)

Continue reading “Making a Photograph – The Four Pillars”

(6961)

Lightroom Tutorial – Workflow

An overview of a very effective Lightroom workflow.

There are about as many definitions of “fine art photography” as there are people who call themselves “fine art photographers.”  For many of us, fine art photography is an expression of our view of the world.  Much of what we see in the world is captured in the images we capture in the field.  But that’s not the whole story.  Why?  Because the true expressive quality of our photographs comes to life in the post processing – the digital darkroom if you will.

Continue reading “Lightroom Tutorial – Workflow”

(2767)

Did You Manipulate That Photograph?

Did you manipulate that photograph?

When I do art festivals and shows I’m often asked, “Did you manipulate that photograph?”  I have several answers.  The most direct is, “Yes, of course.” 

Other times I’ll reply, “My photographs are what I saw, not what the camera saw.”  Or if I’m feeling really wordy I’ll answer, “Let me explain it this way.  I approach photography from the mindset of a painter. I want to give myself the same creative freedom of a painter.”  To which the inquirer will often respond, “Oh, I get it; you’re an artist.”

To manipulate or not to manipulate.  That’s not even the question.  Why?  Because you have to go to extremes to have a photograph that is NOT manipulated.  OK, that’s a pretty bold statement.  So let’s take a deeper look.

Continue reading “Did You Manipulate That Photograph?”

(757)