What Is Depth of Field
Depth of field is a range in front of your camera in which everything within that range is in focus and elements that are either in front of the range or behind it are out of focus. Here’s an example.
Suppose you have the camera set up to give you a depth of field of 100 feet. The depth of field range starts at 50 feet and will extend to 150 feet. All of the elements between 50 feet and 150 feet will be in focus. Elements closer than 50 feet will be out of focus as will elements farther away than 150 feet.
Depths of field can be shallow or deep. A shallow depth of field could be as small as a few inches. A deep depth of field could extend from one foot to infinity.
What Determines Depth of Field?
Depth of field is determined by three factors – the focal length of the lens, the distance of the object you are focusing on from the lens (the focal distance) and the aperture or f/stop.
Lens Focal Length
Lens focal lengths range from wide angle to telephoto. Wide angle lenses are praised for their deep depths of field. A lens with an effective[1] focal length of 16 mm can have a depth of field of 18 inches to infinity with ease.
In contrast, a 400 mm lens could have a depth of field of as little as 3.5 feet or less when focused on an object 100 feet away.
Portrait lenses are often in the range of 80 to 100 mm focal length. This is enough to have the subject in focus while the background is blurred. This is a much sought after effect for outdoor portraits.
Focal Distance
The distance of the object that is focused on from the lens also affects depth of field. If the object is close than, say 5 feet, the depth of field will be shallow. If it is farther from the lens, the depth of field will be deeper.
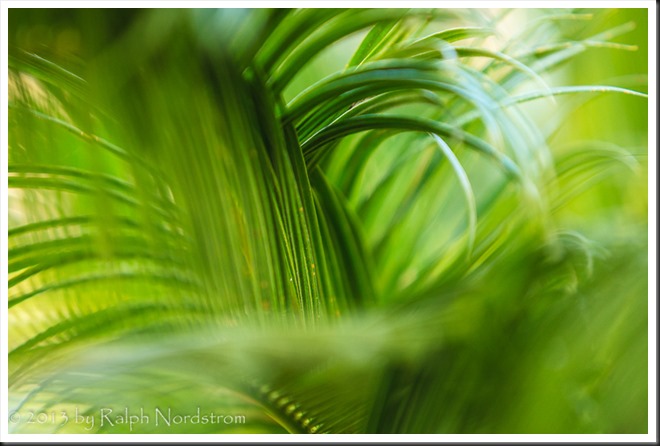
In macro photography, the object being focused on is sometimes mere inches from the lens. This can contribute to a very shallow depth of field, an affect that is often desirable in macro photography.
However, with such a shallow depth of field it is critical that the camera focuses on the intended object. With autofocus, you take your chances and will often lose. Therefore, manual focus and a tripod is important.
Hyperfocal Distance
But near-far compositions pose a different challenge. In this situation an extremely deep depth of field is required. And the focal distance is of critical importance. You need to focus on an object that is at the hyperfocal distance. Fortunately, it is easy to accurately determine the hyperfocal distance. Here’s the process.
-
- Set up your shot on a tripod and get it composed exactly the way you want it.
- Now look through your viewfinder or live view screen and identify the object closest to your lens. This will usually be an object on the bottom edge of the frame.
- Measure the distance from the lens to the nearest object as accurately as you can. For example, the nearest object is 3.5 feet from the lens.
- Multiply that distance by 2. That is the hyperfocal distance. In our example, the hyperfocal distance is 7 feet.
- Locate an object that is the hyperfocal distance from the lens.
- Focus on that object. Be sure to use manual focus so the camera doesn’t change it. It is best to use live view and magnify the object you are focusing on to get a tack sharp focus.
The key to determining hyperfocal distance is in understanding that it is twice the distance to the nearest object in your composition. That’s all there is to it.
A rule of thumb for focusing at the hyperfocal distance is to focus on an object 1/3rd of the way up from the bottom of the frame. This can be a close approximation except in extreme conditions.
F/stop
The third factor in determining depth of field is aperture or f/stop. Wide open apertures have a shallow depth of field. They are often used to get a sharp foreground and blurred backgrounds,
Small apertures have a deeper depth of field. Smaller apertures are used in most landscape photographs.
How Do You Get the Depth of Field You Want?
Shallow Depth of Field
Getting a shallow depth of field is pretty straightforward.
-
- Use a moderately long lens; e.g., 80 to 100 mm
- Get close, 10 to 20 feet or even closer if you can
- Shoot with a wide-open aperture
Deep Depth of Field
This is more complicated.
If you’re effective focal length is 60 mm or less and your aperture is f/8 or smaller, then anything from 25 feet and beyond will be in focus. But think of this as a guideline, not a rule. There can very well be exceptions.
But getting depth of field when the nearest object is closer than 25 feet or the effective focal length is more than 60 mm, then depth of field becomes tricky.
The safest approach is to use one of the many depth of fields apps that are available on smart phones. In this situation you know two of the three things needed to create the needed depth of field – you know the focal length of the lens and you know the focal distance (the hyperfocal distance). Feed these values into your app and it can tell you the f/stop you need.
If an app is not available, you can always ‘bracket’ the depth of field by shooting the scene at different f/stops beginning at, say, f/8 and advancing stop-by-stop to f/22. Later in the digital darkroom, you can select the image that is the sharpest.
[1] An Effective focal length is the focal length for a full frame sensor. For crop sensors, you need to multiply the actual focal length of the lens by the crop factor to get the effective focal length. For example, a crop sensor camera with a crop factor of 1.5 and a 16 mm lens would have an effective focal length of 24 mm (16 * 1.5).
Join me on an exciting workshop. Click here to see what’s available.
(43)


