Mastering Exposure – Expose to the Right

Expose to the Right – put it to the test by creating and comparing actual images.

Over the years there has been a lot of interest in the concept of ‘Expose to the right.’  This is something that is commonly done in digital photography where you intentionally overexpose an image.  The idea is that in digital images there is more information to work with in the brighter tonalities than there is in the darker.  And this will give you more to work with in the darkroom (Lightroom and Photoshop) which will result in a better image.

I’ve written several posts on this topic and if the concept is new to you please read these.  I’m not going to go into the theory here; that is spelled out in these posts.

Lightroom Tutorial – Expose to the Right

Expose to the right – Revisited

Now, I understand the theory.  I’m a computer guy; I had better understand it.  But I’ve always wondered if the promise of a better image actually worked out in real life.  So I did a test during our recent workshop to Big Sur.

Continue reading “Mastering Exposure – Expose to the Right”

(2292)

Lightroom Tutorial – Workflow Made Easy

Simplify your Lightroom workflow with these easy steps.

Lightroom is a great tool. It’s quick and easy to use – once you get the hang of it. But sometimes mastering the workflow, the steps you go through to take a raw file to a ‘final’ image, can be a bit daunting.

Let me say up front that Lightroom is an important part of my workflow but it’s not the only part.  Every photograph I work on starts in Lightroom but is completed in Photoshop.  Nevertheless, Lightroom gets a photograph to about 80% of the final product.  I know many people who use Lightroom exclusively and Photoshop only in rare circumstances if at all.

So back to the workflow.  Can it really be made easy?  Yes it can.  There are four major steps (not counting import – see Lightroom Tutorial – Importing Photographs):

  1. Mechanical adjustments like dust spot removal and cropping
  2. Tonality adjustments
  3. Hue adjustments
  4. Saturation adjustments

Let’s skip the first step and start with the second.  The example will be in Lightroom 4.

Continue reading “Lightroom Tutorial – Workflow Made Easy”

(7129)

Making a Photograph – Black and White Points

Add snap to your photographs by adding contrast. This step-by-step shows you how to set black and white points in Lightroom.

There are a lot of instructional books on how to use Lightroom, Photoshop, Photoshop Elements and the like.  They provide a comprehensive and in-depth review of the various adjustments and filters available in these powerful tools.  And as such they serve as excellent references.  I own many of these fine books.

Now, a lot of workflows are built around the concept of seeing what needs to be fixed next and fixing it.  I advocate a more structured approach; namely, fix the tonality first, then the hue and finally the saturation.  See my recent post on Workflow.  But I often hear the statement, “I look at my photograph and just don’t know what to do.”  Many people often don’t know where to begin.

So I want to take a different approach.  I want to look at an image and identify what it needs and then talk about the various techniques for achieving it.  In other words, I want to start with the question, “What makes a compelling photograph?” and go from there.  It doesn’t help to know all of the tools and tricks available in Lightroom and Photoshop if you don’t know when to use them.

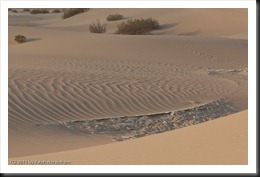
We’ll start with this image.  It is photographed in the Mesquite Flats Dunes of Death Valley.  The dunes provide an inspiring variety of compositions and ligh.  (You can click on this and all other images in this post to enlarge it.)

BP WP Dunes-1

Let’s start by examining the images tonality and see what improvements can be made.


Continue reading “Making a Photograph – Black and White Points”

(11382)