Lightroom Tutorial – When You Get Home

There’s a lot of talk about workflow. But it all begins with importing, organizing and selecting your photo files when you return from the workshop.

I recently returned from seven fantastic days of an exciting photography workshop in the Eastern Sierra (any day or night in the Eastern Sierra is fantastic).  I organized all of my photographs in Lightroom.  And I thought it would be a good idea to share the steps I go through in case you might find it useful.

eastern_sierra_120605__SM31668

Import

I try to keep up with importing the photographs from the day’s shoots into the copy of Lightroom running on my laptop.  I’m not going to go into the specifics of the import process but you can read about it here.

Lightroom Tutorial – Importing Photographs

I’ve set up Lightroom to apply certain adjustments to the files as they are imported.  For example, Lightroom applies adjustments in the following Developer areas – Basic, Tone Curve, Detail (capture sharpening), Lens Correction (lens make and model) and Camera Calibration (Process and Profile).  The details are spelled out in this post.

Lightroom Tutorial – Camera Specific Presets

eastern_sierra_120604__SM31524

Continue reading “Lightroom Tutorial – When You Get Home”

(2690)

Lightroom Tutorial – Importing Photographs

Get post processing started by importing your photographs into Lightroom.

An important part of post processing is importing your photographs into Lightroom.  The goal is to copy the files from your camera or laptop and store them on your desktop computer.  At the same time you also want to make a backup of all of your files.

You might be interested in the configuration of my desktop computer.  It has about 5 terabytes of storage.  This is where the image files will be stored.  I also have several terabytes of external storage – external hard drives.  This is where the backup copies go.

In this example I’ll be copying files directly from the camera.  The plan is to copy the files as they are to the backup storage.  But the files I store on the desktop storage will be converted to DNG format.  More on that in another post.

So with the big picture in mind, let’s get into the details.

Continue reading “Lightroom Tutorial – Importing Photographs”

(3451)

Lightroom Tutorial – Diamonds in the Haystack

So you’ve come back from a shoot with hundreds of not thousands of files. How do you find the diamonds in such a large haystack?

I got a comment on a recent post on workflow.  (Lightroom Tutorial – Workflow)

The question was if there was a way in Lightroom to sort through a large number of photographs to select the ones you want to work on.

Here’s the situation.  You’ve just returned from a five day workshop.  And you have a thousand or so photographs.  Now we know that not everyone of these images is a keeper.  Personally, I’m delighted if I get four or five keepers from a five day workshop.  Hey, given the vagaries of weather and light, I’m happy if I get one.

But the prospect of sifting through hundreds and even thousands of images can be a bit overwhelming.  So here’s what I do.

Continue reading “Lightroom Tutorial – Diamonds in the Haystack”

(2003)

Making a Photograph – Black and White Points

Add snap to your photographs by adding contrast. This step-by-step shows you how to set black and white points in Lightroom.

There are a lot of instructional books on how to use Lightroom, Photoshop, Photoshop Elements and the like.  They provide a comprehensive and in-depth review of the various adjustments and filters available in these powerful tools.  And as such they serve as excellent references.  I own many of these fine books.

Now, a lot of workflows are built around the concept of seeing what needs to be fixed next and fixing it.  I advocate a more structured approach; namely, fix the tonality first, then the hue and finally the saturation.  See my recent post on Workflow.  But I often hear the statement, “I look at my photograph and just don’t know what to do.”  Many people often don’t know where to begin.

So I want to take a different approach.  I want to look at an image and identify what it needs and then talk about the various techniques for achieving it.  In other words, I want to start with the question, “What makes a compelling photograph?” and go from there.  It doesn’t help to know all of the tools and tricks available in Lightroom and Photoshop if you don’t know when to use them.

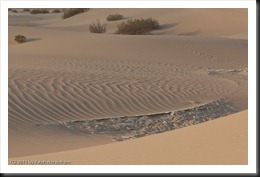
We’ll start with this image.  It is photographed in the Mesquite Flats Dunes of Death Valley.  The dunes provide an inspiring variety of compositions and ligh.  (You can click on this and all other images in this post to enlarge it.)

BP WP Dunes-1

Let’s start by examining the images tonality and see what improvements can be made.


Continue reading “Making a Photograph – Black and White Points”

(11416)

Lightroom Tutorial – Workflow

An overview of a very effective Lightroom workflow.

There are about as many definitions of “fine art photography” as there are people who call themselves “fine art photographers.”  For many of us, fine art photography is an expression of our view of the world.  Much of what we see in the world is captured in the images we capture in the field.  But that’s not the whole story.  Why?  Because the true expressive quality of our photographs comes to life in the post processing – the digital darkroom if you will.

Continue reading “Lightroom Tutorial – Workflow”

(2767)

Expose to the Right – Revisited

Expose to the right is a powerful technique for capturing the most information in your raw files. But processing these images can be a bit daunting at first.

The post I wrote on Expose to the Right about a year ago is one of the most popular on this blog.  I wrote it after a workshop when I suggested this technique and one of the participants complained the photographs looked horrible.  I still use this technique but my workflow in Lightroom continues to evolve.
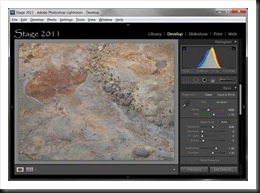
expose to the right 1Recall that Expose to the Right means to overexpose your image so that the histogram shifts toward the right edge.  It is important not to overexpose so much that you introduce highlight clipping.  I like to have a histogram that is positioned a little to the right of center as seen here.  When you expose to the right you can end up with an image that is overexposed by anywhere from 1/3 to a stop or two, depending on the situation.
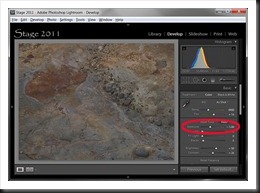
 

expose to the right 2In the first post I suggested that you can ‘normalize’ the exposure in Lightroom with the Exposure adjustment.  If you overexposed by a stop you can start by decreasing Exposure adjustment in Lightroom by one stop.  This will have the effect of moving the histogram back toward the center or even to the left of center.  This gives you an exposure closer to what the camera’s light meter selected.
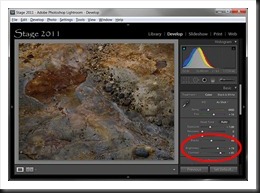


expose to the right 3From there you can continue with your regular workflow.  Here’s an example of some additional adjustments: Blacks to set a black point, Contrast to add interest (contrast is always more interesting than flat) and Brightness to liven it up a little.  There are many adjustments you might perform but these few simple ones serve to illustrate the point.
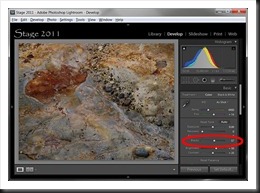


expose to the right 4But another technique would be to take the opposite approach.  Instead of normalizing the exposure, start by setting the black point with the Blacks adjustment.  This has a different effect on the histogram.  Instead of the entire histogram sliding towards the left, the shadow tail is extended without much change in the mid-tones or highlights.  This technique expands the dynamic range of the photograph.
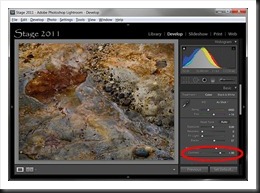


expose to the right 5You can further expand the dynamic range by adding contrast.  With both shadow and highlight areas to work on the Contrast adjustment both brightens and further darkens the image.

In practice you can try both techniques.  Just create two virtual images from the original file and apply one technique to one and the other technique to the other.  Often the first few adjustments you make on an image have an influence on the finished photograph.  So compare the two and decide which one you want to continue with.

This is not about whether one technique is better than the other but rather to give you more options when working with the photographs that you have exposed to the right.

We do photography workshops.  Come on out and join us.  Click here to check us out.

You can also check out our photography.  Click here.

(2295)

Lightroom Tutorial – Shooting RAW

Follow along as I show you how to turn an overexposed mistake into a pretty decent sunset photograph.

Last night I ran across an example of why we shoot in RAW (not in the RAW – puhleeeze).

Digital SLR cameras and a few point and shoot camera support the RAW file format for our images.  RAW is essentially what the sensor captured – unprocessed, uncompressed, unadulterated.  It takes a bit to get used to but once you do you’ll not go back to JPEG, the other file format.

One of the benefits of RAW is it gives you a lot more flexibility including recovering from poorly exposed images, especially over exposed.  Now, if you’ve read any of my histogram posts (search this blog for Histograms to find them), you know that the single most important thing to avoid as far as exposure is concerned is highlight clipping.  But with RAW you have a chance to recover an overexposed image and turn it into something very acceptable.  It doesn’t always work but sometimes it does.

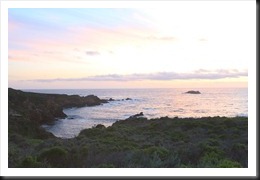
big_sur_scouting_110424__A1P2014-1OK, so I was scanning images in Lightroom last night and ran across this one.  It’s washed out except for the foreground and there is a tremendous amount of highlight clipping in the upper right hand corner.  (I wouldn’t blame you if you stopped reading hear and said, “There’s no way he can do anything with that image.  It’s a mess.”  Which it is.  But humor me and read on.)

By the way, you can click on the images to see them in a larger format.

Continue reading “Lightroom Tutorial – Shooting RAW”

(1779)

The Making of a Photograph – Pond, Owens Valley 2011

Follow along in the making of a photograph as we go from kneeling in the mud to the final print on paper.

It all started with kneeling in the mud.

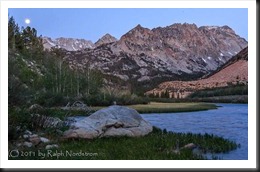
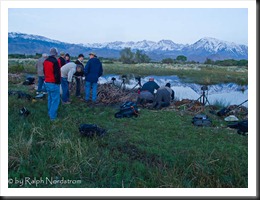
I was with David Muench, Jerry Dodrill and twelve other eager photographers on a Mountain Light Gallery workshop in May.  We lined up along the bank of the pond just outside Bishop, California and aimed our cameras at magnificent Mt Tom, the dominant peak in the Eastern Sierra crest in this area.

eastern_sierra_110506_IMG_6143

I’d like to take you through the process of making a photograph from the images I captured that morning.

Continue reading “The Making of a Photograph – Pond, Owens Valley 2011”

(1743)

Mastering Exposure–Histograms Part 4

Learn more about histograms. We explore the histogram that results from low contrast scenes – how to capture it and what can be done with it in post processing.

In this series of articles we’ve been exploring the histogram.  In the first two articles we discussed what it is.  Now we’re looking at different types of histograms and exploring how to work with them both in the field and during the post processing.  If you want to review or catch up, here are the links to the preceding three posts.

Mastering Exposure – Histograms Part 1: Introduction

Mastering Exposure – Histograms Part 2:  A Closer Look

Mastering Exposure – Histograms Part 3: The Rocky Mountain Histogram

In this article I want to discuss my favorite histogram, the Mole Hill histogram.  I like this one because so much can be done with it in the post processing.  Subtle colors and tonalities can be revealed in soft radiant light.  It lends itself to some of the most creative and expressive images.

Read on and we’ll look at what it is, the conditions in which it occurs, how to photograph it and how to work with it in the post processing to reveal the scene in all of its hidden glory.

Continue reading “Mastering Exposure–Histograms Part 4”

(4684)