Photographing the California Central Coast – Day 3

Tag a long on a scouting expedition of the California Central Coast.

I’m on a three-day scouting trip to photograph the central coast of California from the Sonoma Coast north of San Francisco down to Santa Cruz to the south.  I am preparing for the 2018 Central Coast and Napa photography workshop.  The first two days covered the coast north of Frisco. Today would continue south, picking up the coast at Half Moon Bay.  You can read about the first to days here:

Unlike the prior day where I didn’t roll out of my sleeping bag until 8:00, this day the alarm was set for 5:00.  That’s more consistent with what I’m used to when photographing.  I arose in the dark, took a quick hot shower and broke camp as silently as possible.  When I left the campground it was still dark.

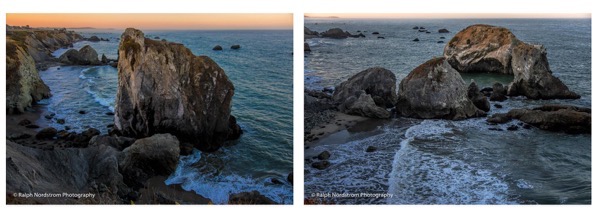
Gleason Beach, which I had photographed the day before, grabbed my attention in the morning light and I had to stop for it again.

Gleason Beach Morning

These two sea stacks that hadn’t impressed me in the afternoon stood out in the soft morning light.  As with the first two days, there were occasional splashes of large waves.  But, from this distance what impressed the eye didn’t impress the camera.  So I was more intent on photographing the patterns made by the surf after the waves broke.

Continue reading “Photographing the California Central Coast – Day 3”

(46)

Photographing the California Central Coast – Day 2

Tag a long on a scouting expedition of the California Central Coast.

I’m continuing a three-day photography scouting trip along California’s Central Coast.  I’m preparing to lead a group here in November for the 2018 Central Coast and Napa Valley workshop.  In the previous post (Photographing the California Central Coast – Day 1), I was joined by a friend and we covered the north end of the Sonoma Coast.

Today is the second day and I’m on my own.  I enjoyed the company yesterday but today will be a more typical experience.

I started out by sleeping in.  It was almost 8:00 when I finally rolled out of my sleeping bag and emerged from my tent to a blue sky.   After yesterday’s overcast and foggy start, this was good news.   A quick breakfast and a hot shower and I was ready to go.  This day was going to cover more mileage than the day before but with fewer stops.

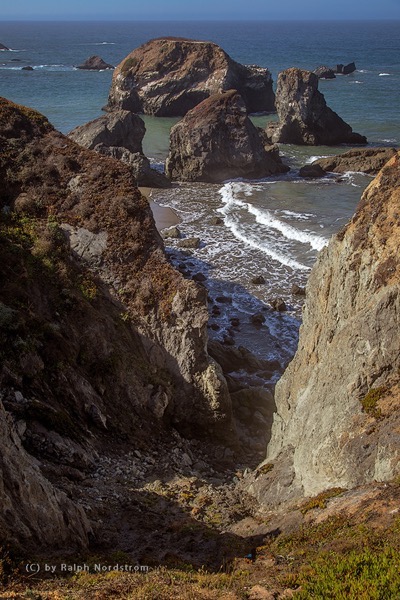
Gleason Beach was the first.

Gleason Beach

There were some sea stacks at this stop but they didn’t stand out.  The severe gash in the cliff that led down to the cluster of sea stacks just off shore, however, was far more interesting. I timed the shot to get two concentric rings of surf which added the grace of curved lines to an overall rugged composition.

Continue reading “Photographing the California Central Coast – Day 2”

(55)

Photographing the California Central Coast – Day 1

Tag a long on a scouting expedition of the California Central Coast.

It wasn’t long ago that I spend three days along the California Central Coast, scouting good shooting locations for the upcoming Central Coast and Napa Valley workshop.   I’m very familiar with the Big Sur coast but this was my first real exposure to the Central Coast north of San Francisco.  And I am excited with what I found.

My base of operations was the Schoolhouse Canyon Campground, a privately owned campground just east of Guerneville on the Russian River.  Clean, quite – I couldn’t have been more pleased.  But on with the photography….

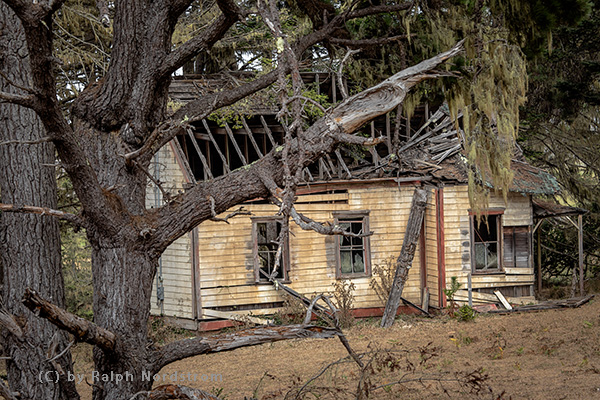
The plan was to start to the north and work south over the next three day’s.  I was joined by a friend the first day which started out overcast and foggy along the coast.  That’s not a huge surprise as this area is still susceptible to the marine layer in September.  But, in this line of business, you work with what you got.  The first destination was Salt Point.  It’s hard to find because there are no marked turn-offs, just a sign saying you’re entering and another sign a few miles up the road saying you’re leaving.  So we overshot it.  And I’m glad we did because we came upon a creepy house that was falling apart.

Creeph House

My friend suggested framing the house with moss hanging from the tree.  That was the perfect touch to give it the macabre feeling we were feeling,  And the overcast sky provided the perfect light.

Continue reading “Photographing the California Central Coast – Day 1”

(106)

Photographic Gear – Lenses

The next stop on a tour through my camera bag – lenses

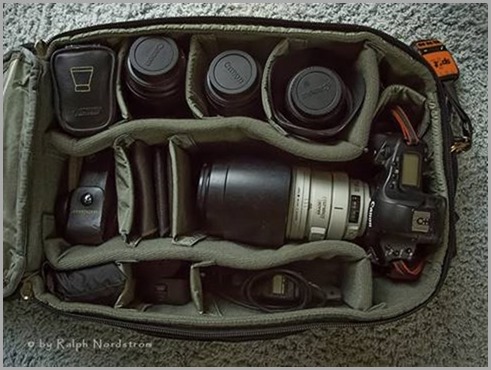
Continuing the tour through my camera bag, we come to the gear that takes up the most room – the lenses. The previous two articles discussed the bag itself and the camera body. Here are the links if you haven’t read them yet.

Photographic Gear – A Tour of a Photographer’s Camera Bag

Photographic Gear – the Camera Body

It’s interesting that most people when they think of a camera, think of both the body and the lens combined. And granted, one is not much good without the other. One day I was with friends at the horse races and was using my 70-200mm long lens. One of my friends said, “Wow, what a nice camera.” (Here’s a tip; it looks even nicer with the lens hood on.) I doubt she would have even noticed if I had a modest 50mm lens on.

But those of us that have camera bodies with interchangeable lenses know that the body and lenses are two separate components. Together they make up what I like to think of as my artistic instrument.

Before going over each of my lenses I want to revisit something I said in the first article and that is that all my gear is selected to support my creative vision. It’s not the technology that drives my buying decisions but rather a limitation in what I’m trying to achieve. If I want to do something and my gear restricts my vision, it’s time to start looking to either replace it or add to it.

With that in mind, when it comes to lenses my creative vision extends from the broad, all-encompassing landscapes at one end to the intimate landscapes at the other. That means I need a collection of lenses that range from extreme wide-angle to strong telephoto. So, let the tour begin.

clip_image002

Continue reading “Photographic Gear – Lenses”

(229)

Photographic Gear – the Camera Body

I’m taking you on a tour through my camera bag and the first stop was the bag itself.

Click here to read the article: Photographic Gear – A Tour of a Photographer’s Camera Bag

The next stop is the camera itself. Now, by this, I mean the camera body, not the body and lens. I’ll talk about lenses later.

Like so many of us, my camera got put aside for quite some years. I was very active in photography in the 1970s. I took frequent trips to Yosemite, camping and exploring with camera in hand. I even worked in a photography studio lab for several years, learning the intricacies of color film processing and printing. But then things changed and time for photography dissolved. Until my daughter was about to be born in 1994, that is.

I bought a Canon EOS ELAN with a Tamron 28-200mm lens and shot countless rolls of film, mostly of the new joy in our lives.

clip_image002[4]I resisted the digital movement for a long time, preferring 35mm film. But when I finally joined the movement around 2000, I purchased a digital point and shoot with a big zoom lens. It was a Canon PowerShot Pro90 IS that I cut my digital teeth on with all of its 2.6 megapixels.

I tried to apply what I had learned in the film world for both color slide and negative films to the digital world. I also tried to apply what I had learned in the color darkroom to Photoshop. It took a while to realize that very little of the knowledge and experience I had gained carried over into the digital world. This required a whole new way of thinking, both in the field and in the digital darkroom. For example, with color slides, you normally want to underexpose a little to saturate the colors more. With digital, you overexpose a little to get more detail in the shadows.

clip_image004[4]It was in September of 2004 that I made the jump to a digital SLR when I upgraded to the Canon 10D. With a little over 6 megapixels, I was a big step up from the PowerShot. This is the camera I was carrying around in the duffel bag I mentioned in the previous article.

I did a lot of shooting with the 10D. I was intimidated by RAW processing at first so I shot in JPEG. Sadly, there are a lot of JPEG files that would have been great had I been able to capture them in RAW but, alas…. Eventually, I moved to RAW when I found a software program that made sense. Adobe bought the software when they were developing Lightroom. It made RAW conversion much less intimidating.

Continue reading “Photographic Gear – the Camera Body”

(272)

Taking Your Photography to the Next Level

Our art, photography, can be a rich and rewarding endeavor and an ever fascinating journey of self-discovery. Be open to the possibilities and hone your skills. Become really good at what you do best.

“Did you manipulate your photograph?”  “Did you use a filter?”  “Do you use a Mac?” “Do you crop your images?” “I’ll have a nicer day than you; I’m not shooting a Canon.”  Yes, someone actually said that to me at Bridal Vale Falls in the Columbia River Gorge of Oregon in response to my cheery, “Have a nice day.”  I guess when you take the entire population of photographers you will always find those that are prejudiced and closed minded just like any other population.  They think they are right and anyone that disagrees with them is wrong.  It’s that simple.

The current issue of Lenswork magazine, the premier journal for black and white photography, has an article by guest contributor Jim Kasson titled “Previsualization in the Digital Age.”  I couldn’t wait to read it.  In my workshops and lectures I’ve always advocated that an artist interprets reality and communicates that interpretation through her or his art.  In landscape photography I’ve encouraged our workshop attendees to leave their camera gear in the car until they connect with a location and only then set up their cameras to try to capture what is is they are experiencing.  Previsualization, the anticipation of what the finished work will look like, is a big part of communicating what you are feeling.

Continue reading “Taking Your Photography to the Next Level”

(4503)

Mastering Composition – Working the Shot

How can you create a strong composition? Here’s one method that really works.

There’s no doubt that composition is one of the key elements of a successful image.  You can have all the other factors of a great shot – fantastic light, optimum exposure and appropriate sharpness – but with a weak composition you have a weak photograph. 

I know photographers that work slowly enough to work out the strongest composition before they press the shutter.  I admire these people immensely.  But I don’t work that way, especially in an area I’m unfamiliar with.

A short while ago I was driving south through Utah on beautiful highway 89 traveling between Bryce Canyon and Zion National Parks after wrapping up a successful photography workshop.  I came upon a stand of cottonwood trees that were in full autumn splendor.  I had to pull over.

I grabbed my point and shoot (Canon G11) and started scouting for photographs.  I like to use the G11 for that, scouting for compositions that are worth the effort of setting up my big Canon.  I found two compositions that were promising.

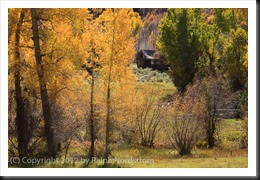
The second proved to be the most interesting, at least in terms of how the final composition evolved.  Behind the cottonwoods was a meadow with a dilapidated shack.  It was so Utah!  I set up what I thought would be an interesting composition.
bryce_121019__SM33931

(Click on the images to enlarge them.)

I positioned my camera so that there would be a narrow opening to the meadow and the shack.  It is a tight composition that draws the viewers eye to the shack which is placed in a very strong position within the frame.  It has a feeling of depth with a strong foreground opening up to the shack in the background.

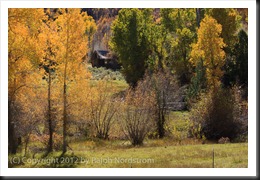
I was feeling good about this composition and then I noticed a glowing cottonwood just outside the frame to the right so I moved the camera a couple of feet to the right and created this image.
bryce_121019__SM33935

The golden cottonwoods on the left are balanced by the single, smaller cottonwood to the right.  This arrangement has the effect of placing more emphasis on the autumnal trees.  The eye makes three stops, first at the cottonwoods on the left, then to the right and finally works its way back to the shack in the back.

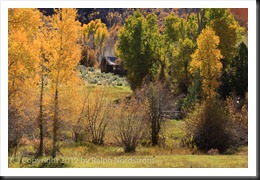
I was pretty  pleased with these two compositions and thought I had something to work with when I got home.  So I disassembled everything and put  it back in my camera bag, collapsed the tripod and started back toward the car.  I hadn’t gone 5 steps when I looked back up toward the shack and saw there was another blaze of cottonwoods right next to it.  So I swung my backpack back down to the ground and set up again for this shot.
bryce_121019__SM33939

Now there are three sources of golden light for the eye to explore – the cottonwoods to the left, the one a little further back on the right and the ones way in the back by the shack.  (Odd numbers of things are always good.)  The image is well balanced and every element in it contributes to the entire impression.

There’s a story here, a story of living in this beautiful valley during a time that is gone and will probably never return.  It must not have been an easy life but one of honest, hard work and the satisfaction of living in a place of such splendid beauty.  We would do it differently today with more conveniences and comforts.  And maybe, just maybe, miss out on the more intimate connection with Mother Earth that living in such a simple shack must have provided.


I’d be interested to hear which of the three compositions you like the most.  Please leave a comment saying which one you like and why.  It will make for a very interesting dialog.

If you enjoyed this post please feel free to Like it and share it with your friends.  You can use the links at the top.

Join me on an upcoming workshop.  Click here for more details.

To see more of my photographs click here.

WordPress Tags: Composition,Shot,image,exposure,area,Utah,highway,Bryce,Canyon,Zion,National,Parks,photography,workshop,trees,splendor,Canon,worth,effort,Behind,shack,Click,images,viewers,depth,foreground,background,arrangement,emphasis,tripod,steps,backpack,numbers,element,valley,life,satisfaction,conveniences,connection,Mother,Earth,factors,compositions,feet,cottonwood,cottonwoods,camera,three

(1275)

HDR for Every Day

How can you get great color photographs in the middle of the day? Read this post to find out.

We landscape photographers tend to avoid photographing during the middle of a sunny day.  The light is harsh with no color.  We prefer golden hour or twilight.

But there are times when we have no choice as to when we can shoot.  When we’re on vacation with family we can’t wait until sunset at every location that sparks our interest.  So we get the shot and hope for the best.  But there’s a technique we can use that will greatly enhance our chances of capturing a more compelling photograph.

Continue reading “HDR for Every Day”

(1829)

Lightroom Tutorial – Polarizer Filter

How do simulate the effect of a polarizer filter in Lightroom.

A Polarizer filter is generally the first filter a landscape photographer buys.  It is so versatile.  It can darken blue skies, reduce harsh reflections and intensify colors.  Many photographers put polarizers on their lenses and never take them off.

But this is a Lightroom tutorial.  So why in the world am I talking about polarizer filters?  Well, it’s because I have a trick I’d like to share with you, one that I’ve never seen discussed anywhere else.  It’s what you can do in Lightroom to create the polarizer effect without a polarizer.  In fact, it can be better than the real thing, especially if you are shooting with a wide angle lens.  Because, the angle of view can be so great that part of the sky will be affected by the polarizer and the rest will not.  So it looks pretty unnatural when the sky in part of your image is dark and the rest is washed out.

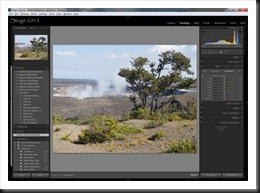
So, what’s the trick?  Well, consider this image taken on a recent trip to Hawaii.  I shot it with my Canon G11 and I don’t even own a polarizer filter for it.  It’s a photograph of the ongoing eruption in a crater in the Kilauea caldera.  In the bottom of the crater is a lake of lava.  The smoke you see is a plume of noxious gas.

polarizer_1

(Click on the image for a larger view)

Continue reading “Lightroom Tutorial – Polarizer Filter”

(19526)

Lightroom Tutorial – Importing Photographs

Get post processing started by importing your photographs into Lightroom.

An important part of post processing is importing your photographs into Lightroom.  The goal is to copy the files from your camera or laptop and store them on your desktop computer.  At the same time you also want to make a backup of all of your files.

You might be interested in the configuration of my desktop computer.  It has about 5 terabytes of storage.  This is where the image files will be stored.  I also have several terabytes of external storage – external hard drives.  This is where the backup copies go.

In this example I’ll be copying files directly from the camera.  The plan is to copy the files as they are to the backup storage.  But the files I store on the desktop storage will be converted to DNG format.  More on that in another post.

So with the big picture in mind, let’s get into the details.

Continue reading “Lightroom Tutorial – Importing Photographs”

(3451)