The Redwoods Are Calling Me

A journey from the craziness of the city to the serenity of the magnificent coastal redwoods.

It’s 6:00 in the morning.  I’m in my car, leaving our Southern California neighborhood and making my way to the freeway.  I’m heading north and have to cross the LA basin which, at this time of day, is not  easy.  But I have a destination that is calling me.  I’m on my way to the redwoods of Northern California, 800 miles from home.  I’m looking forward to feeling small and insignificant and renewed among these magnificent trees.

There are two types of redwood trees in North America and practically all of them are in California.  The coastal redwoods, where I’m headed, are the tallest living organisms on the planet with the tallest topping out at 379 feet.  They are found in groves that span over 450 miles from Big Sur in the south to just across the Oregon border in the north.  They thrive on the fogs that are common along the coast.

The other redwood tree is the Giant Sequoia that grows on the western slopes of the Sierra Nevada mountains.  Where the coastal redwoods are tall and slender, the giant sequoia are of enormous girth.  They are considered to be the most massive living organism on the planet.  (But a rumor is spreading that a coastal redwood was found recently that is more massive than the largest giant sequoia, and thereby giving the coastal redwoods both titles.)

I made it out of the LA basin, crossed over the Grapevine on I-5 and into the great central valley of California.  This stretch of I-5 is considered by many to be the most boring highway in the country with mile after mile of pretty much the same, barren landscape.  After what seems like endless hours I turn west towards the Bay Area.  This will be anything but uneventful.

Making it through the East Bay is more than 100 miles of congestion and is not something I look forward to.  In fact, it’s fair to say that I dread it.  I enjoy the Richmond Bridge; I think I like it more than Golden Gate.  But getting there usually requires navigating mile upon mile of stop and go traffic and once it is crossed, there’s more of the same on the other side.  Arg.

But when it’s finally behind me the promise of the serene redwoods comes over me and I’m excited again, re-energized and eager to continue.
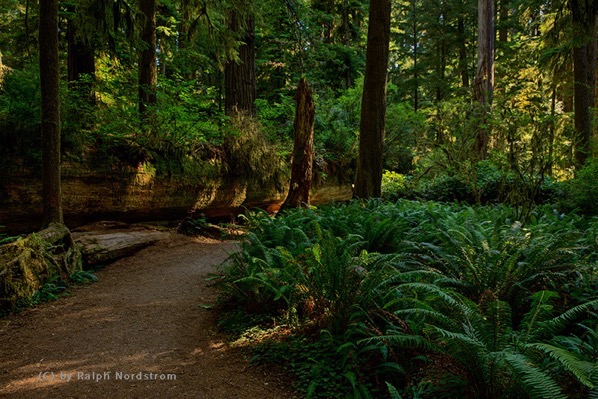
Peaceful moment redwoods 160803 SM3129
Reed Simpson Grove in Jedediah Smith State Park.

Continue reading “The Redwoods Are Calling Me”

(91)

Focus Stacking – First Impressions

A practical guide to focus stacking

Background

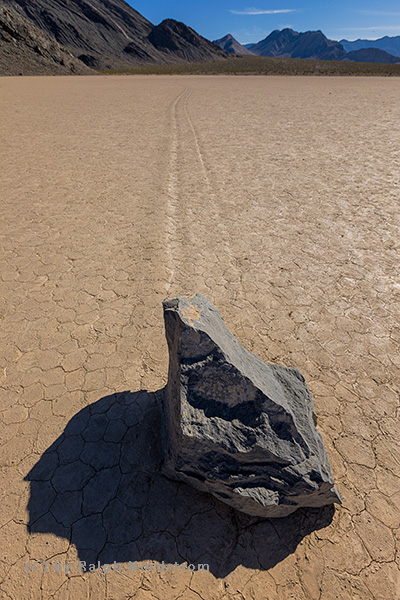
Depth of Field (DOF) is a staple of near-far landscape photography.  It is used when the composition contains object that are very near to the lens as well as objects that are distant.  Traditionally, it has been achieved by using a wide-angle lens with a small aperture or a tilt-shift lens.  Using this technique, it is possible to have the nearest object one or two feet from the lens and everything is in focus from the object to infinity. 

Racetrack rocks death valley 160222 39731
Depth of field example. The rock is 18″ from the lens but with a wide focal length (16 mm) and a stopped down aperture (f/11) everything is in focus.

The disadvantage of this method is you must use a wide-angle or tilt-shift lens, preferably on a full-frame sensor camera body, and a small aperture.  (In this image, the rock was 18” from the lens.  I used a 16mm lens on a camera with a full-frame sensor and was able to get the needed DOF at f/11.). But small apertures introduce lens diffraction which work against you by softening the entire image.  And what if you don’t have a wide enough lens.  You couldn’t get this shot with a 24mm lens.  And getting any kind of DOF with a telephoto lens is virtually impossible, even with fairly distant subjects.

Continue reading “Focus Stacking – First Impressions”

(423)

Why Lightroom?

A brief rundown on the strengths and weaknesses of Lightroom

I remember when I first tried to process RAW files back in 2002.  I had been shooting JPEG up to that point and heard about RAW files, so I thought I’d give it a try.  I used the only RAW conversion program available to me at the time – Camera RAW in Photoshop 7.1.  It didn’t go well.  I couldn’t figure it out, so I continued to shoot in JPEG. 

Then I heard about a product called RawShooter from a Danish company – Pixmantec.  It had just become available and it was free.  With nothing to lose I downloaded it and checked it out.  It was fantastic.  It was so easy to use.  When the company offered the paid version, RawShooter Premium, I was all in.

Then, on June 26, 2006, Adobe announced they had purchased the ‘technology assets’ of Pixmantec for incorporation into Lightroom which was in the third round of beta testing at the time.  Version 1 was shipped in February of 2007 and us Pixmantec customers were grandfathered in.  With RawShooter Premium no longer available and a free version of Lightroom 1, I switched to it and was pleased to see some of the functionality in RawShooter Premium that I especially liked appear in Lightroom 1 that hadn’t been in any of the beta versions. 

Michael Reichman of Luminous Landscape and Jeff Shewe in the Photoshop Hall of Fame put together a video training course which I grabbed up right away.  And my experience with Lightroom was off to an excellent start.

A Brief History

Lightroom was designed from the start for digital photographers.  The core functionality was to be RAW image conversion.  But digital photographers need a lot more than just that. They needed to be able to organize their image files, edit them, categorize them, tag them, export them, print them and more.  In short, professional digital photographers needed to be able to run all aspects of the creative side of their businesses using Lightroom.  It’s tempting to think of Lightroom as a tool to adjust and enhance our images but as you can see, it’s so much more.

The Heart of Lightroom – the Catalog

With the introduction of layers in Photoshop, the notion of non-destructive enhancements was introduced.  The idea is that the original image is priceless and if adjustments change it and they don’t work out, you’re in trouble.  You can’t start over again.  So, Photoshop introduced layers.  Virtually all of the adjustments you could apply to the original file could be applied in layers stacked one on top of the other.

To give the photographer the ability to make adjustments non-destructively, Lightroom took a different approach.  The developers created a catalog that is at the heart of Lightroom.  Understanding how the catalog works is key to getting the most out of Lightroom.

Simply put, the catalog keeps track of virtually everything about the image files.  First, it knows the location of the file – the hard drive it is on and the folder it is in.  When Lightroom creates a JPEG preview file that it uses when it displays the image on your monitor, the catalog knows the name of the preview file and where it is. If you use the star method of ranking files or you flag them or assign a color to them, all that data is kept in the catalog. 

And when you make adjustments such as Exposure or Contrast or Highlights or Saturation or any of the other available adjustments, every one of them are kept in the catalog as a simple list.  This gives you a full history of all of the adjustments.  If you decide to start over, since the original RAW file hasn’t been changed, you can keep the original list and create a new list.  This gives you the ability to try different approaches for an image.  And the original RAW file remains unchanged.

Continue reading “Why Lightroom?”

(124)