We landscape photographers tend to avoid photographing during the middle of a sunny day. The light is harsh with no color. We prefer golden hour or twilight.
But there are times when we have no choice as to when we can shoot. When we’re on vacation with family we can’t wait until sunset at every location that sparks our interest. So we get the shot and hope for the best. But there’s a technique we can use that will greatly enhance our chances of capturing a more compelling photograph.
One of the most powerful tools we have in digital photography is HDR. We can get photographs of scenes with extreme dynamic ranges, images that were impossible to capture with color film and required advanced skills with black and white film. (See How Ansel Adams did HDR). I frequently turn to HDR during sunrise and sunset or in difficult locations like Antelope Canyon.
Briefly, the technique is to capture three or more bracketed images with the camera mounted on a tripod. I bracket 1 1/3 stops and take anywhere from 3 to 7 exposures, depending on the dynamic range challenges presented by the scene. In the darkroom I use Photomatix Pro to blend the images together. Photomatix Pro is launched from within Lightroom with the excellent Export preset they provide.
But what I what to introduce to you in this post is the thought that HDR can be used in the harsh light of midday to produce more vibrant, intense and interesting photographs. I recently traveled from Southern California to Colorado with my family. We stopped at a number of photographic places along the way but, as is the case with family travel, you don’t have the luxury of waiting for the best light.
So every shot I took was three exposure hand-held HDR. As I mentioned above, you normally shoot HDR from a tripod. But you can do hand-held HDR if your camera has a capture rate of 5 frames per second or faster and you are very careful to steady your body when you press the shutter. An image stabilized lens also helps a great deal.
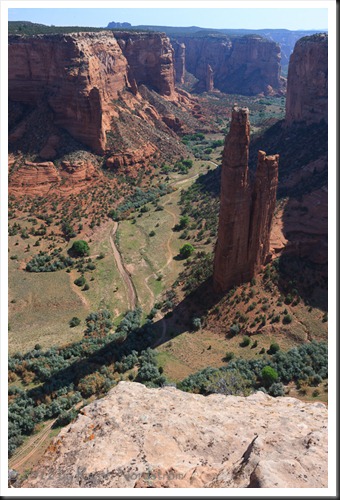
On the third day of our journey we did a quick tour of Canyon de Chelly in Arizona before heading on to Santa Fe, New Mexico. This is one of the Southwest’s iconic locations, rich with scenic beauty and 5000 years of Indian history and tradition. I was especially eager to photograph Spider Rock, one of the most outstanding spectacles in the park. It was about 10:00 in the morning when we arrived. Sunrise had been at 6:30 that morning so the sun was well beyond the golden hour and already high in the sky, but still low enough for the 750 foot spire to cast a long shadow across the canyon floor.
My Canon 1Ds Mark III calculated an exposure of f/11, 1/30 sec at ISO 200. Highlight Tone Priority was turned on so that the camera could capture an expanded dynamic range. I was also using my Canon 24-105 image stabilized lens. The shutter drive was set to high speed continuous to automatically capture the three bracketed exposures with one extended press of the shutter button.
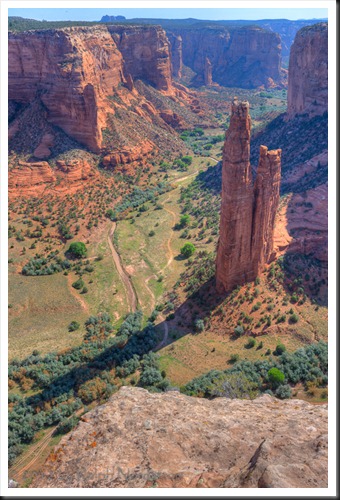
The un-bracketed image is not too bad. There is no highlight clipping and the shadows have detail. All in all, the dynamic range was not excessive except for a tiny amount of clipping in the blue channel. But the light is quite harsh. There was a lot of blue haze in the atmosphere (it was monsoon season) so the reds of the canyon walls are a bit muted and the haze was especially blue. It’s not a bad photograph but it’s not a great one either. We can do better. Here’s where the HDR comes into play.
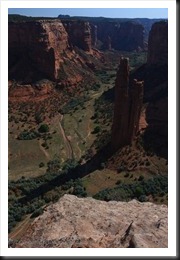
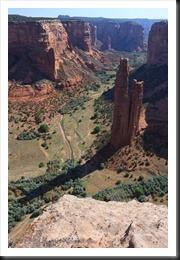
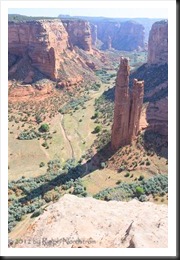
Here are the three photographs used for the HDR processing. The underexposed photograph on the left tones down the bright areas of the image, rendering them in a more pleasing tonality. The overexposed photograph on the right opens up the shadows to show all the detail to an extent not seen in the middle exposure. I shot aperture priority so the ISO and f/stop was the same for all three images; you always shoot aperture priority for HDR. The shutter speeds were 1/80 for the left image, 1/60 for the center image and 1/13 for the right. (Such a slow shutter speed for the right image is possible because of the image stabilized lens.)
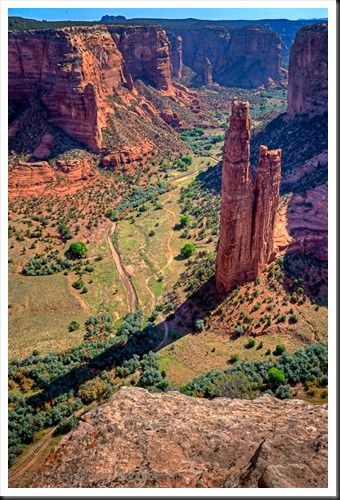
Processing the images with Photomatix Pro resulted in this TIFF image. Already it’s looking a lot more interesting, more distinctive and closer to what I actually saw.
You can already see a more luminous quality to the image. The foreground rock is not overly bright as it was in the original image. It has very pleasant and believable tonality. The sky is not washed out but has a pleasing blue saturation. But Spider Rock has lost its harshness. The part of Spider Rock that was in deep shadow in the original capture now is opened up and practically glows. It seems to be enveloped in the beautiful Southwest light.
A few minor adjustments in Lightroom followed by a little more processing in Photoshop and you have the final image.
The side-by-side comparison of the before and after images is very revealing. It clearly shows how much HDR can enhance the image, creating an exciting photograph that is still believable.
|
OK |
Keeper! |
Admittedly I didn’t do anything with the before image. I could have adjusted the color balance a little to remove some of the blue and tried to open up the shadows with the Lightroom Shadows adjustment. And I could have saturated the yellows and oranges. But I couldn’t have gotten the enveloping quality of light and the vibrance and impact found in the HDR image.
To recap the technical considerations, you will be shooting hand-held HDR and for that you need a camera that shoots at least 5 frames per second in continuous drive. You’ll shoot aperture priority. And it’s really an advantage if you have an image stabilized lens.
So you don’t need to give up on midday shooting when you don’t have the option of waiting around for the best light. Instead of settling for lackluster photographs, try shooting HDR. I think you’ll be very pleased with the results.
If you like this post interesting then please Like it and consider sharing it on Facebook or by emailing it to your photographer friends.
But more importantly, let us hear from you. Join the conversation. Please feel free to leave comments.
We do photography workshops. Come on out and join us. Click here to check us out.
You can also check out our photography. Click here.
WordPress Tags: photographers,hour,vacation,sunset,location,technique,tools,photography,skills,Ansel,Adams,sunrise,locations,Antelope,Canyon,tripod,exposures,Photomatix,Lightroom,Export,Southern,California,Colorado,luxury,exposure,Arizona,Santa,Mexico,Southwest,Indian,history,tradition,Spider,Rock,spectacles,park,foot,spire,Canon,Mark,atmosphere,monsoon,reds,Here,areas,extent,aperture,TIFF,Already,foreground,saturation,adjustments,Photoshop,comparison,Keeper,Shadows,adjustment,impact,advantage,option,Instead,three,camera,lens
(1829)

Wow!
I’ve just told my wife that I love reading about other people doing exactly what I do!
I also take pictures whilst travelling, whenever we stop, I’m always part of a group, and feel forced to do hand-held attempts at HDR. Slowly managing to get there!
Thanks for such an easy read! Very few observations, but straight to the point