
As part of the Desert Institute class I was teaching in Joshua Tree National Park, we did a sunset at the end of the second day at the trailhead parking log for Ryan Mountain. Across the road one of the participants found a composition that I liked a lot, so we talked about the possibilities. He ended up with a nice photograph and moved on. I spent a little more time on it because I saw that there was a depth of field problem that needed to be resolved.
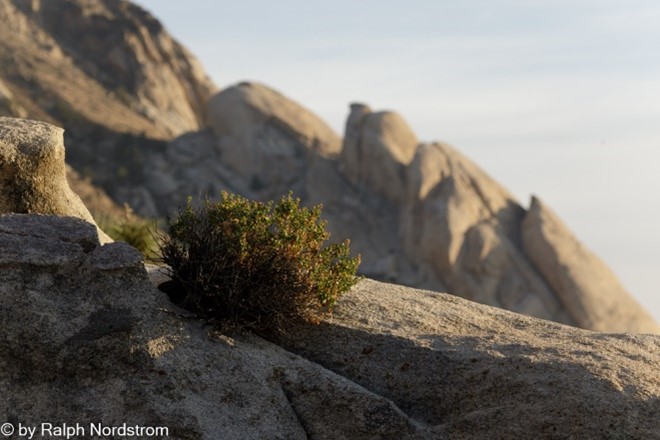
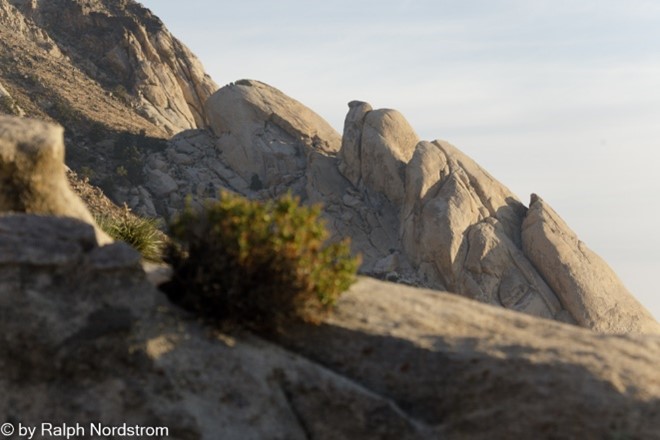
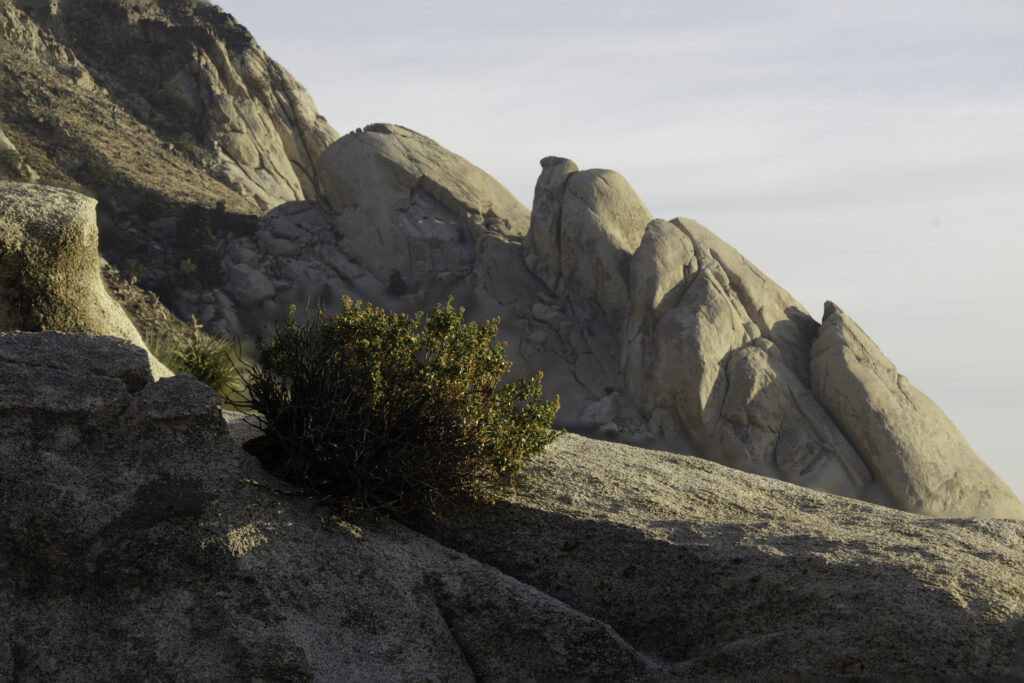
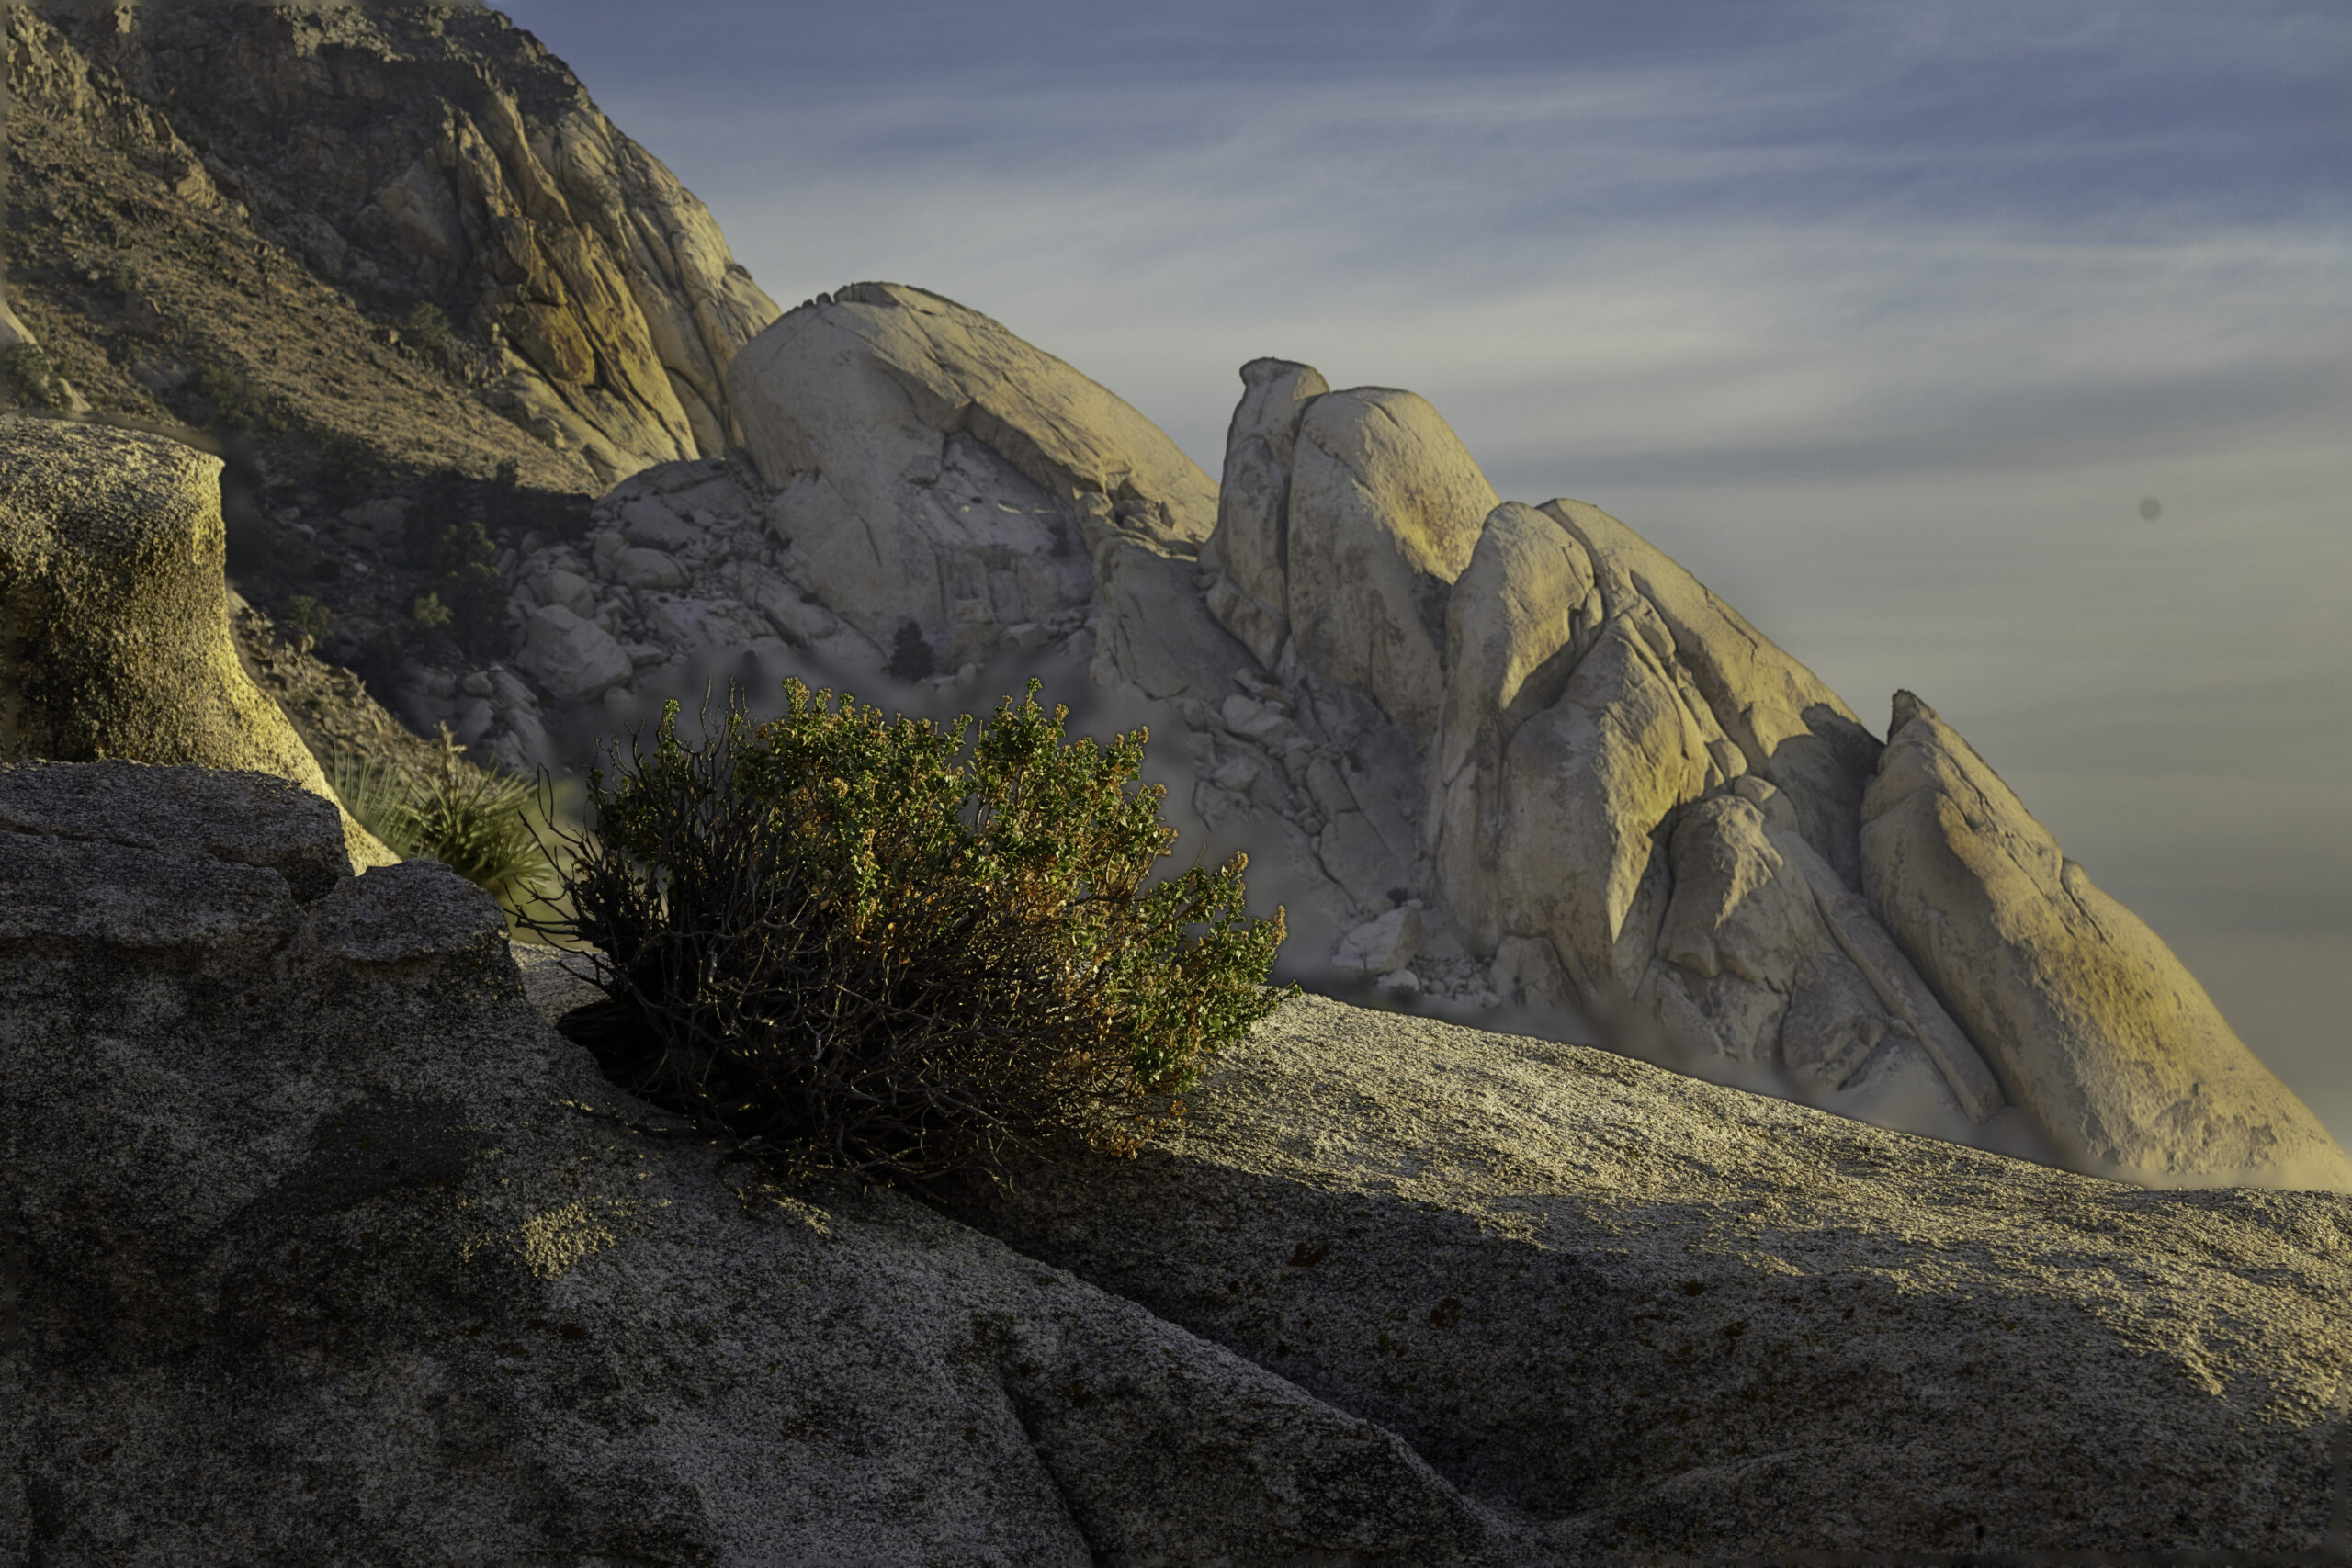
The foreground was about 20 feet from the camera and the background was a least a quarter of a mile away. At a focal length of 190 mm there was no way I could get that depth of field even with an aperture of f/32. So, as you can see below, I did two shots, one focused on the bush in the foreground and the second focused on the outcrops in the background. The plan was to use focus stacking to get a sharp image throughout.
Photoshop does an excellent job of focus stacking. To get it started, I selected the two files in Lightroom and clicked Open as Layers in Photoshop… from the Photo menu.
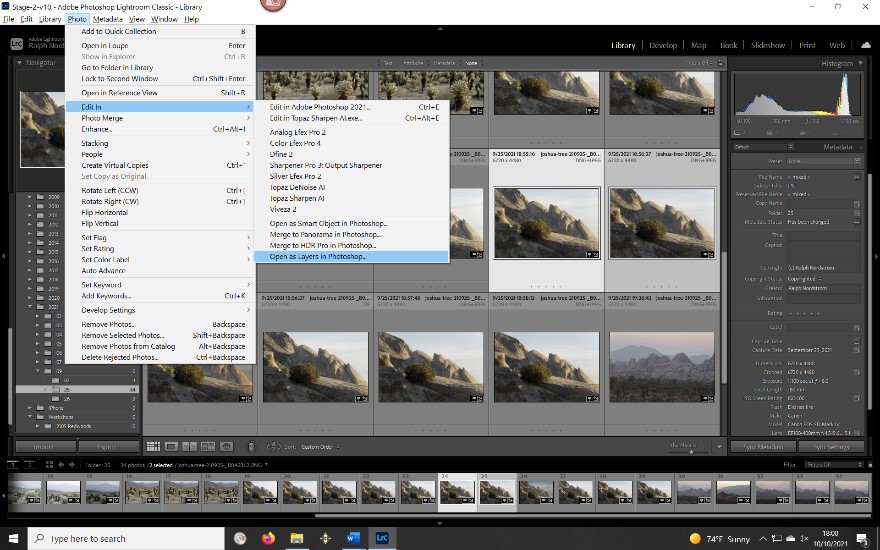
Lightroom converts the DNG files to Tiffs and loads them into Photoshop where they are stacked as two layers, one on top of the other.
In Photoshop, select both layers and in the Edit menu first click Auto-Align Layers… and then Auto-Blend Layers…. It’s that easy.
Photoshop adds layer masks for each of the two layers, masking out the areas that are out of focus with a black mask. Then it creates another layer that is the combination of the two masked layers.
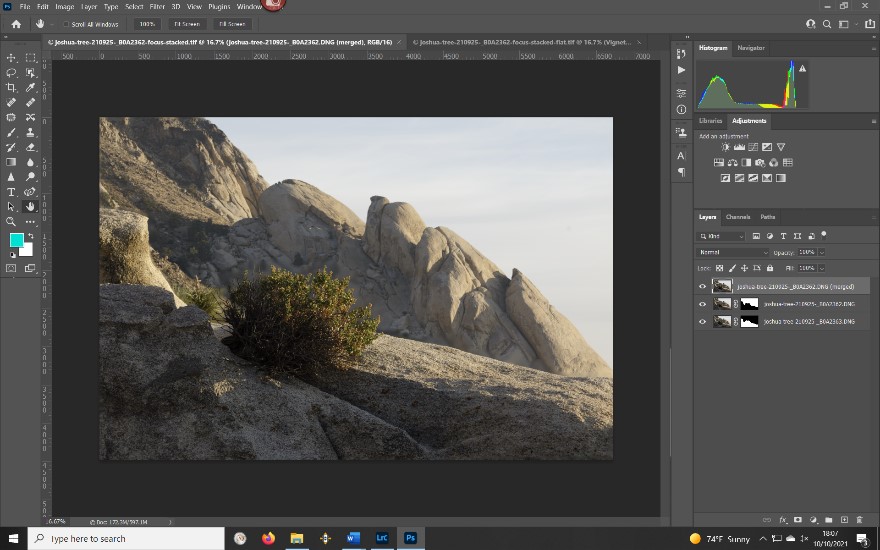
Next you click on the eyeball icon of the two masked layers to deselect them and flatten the image, discarding the unused layers . Now it’s time to go to work and finish the photograph.
I took the photograph because of the bush in the foreground so I want to emphasize it. The composition is good so there’s nothing to change there. But the visual weights of other elements draw attention away from the bush.
First of all, the bush is too dark, and it needs for its shadows to be opened up a bit.
Secondly, I noticed the background outcrop appears closer now that it’s sharp. If it was still blurred, that would give it a greater illusion of depth. To fix that I’ll need to darken it to restore some of that illusion.
Third, the outcrop in the upper left corner is in full sunlight and that’s attracting attention. So I’ll need to darken that too.
And finally, the sky is washed out, so I’ll need to bring out more detail and color.
Now that I have a plan, it’s time to execute it.
The first thing I do in Photoshop is use an action I developed to create layer groups, one for Global Adjustments, a second for Local Adjustments and a third for Soft Proof.
After that I use another action to create what I call the Mid-tone Contrast Mask in the Global Adjustment layer group. It smooths out the light but at the same time it reduces overall contrast. So the action also creates a Curves layer to restore some of the contrast and set a black point.

The rest of the adjustments are local and the first of them addressed the sky. The Sky tool in the Select menu is pretty amazing. You don’t need to give Photoshop any hints as to where the sky is. It goes out, finds it and creates a mask with the sky selected (white) and everything else excluded (black). Using the mask I added a curves layer to increase the contrast by darkening the blue parts of the sky which also restored the blue of the sky.
After that I created a Dodge/Burn layer with another action and used it to brighten the bush to draw out a little more detail in the shadows. A nice thing about adjustment layers is you can return and tweak them more when needed. I did that to this layer towards the end to brighten the rock to the right of the shrub.
I created another Dodge/Burn layer for the sun-drenched outcrop in the upper left corner. I could have used the same layer that I used for the brush but created a second one so that the adjustments would be clear. Not only did I darken the upper left corner, but I also darkened the background outcrop.
Finally, I created a subtle vignette to darken the corners and edges and pull the viewer’s eye into the center of the frame. Here’s the before and after.
The light in the finished image is less harsh and more inviting. The Golden Hour light adds warmth and a feeling of comfort. The sky provides a complementary color. A lot of tonality adjusting was done to control the visual weight of a number of elements including the bush. But the bush is still dark and it is its other qualities that draw attention to it. First of all, it’s isolated in that it’s the only foliage in sight. It is also in a strong position, being off center to the left which not only draws the eye but adds visual tension. Its green color contrasts pleasantly with the surrounding beiges. And the texture from its leaves also adds visual weight and contrasts it with the texture of the surrounding rocks. As a result, it doesn’t stand out because of its brightness but it’s still clear that the bush was the reason I took the photograph.
Note that no hue or saturation adjustments were made. The tonality adjustments also brought out a modest degree of saturation in the colors and that was all the image needed.
As for the composition, the overall sweep of the lines is downward, creating a sense of motion and dramatic energy. One might be inclined to associate that motion with winding down the day as we approach sunset.
Here’s the final image.

(212)