Tell Me More about Exposure

Dig into the mysteries of exposure and explore how it works and how it is controlled.

What is Exposure?

When we photograph nature, some scenes are very bright like sand dunes in the middle of a sunny day. Others are very dark like the deep shade of a forest. Other scenes are both bright and dark like a blazing sun that just rose above the horizon on a brilliant morning.

There are many unique situations with different amounts or intensities of light.

Exposure is basically dealing with these different levels of light and making sure the sensor gets enough light to make a good photograph without getting too much light.

How Much Light Does the Sensor Need?

One way to think of it is that in low light situations (dark) the camera needs more light. In bright light situations it needs less. But that’s not true. The camera needs the same amount of light in either situation. A more accurate way of looking at it is in low light situations, it will take longer for the camera to get enough light than in a bright situation.

But there’s another aspect to this so let’s take a deeper look.

The image that passes through the lens is captured by the sensor and eventually stored as a file on a memory card. (There’s a lot that goes on between these two steps, but they are not important for this discussion.) The sensor, as you know, is made up of millions of pixels, microscopic elements that are sensitive to light. Actually, a pixel is three light-sensitive elements, one for red, another for green and a third for blue. But let’s keep it simple and speak of it as just one element that captures tones of gray.

When a picture is taken a different amount of light falls on each pixel depending on the subject photographed and the nature of the composition. In the shadow area there may not be enough light to even register on the sensor. This is called ‘shadow clipping’ and will produce a black dot.

In the bright areas there may be so much light, more than the sensor can measure. You can think of this as a glass filled to overflowing. There’s a limit to how much water a glass can hold and light a sensor can capture. This is called ‘highlight clipping’ and results in a white spot.

If a moderate amount of light falls on a pixel, it will capture the light and that pixel will render a gray spot that falls somewhere between black and white, depending on the amount of light.

Now, if the difference in the amount of light between black clipping and white clipping is ten stops, then the sensor has a dynamic range of ten stops. That is fixed and cannot be changed.

Back to the question – how much light does the camera need to make a proper exposure? If you took the amounts of light recorder by all of the millions of pixels and average them, the camera considers it a proper exposure when they average out to a neutral gray, a gray that is perceived as being neither dark or light but right in the middle. The definition of neutral gray is very precise. It is a gray that reflects 18% of the light.

There are different metering modes that go beyond just taking a simple average of all the pixels. There is center weighted which pays more attention to the pixels in the center of the frame, spot which only looks at the pixels covering about 5 degrees in the exact center of the frame and matrix which attempts to analyze the image and make a smarter determination.

But whichever metering mode you choose, the basic goal is to have the result produce a neutral gray.

The processor in the camera (all digital cameras are computers after all) has the logic to make this calculation. With the results, the computer can set the exposure settings.

The Exposure Triangle

The camera has three exposure settings that can be adjusted to get a proper exposure. They are ISO, aperture and shutter speed.

ISO controls the sensitivity of the sensor. The higher the ISO, the greater the sensitivity and less light will be needed.

Aperture controls how much light comes through the lens. You can think of it as adjusting the brightness of the image falling on the sensor.

Shutter speed controls how long the sensor is exposed to the image.

Shooting Modes

Most cameras have at lest four shooting modes – Auto, Aperture priority, Shutter priority and Manual. The setting you choose determines how many of the exposure settings the camera sets and how many you control.

Auto – The camera decides all three exposure settings.

Aperture priority – You decide the ISO and aperture and the camera decides the shutter speed.

Shutter priority – You decide the ISO and shutter speed and the camera decides the aperture.

Manual – You decide all three exposure settings.

In Summary

To sum it up, an exposure is the amount of light falling on a sensor, taking into account the sensor’s sensitivity. A proper exposure from the camera’s perspective is one where the amounts of light captured by all of the pixels being monitored average out to a neutral gray.

In a bright snow scene where most of the pixels are registering the bright white of the snow, the camera will make the snow a neutral gray.

In a dark scene with most of the pixels registering deep shadows, the camera will make the shadows a neutral gray.

But in a scene with a balance of bright and dark areas the exposure will be more like what we see.


Join me for a great workshop.  Click here to see what’s possible.

Read more:

Tell Me More About ISO
Tell Me More About Aperture
Tell Me More About Shutter Speed
Tell Me More About the Exposure Triangle

(44)

Tell Me More About Aperture

Take a closer look at aperture.

What Is Aperture?

Every lens has a built-in diaphragm that opens and closes like the iris of your eye. By opening and closing it the brightness of the image coming through the lens can be adjusted.

In today’s cameras, most camera bodies communicate with their lenses to tell them what aperture the photographer requested. The lens has a little motor in it that sets the aperture when the shutter is triggered. Otherwise the aperture is wide open.

How Is Aperture Used?

Aperture is measured in f/stops. An example is f/8. The f/stop looks like a fraction and indeed, it is. The f stands for the focal length of the lens. And the fraction defines the diameter of the opening. Here’s an example:

Suppose the lens has a focal length of 50 mm. If the f/stop was f/2, then the diameter of the opening would be 50/2 or 25 mm. If the f/stop was f/4 then the diameter of the opening would be 50/4 or 12.5 mm. If the f/stop is f/22, then the diameter of the aperture is 2.27 mm.

The aperture numbers are created in stops. A change of one stop either doubles or halves the brightness of the image coming through the lens. The f/stops have very weird numbers. Here is a table of f/stops where the interval between settings is 1 stop.

f/stop

Aperture diameter on 50 mm lens

f/1

50.0 mm

f/1.4

35.7 mm

f/2

25.0 mm

f/2.8

17.9 mm

f/4

12.5 mm

f/5.6

8.9 mm

f/8

6.2 mm

f/11

4.5 mm

f/16

3.2 mm

f/22

2.3 mm

The speed of a lens is identified by its widest aperture. An f/4 lens is not considered fast. An f/2.8 is in the class of fast lenses. But f/2, f/1.4 and especially fast and an f/1 lens is extremely fast. And they generally, the fast lenses have a price to match.

What Else Do Apertures Do Besides Control Brightness?

Apertures have an effect on depth of field. Wide apertures have a shallower depth of field and small apertures have a deeper depth of field. This makes the aperture setting important when taking landscape photographs, especially with a near-far composition. It is important to get an aperture that will give you the depth of field you need.

But apertures also affect sharpness. When photographing at small apertures such as f/16 or f/22, the size of the aperture is so small that it actually interacts with the light passing through it. The edges of the diaphragm in particular interact with the light and cause it to scatter. This produces an overall softening effect.

Shooting wide open can also have some softness. This is not because of the aperture but of the design of the lens optics. Typically, the sharpness sweet spot of a lens is two to three stops above wide open. With an f/4 lens that would be f/8 or f/11. With a f/2.8 lens that would be f/5.6 or f/8.

Exposure Triangle

Aperture is one side of the Exposure Triangle. The other two sides are ISO and shutter speed. The sides of the exposure triangle are measured in stops or Exposure Values (EV). The light coming through the lens at an aperture of f/4 would be twice as bright as the light at f/5.6.


Join me on an exciting workshop. Click here to see what’s available.

Read more:

Tell Me More About Exposure
Tell Me More About ISO
Tell Me More About Shutter Speed
Tell Me More About the Exposure Triangle

(53)

The Future of AI in Photography

AI is in our future as photographers. Take a look at where it is today and where it is likely to go in the future.

I recently became interested in the growing role that Artificial Intelligence, or AI, is already playing and will be playing in photography. Make no mistake, AI has already been deployed in our smart phones. And Adobe and a host of competitors have already enhanced their products with the first round of AI improvements. What effect will AI have on us, whether we be casual or serious photographers, amateurs or professionals? We will all be affected sooner or later. So, let’s take a look and see what’s happening right now and where AI is likely to take us.

Continue reading “The Future of AI in Photography”

(304)

Photography as Art – A Brief History

A brief history of photography as art from its beginning in the mid 1800s to the impact of computational photography and artificial intelligence.

Back in the mid 1800s photography was just born.  New advances were made in rapid order.  All those that saw the amazing photographs were struck with their realism.  Painters who made their livings from portraits saw their businesses shrink virtually overnight, replaced by the camera. 

It was the realism that separated the photograph from the other visual arts.  The generally accepted idea was that photographs could never be art.  And yet, some photographers took exception with that.  They contended that photographs can be art and they borrowed techniques from painters to prove it.  In England, Henry Peach Robinson published his ground-breaking book in 1869, Pictorial Effect in Photography: Being Hints On Composition And Chiaroscuro For Photographers, that powerfully and effectively not only made the case for photography as an art form but provide guidelines on how to accomplish that end.  Pictorialism became a movement that swept European photographers and, in the United States, had Alfred Stieglitz as its most influential proponent and promoter. Even Ansel Adams had his Pictorialism period.

While pictorialism was many things, one of the defining qualities was a soft focus to reproduce the effect generally seen with paint on canvas.  Composite images made from more than one negative were also very common and well accepted, even demanded.  But the main intent was to create photographs that went beyond realism and elicited an emotional response in the viewer.

Photography continued to evolve as an art form along with Modernism and the social and intellectual movement it spawned.  Group f/64, founded by William Van Dyke and Ansel Adams in the San Francisco area, rejected the notion that fine art photography must have a soft focus.  Adams, upon meeting with Stieglitz in New York, convince him that photographs of the natural world that were in sharp focus were also art. 

Not only that, but Adams also developed the Zone system that brought a high degree of precision and accuracy, providing photographers with great control through the interpretive decisions they made in each step of the photographic process.  One can get insights into the numerous decisions from Adams’ insightful book Examples: the making of 40 photographs.  The path shaped by each decision they made took them to the final print and what they visualized it would convey.  Each photographer was in complete control of the entire process.

Eventually Kodak and other film companies took over the development and printing part of the process.  This removed the investment individuals would have to make not only in the needed equipment, chemicals and time but also the knowledge and experience required to make the decisions that led to the final print. On the one hand, photographers lost control of a good part of the process but on the other hand the masses gained access to this wonderful new technology and the benefits it provided. They delivered the undeveloped film to the lab or the neighborhood photo store and a few days later received the developed negatives and prints.

Exposure was hit and miss for the general population.  The professional and serious enthusiasts used light meters to calculate their exposures.  But the general public just guessed although in many cases their cameras didn’t give them any control over exposure.  It was only a matter of time, however, before camera manufacturers would incorporate light meters in the camera itself.  The first one I ever saw had a gauge with a needle on the top of the body that would move back and forth as the aperture and/or shutter speed was adjusted.  The idea was to line up the needle with the mark in the middle.   The same decisions used with the light meter were essentially incorporated into the camera. Continue reading “Photography as Art – A Brief History”

(60)

Photographing the Redwoods

Photographing the coastal redwoods of Northern California is both rewarding and challenging. Explore some of the conditions you will face and how best to capture them.

Walking among the redwoods is an inspirational experience. But wait, if we’re talking about the redwoods in California, the trees I am thinking about could be 600 miles from the trees that are conjured up in your mind’s eye. That’s because there are two species of redwoods in California – the massive giants found in Sequoia and Kings Canyon National Parks on the western slope of the Sierra Nevada Mountains and the tall ones that hug 450 miles of the fog-shrouded California coast, culminating in the Redwoods National and State Parks of Northern California. While both species are spectacular, each is unique in its own way and photographing them presents dramatically different challenges and opportunities. In this post, I will be taking you through the Coastal Redwoods of Northern California.

The Redwoods National Park was established in 1968. California had already created three state parks, beginning in the 1920s, that encompassed some of the remaining redwood old growth groves – Jedediah Smith, Del Norte Coast and Prairie Creek.  The two park systems were joined in 1994 to create the Redwoods National and State Parks.  Now 139,000 acres of the Northern California coast are under the joint management and protection of the National Park Service and the California Department of Parks and Recreation.

Being along the Northern California coast, temperatures are moderate throughout the year and moisture is plentiful, not only from winter storms but also from life-giving fogs that roll in year-round from the Pacific Ocean.

Fog is an ever-present possibility in the groves and presents unique challenges and opportunities. The light in the groves is soft and delicate and contrasts and, tp some extent, masks the strength and power of the trees. This light is perfect for capturing this more delicate mood of the redwoods. Slightly overexposed images best capture the lite airiness of the fog.  Compositions with strong foregrounds enhance the feeling of depth created by the fog.

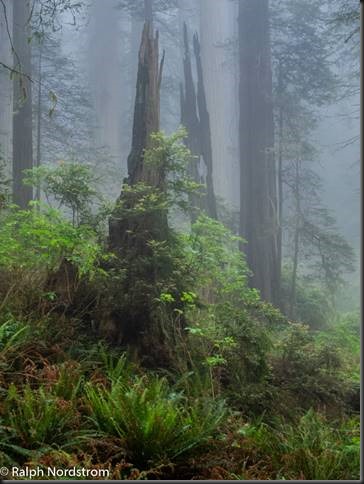
Castles in the fog
‘Castles’ in the fog

Continue reading “Photographing the Redwoods”

(277)

Polarizing Filters and Blue Skies

Polarizing filters are fantastic but they have their limitations that can get you into trouble if you’re not aware of them.

What comes to mind when you think of a polarizing filter? It’s probably how it can darken blue skies. This is just one of the many things this versatile polarizer can do. Many photographers swear by them and some go so far as to keep them on their lenses all the time. But as far as darkening blue skies are concerned, polarizers can create more problems than they solve if you’re not careful.

But before getting into all that, just exactly what does a polarizing filter do? How does it darken blue skies?

It all starts with the fact that light is a wave. We speak of the color of light in terms of the frequency of the wave, just as we speak of the pitch of a sound in terms of its frequency. Red light has a lower frequency and blue light, a higher frequency. It’s as if light vibrates – up and down. And most light vibrates in all directions. But some forms of light vibrate in a single direction. This is called polarized light. For example, glaring light bouncing off the highway can be polarized in a horizontal direction. That’s why Polaroid sunglasses work. They block horizontally polarized light while allowing light polarized in the other directions to pass.

The same is true of a blue sky, or at least some of it. Depending on where the sun is, blue sky light is polarized to a greater or lesser extent. If you stand facing the sun and look through your polarizer, you will notice that it has no effect – the sky is not darkened. But if you continue to look through the polarizer and slowly turn away from the sun you will notice the sky gets darker and darker until the sun is directly over your shoulder. Continuing your turn, the sky will get lighter and lighter until the sun is directly behind you.

…as far as darkening blue skies are concerned, polarizers can create more problems than they solve if you’re not careful.

You can tell in which direction the effect is the greatest with this simple trick.

Continue reading “Polarizing Filters and Blue Skies”

(1869)

The Call of the Redwoods

Photographing the coastal redwoods of Northern California should be on everyone’s bucket list.

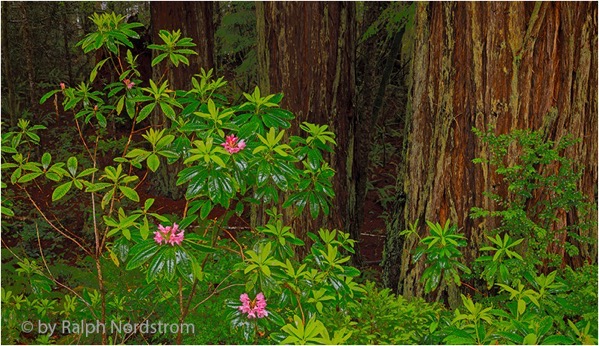
Rhododendron spring 130529

It’s often said that California has everything.  And it’s true.  From the southern border with Mexico to the northern border with Oregon, the state goes from parched desert to lush mountain slopes. 

California also has the oldest living trees in the bristlecone pines of the White Mountains, the most massive trees in the Giant Sequoias of Sequoia and Kings Canyon National Parks, and the tallest trees in the Coastal Redwoods along the California coast.

Can you imagine what it is like to experience these trees?  Just think of it.  The oldest bristlecones were seedlings when the pharos of Egypt were laying massive stone upon stone in Giza.  And both the giant sequoias and coastal redwoods were seedlings when Christ was born in Bethlehem.

The coastal redwoods are the monarchs of these mountains, especially the unlogged old-growth groves….

Continue reading “The Call of the Redwoods”

(169)

The Redwoods Are Calling Me

A journey from the craziness of the city to the serenity of the magnificent coastal redwoods.

It’s 6:00 in the morning.  I’m in my car, leaving our Southern California neighborhood and making my way to the freeway.  I’m heading north and have to cross the LA basin which, at this time of day, is not  easy.  But I have a destination that is calling me.  I’m on my way to the redwoods of Northern California, 800 miles from home.  I’m looking forward to feeling small and insignificant and renewed among these magnificent trees.

There are two types of redwood trees in North America and practically all of them are in California.  The coastal redwoods, where I’m headed, are the tallest living organisms on the planet with the tallest topping out at 379 feet.  They are found in groves that span over 450 miles from Big Sur in the south to just across the Oregon border in the north.  They thrive on the fogs that are common along the coast.

The other redwood tree is the Giant Sequoia that grows on the western slopes of the Sierra Nevada mountains.  Where the coastal redwoods are tall and slender, the giant sequoia are of enormous girth.  They are considered to be the most massive living organism on the planet.  (But a rumor is spreading that a coastal redwood was found recently that is more massive than the largest giant sequoia, and thereby giving the coastal redwoods both titles.)

I made it out of the LA basin, crossed over the Grapevine on I-5 and into the great central valley of California.  This stretch of I-5 is considered by many to be the most boring highway in the country with mile after mile of pretty much the same, barren landscape.  After what seems like endless hours I turn west towards the Bay Area.  This will be anything but uneventful.

Making it through the East Bay is more than 100 miles of congestion and is not something I look forward to.  In fact, it’s fair to say that I dread it.  I enjoy the Richmond Bridge; I think I like it more than Golden Gate.  But getting there usually requires navigating mile upon mile of stop and go traffic and once it is crossed, there’s more of the same on the other side.  Arg.

But when it’s finally behind me the promise of the serene redwoods comes over me and I’m excited again, re-energized and eager to continue.

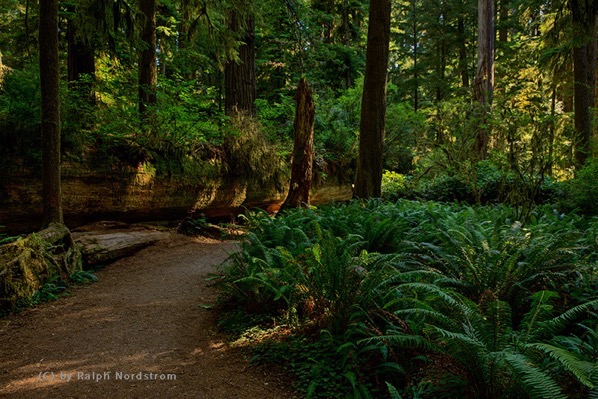
Peaceful moment redwoods 160803 SM3129
Reed Simpson Grove in Jedediah Smith State Park.

Continue reading “The Redwoods Are Calling Me”

(91)

Focus Stacking – First Impressions

A practical guide to focus stacking

Background

Depth of Field (DOF) is a staple of near-far landscape photography.  It is used when the composition contains object that are very near to the lens as well as objects that are distant.  Traditionally, it has been achieved by using a wide-angle lens with a small aperture or a tilt-shift lens.  Using this technique, it is possible to have the nearest object one or two feet from the lens and everything is in focus from the object to infinity. 

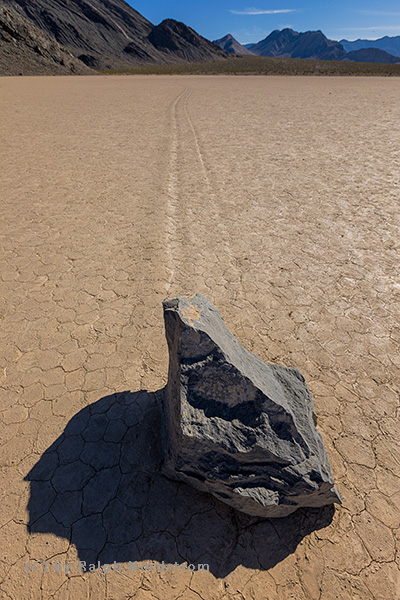
Racetrack rocks death valley 160222 39731
Depth of field example. The rock is 18″ from the lens but with a wide focal length (16 mm) and a stopped down aperture (f/11) everything is in focus.

The disadvantage of this method is you must use a wide-angle or tilt-shift lens, preferably on a full-frame sensor camera body, and a small aperture.  (In this image, the rock was 18” from the lens.  I used a 16mm lens on a camera with a full-frame sensor and was able to get the needed DOF at f/11.). But small apertures introduce lens diffraction which work against you by softening the entire image.  And what if you don’t have a wide enough lens.  You couldn’t get this shot with a 24mm lens.  And getting any kind of DOF with a telephoto lens is virtually impossible, even with fairly distant subjects.

Continue reading “Focus Stacking – First Impressions”

(423)