File Naming Conventions

Everyone it seems has a recommendation on how to name your image files.  There’s the cryptic file name assigned by your camera such as CRW0123.   Programs like Lightroom allow us to modify the name when the files are imported.  Many people recommend adding the date to the camera file name.  I like to add the date and the camera model to the file name since I now (fortunately) shoot with two cameras.

But when I’m ready to add a photograph to my portfolio (those photographs I wish to display and sell), I go with a different naming convention that I wish to share.

Continue reading “File Naming Conventions”

(1326)

How to Photograph Antelope Canyon

I certainly don’t want to presume to hold myself up as the definitive expert in shooting Antelope Canyon but I wouldn’t mind sharing my thoughts and welcome feedback from anyone who has shot there and has similar or dissimilar impressions.

Anyone who has been to Antelope Canyon in northern Arizona just outside Page knows there are two canyons – Upper and Lower.  They are about five miles apart.  The two canyons are distinctly different.  Let’s start with Upper.

Continue reading “How to Photograph Antelope Canyon”

(18568)

High Dynamic Range #3 (HDR)

On the technique to use to capture the full dynamic range of the scene

HDR Exposure

This is the third in a series of articles on high dynamic range, more commonly known as HDR.  The previous article illustrated how HDR situations occur; namely, when the dynamic range of the subject exceeds the dynamic range the sensor (or film) is capable of capturing.

High Dynamic Range

But with digital photography there is a technique for dealing with it.  In the field, it begins with taking multiple shots at different exposures so that the combined dynamic range exceeds that of the subject.

Continue reading “High Dynamic Range #3 (HDR)”

(1576)

High Dynamic Range #2 (HDR)

How the limitations of the camara sensor create HDR problems.

In the first posting we discussed how colors are translated into three numbers in a digital camera, one for each of the three primary colors – Red, Green and Blue (RBG for short).  After all, digital cameras are computers complete with processors, memory and software.  We described the 8 bit color mode in which the numbers range from 0 to 255 and are used to measure and store the brightness of each color.  Zero is darkest dark possible and 255 is the brightest bright possible.  When all three colors are combined in equal proportions you end up with gray.  If all three colors are zeros (0,0,0) you have pure black; if they are all 255s (255,255,255) you have pure white.

Camera Sensor Dynamic Range

The next step in this journey of understanding it to realize how the pixels in the camera sensor work.  Recall that each pixel is really three pixels – one for each of the primary colors.  While the following is an oversimplification, suffice it to say that the sensor has a built in dynamic range that can be measured in stops.  That is to say, the range from the darkest darks to the brightest brights that the sensor is capable of capturing can be measured in stops.  This is also true of all films.  For example, the dynamic range may be as little as five stops (generally most color positive films) and as much as ten stops or more (generally the most advanced digital cameras). For the remainder of this discussion we can assume our camera has a dynamic range of 7 stops.  It can be illustrated in this way….

 Sensor Dynamic Range

Continue reading “High Dynamic Range #2 (HDR)”

(1201)

High Dynamic Range #1 (HDR)

How digital convert the world into numbers.

This is the first in a series of articles that address the fascinating topic of High Dynamic Range or HDR.  HDR not only refers to situations you face when photographing in the field but also the digital darkroom techniques for processing HDR images.  This first article will lay the groundwork necessary for understanding HDR.

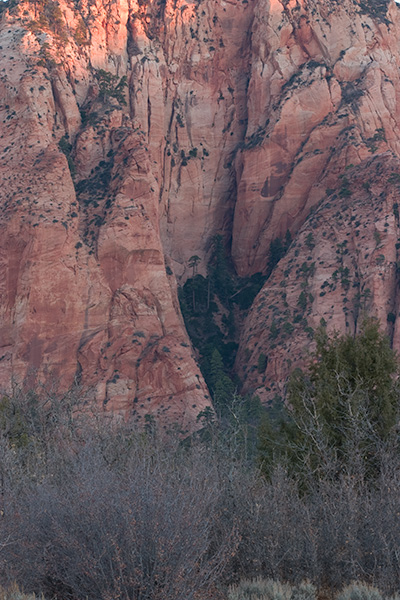
How often do you look at your photographs and are dissatisfied because the images appear washed out, or at least parts of then.  Maybe you took an outdoor family shot at a gathering or picnic.  The people may look great but the sky is washed out.  Or perhaps you were on vacation and something similar happened – part of the image was washed out.  The opposite could also happen.  The image could be too dark.

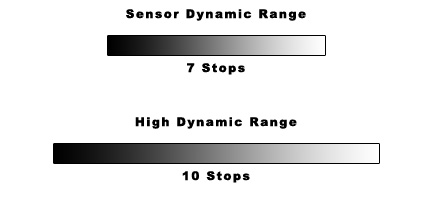
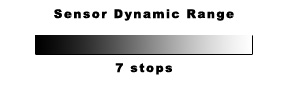
Normally modern digital cameras have very sophisticated built in light meters that give you excellent exposures.  But often the conditions of the scene you are shooting are simply beyond the capability of camera to capture, regardless of whether you’re shooting digital or film.

If you’re collecting pictures for the family album these defects may not be a problem at all.  It’s the memories that the photograph conjure that are important, not the technical merit of the image.  These are photographic records of important events in our lives.

But if you’re intention is to create a work of art, a washed out image is one sure way to frustrate your efforts.  If you’re shooting RAW you have some ability to recover washed out highlights or black shadows.  However, once you’ve completely lost your highlights and/or shadows there’s nothing you can do to recover them.

Continue reading “High Dynamic Range #1 (HDR)”

(932)

Experiences with CIE Lab Processing – Follow-up

I worked more on the CIE Lab photo from the previous post and have some thoughts on what I’d do differently.

 First, I didn’t do a whole lot of value and contrast adjustments the first time.  I just created one Curve to adjust luminance.  Next time around I’ll add curves for brightening/darkening and for contrast enhancement/reduction.  All of these will operate on the L channel.

What I won’t do is get into Hue/Saturation or Selective Color.  If that’s needed I’ll do that once I get back into RGB mode.  Hopefully not much will be needed as we’re back with the old problems of RGB.

(327)

Experiences with CIE Lab Processing

Last night I tried processing an image in Lab color space for the first time.  If you’re not familiar with Lab, it is the most accurate color space and has a gamut that covers the entire human visual spectrum.  There’s an interesting article written by Jeremy McCleary that describes how human vision works and compares it to the Lab color space which is as close of a match as you can come – Human Vision and Digital Imaging.

Basically, Lab separates luminance (think black and white) from color.  Similar to RGB, there are three channels.  However, with RGB the channels are Red, Green and Blue.  With Lab the channels are L for luminance (brightness and darkness), a for magenta green opposition and b for yellow blue opposition.

The advantage of Lab over RBG (or CMYK) is that the luminance can be adjusted without affecting color and vise versa.  In RGB changing luminance will affect color saturation; in Lab it doesn’t.

Continue reading “Experiences with CIE Lab Processing”

(1202)

Photoshop Discoveries 2

Use of Spot Healing Brush

I have an image that is a shot of the Eastern Sierra at sunrise.  There are gorgeous clouds hanging over the peaks.  The early morning sun lit them on fire along with the mountains.  It was amazing!

My exposure was pretty close to being right on.  And yet, there was one part of the clouds that technically wasn’t clipped but was very close.  The RGB numbers were not 100% but were in the high 80% to low 90%.  The thing was there wasn’t much detail and it really stood out.

Continue reading “Photoshop Discoveries 2”

(823)

Photoshop Discoveries 1

I stumbled across a very effective technique tonight.  But first a little background.  The image I was working on was a 4 photo HDR shot.  I processed each of the four first in DXO, then LR and finally Photomatix.  The first pass resulted in a sky that was very strange.  The word that best describes it is ‘posterization.’  No other area of the image had this problem, just the sky.  Where it transitioned from a darker blue to a lighter hue the transition was splotchy and pixelated. 

Continue reading “Photoshop Discoveries 1”

(716)