OK, so this isn’t a very sexy topic but having a strategy for naming your image files can save you a lot of grief down the road. Let me run through what I’ve worked out over the years (and believe me, it’s taken several years to perfect this).
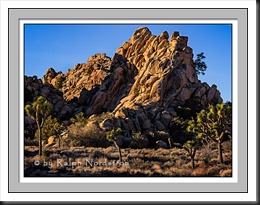
So it starts in Lightroom which gives you the option of renaming your files when you import them. I’m following Scott Kelby’s recommendation here. Let’s start with a file name as it is created in the camera. It’s going to look something like this – _SM35116.CR2. By the way, here’s the photograph that that goes with.
Hidden Valley (2013)
When I import the file into Lightroom I rename the file with a shoot name, capture date and the original file name. It ends up like this –’ joshua_tree_130119__SM35116.dng’. (Yes, I convert to dng when I import.) The shoot name (‘Joshua_tree’ in this case) is an easy way to tag the image with the location right in the file name. This is extremely helpful in Lightroom when I want to create smart collections. The reason for adding the capture date (format is YYMMDD) is it helps me later on as you will see.
So once the file is imported into Lightroom I go through a selection process and finally identify the photographs I want to work on. These I’ll develop in the Lightroom Develop module and if they pan out I’ll do more with them in Photoshop. And if they make the cut for my portfolio I’ll copy the files to a directory on the portfolio drive titled ‘Almost There.’ This folder is for photographs that still need some final proofing and tweaking before they end up in the regular portfolio folders.
In the ‘Almost There’ folder I rename the file to its almost-final name. This file was renamed to ‘hidden_valley_130119_5116.tiff’ In this name I replace the shoot name (‘joshua_tree’) with the title (‘hidden_valley’). I keep the capture date (don’t worry, I’ll explain why in just a minute). And I also keep the sequential part of the camera file name (‘5116’). The reason for this is I also like to copy the RAW file to a subfolder of ‘Almost There/RAW’ because I’m trying to keep a copy of the original RAW file with the final TIFF. And I don’t want to rename the RAW file so I keep part of the original camera assigned file name.
I mentioned that in the ‘Almost There’ folder I do final proofing and tweaking. Proofing involves printing and I use Image Print for that. One of the key decisions in printing is Rendering Intent; that is, deciding if you want to use Perceptual or Relative Colorimetric when rendering the image on paper. I always check out the two options and determine which works best for each image. Some work well with Relative Colorimetric and with others Perceptual works best. Also, Image Print provides a black point control that can be used to tweak the amount of detail in your shadow areas. This is also very important to me so I’ll also adjust the black point control to get the result I want. For example, the image above used Perceptual rendering intent with the black point control set to 50. This is going to get added to the file name.
But I also want to remain open to slightly different settings if I should print on different papers. I use Red River Polar Matte 99 percent of the time. But sometimes I like the Red River Polar Metallic paper. So, once I finalize the paper and rendering settings I add them to the file name. So the final name ends up ‘hidden_valley_130119_5116_rrpm_p50.tiff.’
The thing that’s great about this naming system is I’ve documented the settings I use in Image Print right in the file name. I could keep a separate database of all the settings (arg!) or just print everything the same (and compromise the quality I’m after). But putting the settings in the name means a year from now when I’m printing this I’ll know exactly what settings to use to get the exact same results I got the day I proofed it and gave it the thumbs up.
So what about the capture date? Well, that’s simple. It serves two purposes. The most important is when I’m matting the photograph I write the title of the photograph and the year on the photograph itself and on the matt. And the year is right in the name. So the title of this photograph would be ‘Hidden Valley (2013).’ Easy. The other reason is if for some reason I need to go back and find the original RAW file in my backups I have the date it was shot and that’s the way all my files are organized – by year/month/day. So it’s easy to find.
OK, so I told you this wasn’t sexy but some of these more mundane things sure make life a lot easier so I have less grief and more time for the sexy stuff.
We offer some great photography workshops. Check them out.
You can also check out our photography. Click here.
(2885)

