I’ve been giving a lot of thought recently to what goes in to making a great landscape photograph. It turns out there are four things, four pillars if you will. Four, that’s a good number. There are the four legs of a table or the four wheels of a car. And not to forget the four sacred directions of the Native Americans.
In landscape photography the four pillars are evenly divided between the aesthetics and the technical. So what are they? The two aesthetic pillars are Fantastic Light and Strong Composition. No surprise there. The two technical pillars are Appropriate Sharpness and Optimum Exposure. No surprise there either. If just one of those pillars is missing, well, the table collapses, the image suffers.
Let’s look at them one by one….
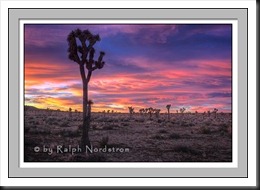
Fantastic Light
We’re always looking for fantastic light and, unlike studio photographers, we have to work with what we’re given. But we know that there are certain times of the day when we’re more likely to find fantastic light. That’s why we get up hours before sunrise and don’t pack up our gear till an hour or so after sunset. We love the light found during the bookends of the day.
Learning to make the most of the light means becoming keenly aware of two of light’s most important properties – Color and Shadow.
Color
Color can be used to establish a strong emotional connection with the image and its subject. The color of outdoor light changes as the conditions change. The light we have at midday on a clear sunny day is daylight, our standard for white light. It has no color cast to it. Objects are seen in their ‘real’ color. But that’s generally not a color that creates an emotional connection. During sunrise of the same day the color is much different; it’s warmer. And sunset color is even warmer than sunrise.
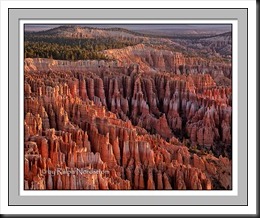
But during twilight the light becomes very cool. It is also cool in open shade and on overcast days.
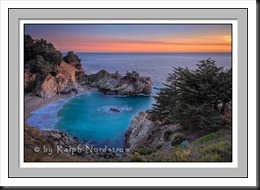
Shadows
Shadows are the other key property of light. On a bright sunny day the shadows are strong and deep.
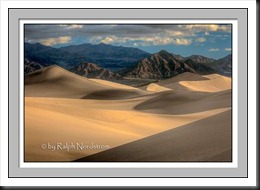
On overcast days, during twilight or in open shade the shadows are very soft and subtle.
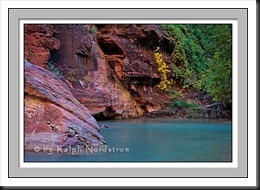
Depending on what you want to convey, shadows can communicate strength and energy or softness and delicacy.
Because of harsh shadows and white light, landscape photographers generally shy away from photographing during midday. However, sometimes you can’t avoid it – like when you’re on vacation with the family. So the trick to getting good midday photographs is to work the shadows. Become aware of shadows and work them into your compositions.

Strong Composition
Speaking of compositions, the second pillar is strong compositions. Composition can be a complicated topic. There is a list of compositional principles as long as your arm. But it boils down to just a couple of things. However, before I get to them it’s worth mentioning two very common and useful principles – the Rule of Thirds and Border Patrol.
I think most everyone is aware of the Rule of Thirds – that tick-tack-toe grid you superimpose on the image and place significant elements on or near the lines or their intersections. Border patrol is scanning the edges of your image to make sure you don’t have any unwanted elements intruding into the image. It’s a simple idea but not as easy is it might sound.
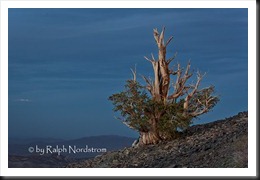
I’ve used the word ‘elements’ several times now. Composition is the arrangement of elements within a rectangular frame. Sounds academic, I know, but it’s about the most useful definition I’ve come across. Elements are trees and rocks, streams and bushes, roads, fences, buildings, clouds, all the things that are enclosed within the borders of the image. Arranging them within the rectangular frame is why we move our tripods three feet to the left, two feet back, down six inches, etc.
So the compositional principles I really want to talk about are Unity, Balance and Visual Tension.
Unity
Unity is the inclusion of those elements that enhance and contribute to the image and the exclusion of those that do not. Every strong image has a subject, focal point or message. And all of the elements need to guide the eye through the image. Elements that distract from the focal point need to be removed or at least deemphasized. When you achieve this you have achieved unity.
Balance
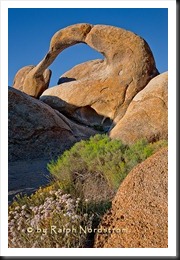
Balance relates to the arrangement of the elements. Each element caries a visual weight. Large can balance small, dark can balance light, blue can balance yellow. By balancing the elements you can create a visual center of gravity. Now, when I talk about balance I’m not referring to the symmetry of an English or French formal garden. These are beautiful but they are structured and rigid. I’m referring more to the harmony of a Japanese garden.
Visual Tension
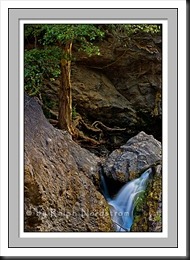
And this leads to the third point – visual tension. Images are interesting if they are both in and out of balance – a ying and yang thing. Placing key elements off center, for example, creates visual tension. Our minds want to move them to the center where they can be at rest. Visual tension creates energy.
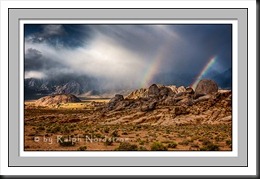
Most of the compositional principles that you can study are not universal; they do not apply in every situation. But unity, balance and visual tension are about as close as you can come to something that is always relevant.
These are the two aesthetic pillars and both are rich with possibilities for exploration, discovery and learning. They are truly life-long studies.
Appropriate Sharpness
Turning now to the technical, sharpness is a key feature of a successful landscape photograph. But the sharpness needs to be appropriate to the subject. Some subjects require tack sharpness throughout. Many landscape images cry for everything to be sharp from the foreground to the most distant objects.
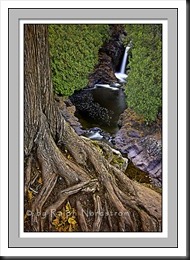
Other subjects require much of the image to be out of focus. Flowers and tiny insects are examples of this kind of selective focus.
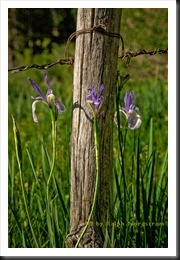
To master sharpness you need to understand Depth of Field and to master depth of field you need to understand the 3 F’s – Focal distance, Focal length and F/stop. These are the three things that come together to determine depth of field. For the grand landscape you need a short to moderate focal distance, a small focal length (wide angle) and a high f/stop to get the extreme depth of field needed by some of these compositions. For the flower shot you need a short focal distance balanced with a moderate focal length and a wide-open f/stop to get the shallow depth of field.
The other skill you need for the grand landscape shot is determining Hyper-focal Distance – the focal distance that holds both your nearest and most distant elements in focus. For those tricky near/far compositions, hyper-focal distance is twice the distance from the closest object to the front of the lens.
Optimum Exposure
In the days of film you really had to nail your exposure regardless of whether you were shooting color or black and white, negative or positive film. With digital we have a bit more leeway, especially when we shoot raw. We can often correct for exposure problems in the darkroom. Achieving the optimum exposure may sound like a basic skill but it is profoundly important.
Mastering exposure is a matter of mastering the Histogram – understanding what it is telling you and taking appropriate action. The histogram tells you if your exposure is right on or if it is over or under exposed. It tells you if you have highlight or shadow clipping . And it tells you if your camera’s sensor can handle the light conditions or not. With this knowledge you can take corrective action and get the optimum exposure.
The basic rule of the histogram is to keep it away from the edges by adjusting your exposure. Increasing your exposure will shift it to the right; decreasing it will shift it to the left. If you can’t avoid the edges then you can use other techniques like graduated neutral density filters or HDR. But it’s the histogram that provides this important feedback.
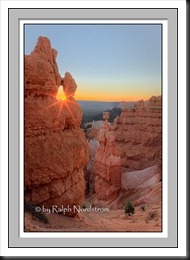
That’s it. These are the four pillars – Fantastic Light, Strong Composition, Appropriate Sharpness and Optimum Exposure. But it’s important to note that this is the starting point of a great photograph. The work is not over when you press the shutter, it’s just beginning. The darkroom still lies ahead. It doesn’t matter what kind of a darkroom you work in – the kind that is actually dark and smells funny (good) or the kind that has a keyboard, mouse and casts a glow on your face. It’s all the same and that is where the magic is completed.
I hope these ideas I’ve shared with you will help you with your photography. If you do find this post helpful please Like it. And if you know of someone who might also enjoy it you can use the Share button at the top to pass it along.
We do photography workshops. Come on out and join us. Click here to check us out.
You can also check out our photography. Click here.
(7366)

Ralph, you make beautiful photographs. I was taken by the Tree @ Cascade Falls. I don’t know how you got it all in focus. I have tried several times to get all elements tack sharp and it just doesn’t work out for me. I have signed up for the DV workshop, I sure hope you can help me.
Jerry, I used a 17 mm lens on a full frame camera. That gives very good depth of field. But I had to set it up very carefully and determine the appropriate f/stop to use to hold the focus on everything. It took a bit of careful planning to pull it off.
Great article Ralph. I appreciate having the essentials succinctly spelled out and in one place. Thank you for taking the time to do that.
Thanks Diana. Keep up the good work.
I enjoyed the article, the example photos were helpful. I like how you broke down the pillars into the most basic form. Thank you for sharing your knowledge and taking the time to write.
Thanks Forrest. I appreciate your feedback.