California is blessed with two species of redwoods, the Giant Sequoia (Sequoia giganteum) of the Sierra Nevada Mountains and the Coastal Redwoods (Sequoia semperverins) along the California coast from the Oregon border to 150 miles south of San Francisco. These awe-inspiring trees are both a joy and a challenge to photograph. I recently spent a week in Crescent City in Northern California photographing the Coastal Redwoods and leading a photography workshop there. I’d like to pass along some of the techniques we employed to capture photographs that do these majestic trees justice in breathtaking but often very difficult light.
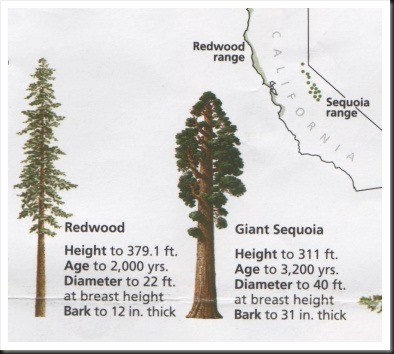
But before getting into the photographic details it is useful to spend a little time getting to know our subjects. Let’s start with a comparison of the Coastal Redwoods and the Giant Sequoias. The two trees are related but have their own distinct characteristics. The Giant Sequoia is the most massive living thing on earth which boast enormous diameters at their bases. And while very tall, the height record goes to the more slender, more graceful Coastal Redwoods. Their fascinating statistics are shown in the chart below.
High in the Sierra Nevada Mountains where the Giant Sequoias grow the air is clear, the sky is blue and the sun is bright most of the time. But along the coast the Redwoods grow in the coastal fog belt. When the winter rains abate it is the summer fogs that provide the much needed moisture to the redwoods and other fog belt plants.
There’s no question that there is Fantastic Light in the Coastal Redwoods, one of the Four Pillars of a compelling landscape photograph. And one of the areas in which we grow as photographers is to learn to not only recognize and appreciate the Fantastic Light we encounter but to know how to make the most of it. And this brigs up another of the four pillars – Optimum Exposure. Getting the right exposure for some of the light we encounter is pretty straightforward while other lights are extremely challenging but, if we can get it right, incredibly rewarding. So let’s talk about three kinds of light found in the Coastal Redwoods and the best exposure techniques used to capture them.
Fog
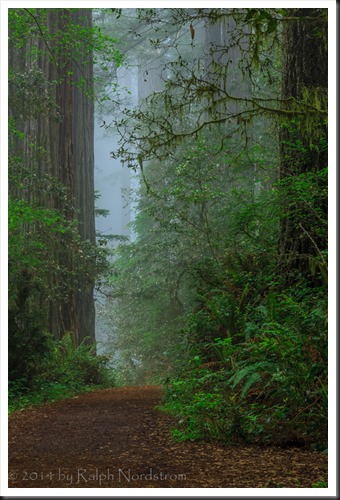
Fog plays an important role in Coastal Redwood photography and provides perhaps the best light to photograph them in. When the fog rolls in the grove becomes soft, enveloping and mysterious. It silently drifts through the trees creating ever-changing scenes that have an unsurpassed delicacy. The feeling of depth one gets in the fog is like none other. It’s not the grand vistas like Death Valley or the Eastern Sierra but a more subtle depth, created by the suggestion of massive trees barely visible in the mist.
The light is equally soft, delicate and mysterious. There are no harsh highlights. Everything is subdued and subtle.
Exposure becomes very simple under these conditions. With fog you don’t have to worry about highlight or shadow clipping caused by high contrast. The exposure that the light meter in your camera determines will produce excellent results. In fact, you may want to consider exposing to the right to provide more detail in the shadow areas.
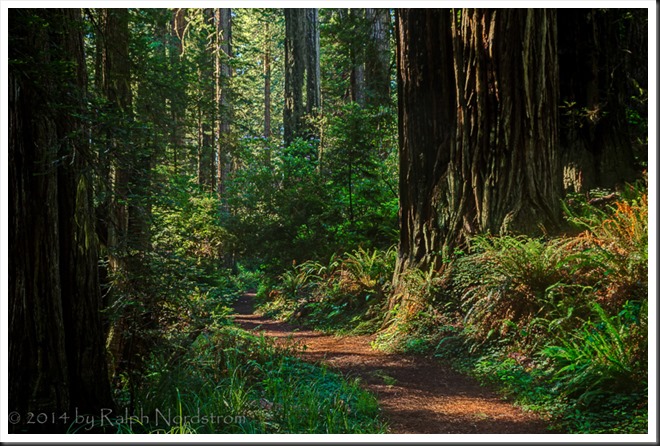
For most landscape photographs you want to take advantage of the full dynamic range of the medium when you do your processing In the digital darkroom. This is NOT one of those situations. That would produce a hard, high contrast look that is not at all consistent with soft, gentle fog. Instead, correct the exposure (if you exposed to the right), consider setting a black point but only on close objects and then bump the saturation a little. In Lightroom 5 I used +75 Clarity on the above image which works well because there aren’t a lot of hard edges for it to do its magic on. All it did was bring out the sword ferns in the foreground but didn’t disturb the soft feel of the light in the background.
Dappled Sunlight
If you don’t have fog the groves light up and become very exciting. Dappled sunlight falls in splashes of brilliance on the trails and forest floor. The grove is bathed in energy and scintillating beauty. But this exciting light comes with an extremely high contrast and the exposure gets a whole lot harder. In fact, the contrast is so great that it is well beyond the capabilities of our cameras’ sensors. Severe highlight clipping that cannot be overcome in the darkroom becomes a major problem.
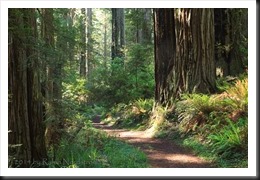
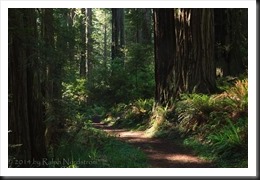
Look at this photograph here. It was captured at the exposure determined by the camera’s light meter. You can’t miss the hot spot right in the middle of the frame, creating highlight clipping that cannot be recovered. There is simply no way to get rid of it.
Even when I underexposed by more than a stop I couldn’t get rid of the highlight clipping and now my problem was compounded with shadow clipping.
It seems like this is a situation where there’s no way to win and in fact that would be true if we were still shooting film. As much as we admired the beauty we would have to walk away from this shot. But with digital photography there is a solution and the solution is HDR. Now don’t get excited; HDR is not a four letter word. When used to control high dynamic range situations like this one it becomes an essential tool in our photographic creative vocabulary.
I took five exposures each bracketed by 1.3 stops with a –1.3 EV exposure compensation on the middle shot. That was the only way I was able to capture the detail in the hot spots while at the same time getting rich shadows also with detail. The results are quite pleasing.
HDR does not have to produce a surreal or grunge effect. In fact, I like it best when it produces a natural effect like the one above and helps me capture the feeling I had when I was there.
It’s worth mentioning that I had to wait about 20 minutes to get this shot in order for the sun to move into position that eliminated some extreme hot spots that I would not have been able to capture. For example, the foliage was wet after a gentle night rain but this created some specular highlights. So I waited for the sun to move enough that these plants came into shadow. There were more lighting challenges besides this one that were solved by patience and time.
God Rays
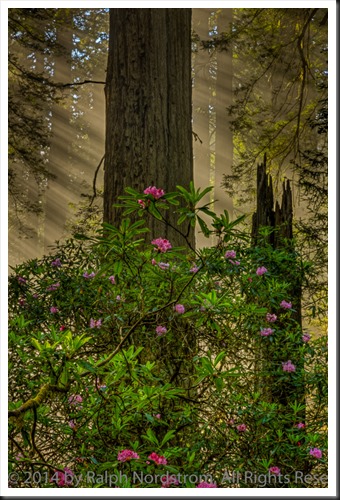
By far the most exciting light is when the fog begins to lift and you get the God rays (crepuscular rays if you prefer the scientific name). This light produces some of the most thrilling light any photographer could wish for. We all stand in awe when we gaze on a photograph with these glorious rays streaking down from above. They hold a special magic. But this too is very challenging light, again because of the difficult dynamic range. If I just took what the camera was capable of giving me this is what I’d get. And it wouldn’t come close to expressing the thrill and excitement I was feeling when I first saw this shot.
To delineate the rays while capturing the fragile beauty of the rhododendrons and the depth of the forest behind I again turned to HDR. I used the same formula as above – five shots bracketed 1.3 EV with the middle exposure –1.3 EV to ensure I captured the highlights. The results speak for themselves. This communicates what I felt.
This was one of those exciting moments when I knew I had something very special. Notice the details I was able to bring out with HDR – the specks of blue sky in the upper left corner, the trees in the background. Had I not used HDR the sky would have been completely washed out and clipped and the trees would remain hidden behind a wall of light. It’s subtle details like this that take a photograph to the next level.
In the HDR processing in the darkroom I went for a natural look (I use Photomatix Pro). I finished the image in Lightroom and Photoshop. What I tried to achieve was to make the God rays very clear (clarity in Lightroom did wonders) and give them a warm hue. And since this photograph was about the rhododendrons I pushed the saturation on the flowers just enough to make them stand out. I’m really fond of this image and think it is one of the best to come out of the Redwoods photography workshop.
Summary
So, to summarize…
- Foggy conditions provide the best light for photographing the Coastal Redwoods. The light is soft and mysterious and the dynamic range is low. Your camera has no trouble capturing it.
- If you are fortunate enough to get God rays, be aware of the dynamic range and take appropriate measures. HDR is the most effective technique to use.
- If you have a sunny day with dappled light on the forest floor again use HDR to capture this very challenging dramatic light. And to ensure you capture the highlights underexpose the middle exposure by one to two stops.
We always look forward to reading your comments so please feel free to share your experiences with us. And if you have a friend that would enjoy this post pass it along to them.
We do photography workshops. Come on out and join us. Click here to check us out.
You can also check out our photography. Click here.
(7864)

Sometimes when there’s a few hot spots, I like to see if I can selectively pull a piece from a 2nd exposure and add it to a 1st image. Does not always work. But I find the drawback with HDR in the redwoods is if t there is any kind of breeze at all, a lot of the leaves, fronds and dangling moss are not positioned the same even if I use a tripod.
M.D., this is a common concern when doing HDR. I use Photomatix Pro and it has a deghosting feature that allows you to select one of the images for areas where the foliage may have moved. There is both a manual and semi-automated mode. I find it works well.
Haven’t taken anything HDR yet since the last post, to try the de-ghosting feature. But I may pick a spot this spring just for that experiment. On another note, regarding the two big redwood species, coast redwood now has the widest trunk, as of 2015, surpassing all known giant sequoias. Sequoia sempervirens is the tallest and widest.
M.D., that’s very interesting about the sempervirens now also having the widest trunk, at least one tree. Would that be in or near the Grove of the Titans?
Lightroom CC now has a rudimentary HDR that also includes de-ghosting. If you have CC you might want to give that a try.