Everyone Can Take a Picture but Few Can Make a Photograph

Making a photograph involves much more than ‘point and shoot.’

“Anything that excites me for any reason, I will photograph; not searching for unusual subject matter, but making the commonplace unusual.”

~ Edward Weston

There are millions of pictures taken every day, every hour even.  They are fun and spontaneous.  They record moments in peoples’ lives.  They are shared on social media and sent in emails. And when viewed later, they bring back memories.

It’s easy to take a picture.  The dominant camera is the smart phone.  Just hold it up and tap the red button.  It takes no time at all and the reward is instantaneous.  It requires no particular skills or training.  It’s easy; anyone can do it.

These pictures will fill the internet’s networks and some may even end up on peoples’ walls or in scrapbooks.  But mostly when shared face to face, it’s from the smart phone’s camera roll.

Making a photograph is not at all like taking a picture.  It’s not easy.  It requires training, experience, special skills and patience.  The rewards are not instantaneous and not everyone can do it.

Continue reading “Everyone Can Take a Picture but Few Can Make a Photograph”

(107)

Photographing Death Valley National Park

Enjoy some of the photographic wonders of Death Valley National Park on an exciting photography workshop.

People sometimes ask me if there’s anything to photograph in Death Valley.  At 5,262 square miles of desert and mountains, it’s one of the largest national parks.  The valley itself is 140 miles long.  Think of it.  It takes three hours to drive from one end to the other.  And surely, in all that space there should be something to photograph.  And yet, most of it is desert.  In fact, the valley itself is the hottest, driest place on earth. It’s also the lowest spot in North America at 282 feet below sea level.  So what’s to photograph?

Mesquite Flats Dunes

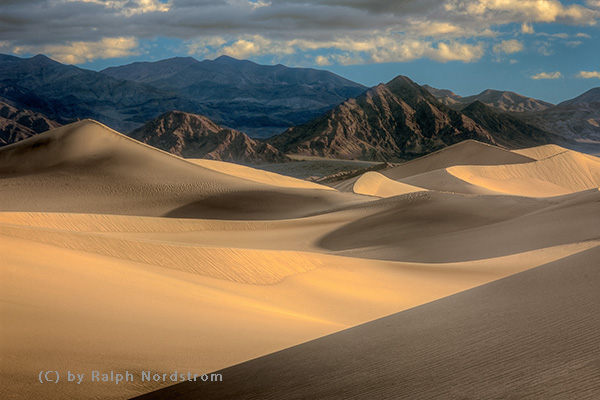
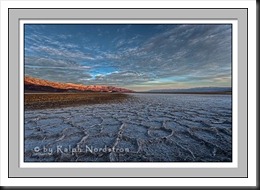
Death valley dunes 2011

Being a desert you might expect sand dunes and you would be right.  The Mesquite Flats Dunes are in the middle of the valley near Stovepipe Wells.  While not excessively high, they cover a large area and provide wonderful photographic opportunities at both sunrise and sunset.  I prefer sunrise which means heading out across the desert while it’s still dark to arrive at the dunes just as it’s starting to get light.  I go to a place that’s not heavily visited.  It’s an exciting experience.

Zabriskie Point

Zabriskie point pano 140211

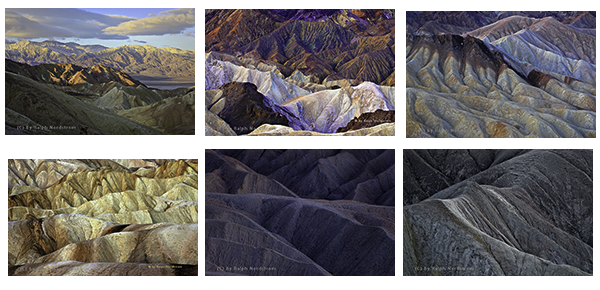
Zabriskie Point is one of the most visited places in Death Valley.  It attracts photographers and tourists alike.  At first it looks like an inhospitable badlands with not much to offer the photographer except a lot of tan wilderness.  But at the right time of day these ‘bad’ lands become extraordinarily beautiful.

Zabriskie collage

It’s all a matter of being there at the right time.

Continue reading “Photographing Death Valley National Park”

(223)

Five Tips for Successful Hand-Held Photography

These five tips will help you improve your hand-held photography and bring home photographs you will be proud of.

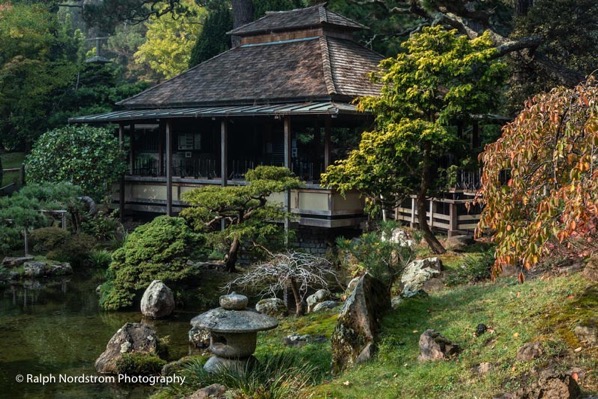
japanese tea garden, golden gate park

As landscape photographers, we prefer to shoot from a tripod. There are a lot of good reasons for this.  Tripods help to ensure a sharp image.  They slow you down so you’re more likely to think through your shot.  They can also keep you from taking so-so shots; if it’s not worth the effort to set up a tripod it’s not worth taking.  And you can dial in very precise compositions.

But when spontaneity is appropriate, tripods simply don’t work. Shooting hand-held gives you the freedom and spontaneity that is required in some situations but it also presents challenges that you don’t even think about when shooting from a tripod.  Fortunately, there are several things you can do to overcome these challenges and create great photographs.

1. Shutter Speed

japanese tea garden, golden gate park

With a tripod we don’t worry about shutter speed.  It doesn’t matter if it’s 1/1000 second or 30 seconds.  But when shooting hand-held, the right shutter speed is essential for a sharp image.  If the camera moves ever so slightly while the shutter is open, you have a blur.

Fortunately, there’s a simple way for you to determine what shutter speed will give you a sharp image and it depends on the focal length of your lens.  The formula is simple: 1 / focal length.  If your focal length is 60 mm then a shutter speed of 1/60 second or shorter will give you a sharp image.  But if your focal length is 100 mm then you need a shutter speed of 1/100 second or shorter.

If you have a crop sensor camera then you need to use the effective focal length.  Using a crop sensor Nikon as an example, the conversion factor is 1.5.  In other words, if the lens says 100 mm the effective focal length is 100 x 1.5 or 150 mm.  So, the shutter speed needs to be 1/150 second or shorter.

This photograph above was taken at the Japanese Tea Garden in Golden Gate Park, San Francisco.  It’s an extraordinary experience, especially early in the morning when the crowds are light.  The focal length was 47 mm so a shutter speed of 1/50 second would have been fast enough to get a sharp image.  However,  with image stabilization I was able to shoot it at 1/25 sec.  ISO was bumped to 1600 because of the dark conditions.  And an aperture of f/11 ensured enough depth of field for everything to be sharp.

You still want to hold the camera as steady as possible when taking your shot.  It’s the combination of a steady camera and an appropriate shutter speed that will give you a sharp image.

Continue reading “Five Tips for Successful Hand-Held Photography”

(190)

Photography Class on Mt San Jacinto

I recently taught a photography class for the Mt San Jacinto Natural History Association.  At an elevation of 10,834 feet, San Jacinto is the second highest peak in Southern California.  The Natural History Association operates in conjunction with the Mt San Jacinto State Park and has a rich program of mountain activities.  I was fortunate to be invited to teach the first-ever photography class for the association.

The class would consist of lectures and demonstrations, and be conducted in one of the meeting rooms in the mountain station of the Palm Springs Ariel Tram.  We would have a morning and afternoon shoot in nearby Long Valley,

In preparing for the class, I anticipated that there would be a large cross-section of experience and abilities, with gear ranging from smart photos to high-end digital cameras,  And that proved to be true.  So rather than getting into the technical aspects of photography, the emphasis was on the creative.  This normally consists of talking about light and composition which we took a bit of time to cover.  But the main emphasis was On Seeing.

I wasn’t sure what there was to actually See in Long Valley.  It was always something to pass through on the way to more exciting places like Round Valley or the summit,  So, to find worthwhile things to photograph, our quest became to find and capture the essence, the soul of Long Valley.

And here’s what we found…

Continue reading “Photography Class on Mt San Jacinto”

(105)

Sleeklens Lightroom Workflow Review

Use Lightroom presets and brushes from Sleeklens to enhance your creativity and improve your images.

Sleeklens is a company with a concept that is not new in the Adobe Lightroom world – providing presets to help us in processing our photographs. I’ve always shied away from using presets, just like I rarely if ever use the Auto tone adjustment built into Lightroom. I’ve always felt that I prefer making all the decisions myself rather than letting the computer make them in the case of Lightroom Auto tone or a designer make them in the case of presets.

But I recently received an evaluation copy of one of the Sleeklens presets workflows and have been using them on several photographs I’m working on. Sleeklens has a variety of presets for different purposes. The collection I received is titled ‘Through the Woods Workflow.’

Content

Through the Woods Workflow consists of forty-seven presets and twenty-nine brushes.

Presets

The Presets are global adjustments, affecting the entire image. Once installed they are in their own folder in the Presets area of the Development module screen. The presets are applied just like any other preset – namely, clicking on them.

The presets are organized into seven groups – All in One, Base, Exposure, Color Correction, Tone/Tint, Polish and Vignette. The All in One presets can affect the Basic, Tone Curve, HSL and Split Toning adjustment groups. Base mostly affects the Basic adjustments and occasionally the Tone Curve. One Base preset affects HSL and Split Toning. Exposure sets either Basic or Tone Curve. Color Correction adjustments are applied to HSL. Tone/Tint plays with Vibrance and Split Toning. Polish mostly adjusts Basic. And Vignette sets Post-Crop Vignetting in Effects. One thing that is missing is settings that utilize the new Dehaze adjustment in Effects.

Brushes

The brushes are used with the Adjustment Brush, Graduated Filter or Radial Filter. There are five groups – Basics, Color, Effects, Haze and Light. The brushes are applied by selecting the effect and painting with the Adjustment Brush or creating the Graduated or Radial Filter. Continue reading “Sleeklens Lightroom Workflow Review”

(1146)

Creating Images with Impact – Dynamic Range of the Medium

The pros create dramatic photographs, images with impact. You can add impact to your images too using these simple Lightroom techniques.

We’ve all seen those photographs that stop us in our tracks, that inspire us, that speak to us. Some photographs seem to have a special power, a special presence. Often times we hear ourselves saying, “Wow.” They have qualities that make them stand apart from other photographs. These are images with impact.

The masters of landscape photography seem to have the ability to capture a special quality of light in their photographs. It doesn’t matter whether they use film or shoot digital, their images stand out.

There are certain things about these images that do more than just appeal to us – we are drawn into to them. They capture our imaginations, stir our interests and perhaps show us moments in nature we could only hope to experience. We want to linger with them, explore them, take them in, get lost in them.

Without a doubt these photographs have compositions that are very strong, are bathed in fantastic light and have technical qualities of exposure and sharpness that are perfect. These are all decisions that the artist makes in the field, decisions that are critical to a strong image.

In the days of film, a good portion of the magic was done in the darkroom. That’s where their genius really became apparent. And it hasn’t changed today. We don’t actually have dark rooms to work in, closed rooms with the strange array of mysterious orders and the soft, dim yellow lighting. Today we have powerful software running on even more powerful computers. But really, how is that different from what the film Masters did in the darkroom? I don’t believe it is. I can’t think of anything that’s been done with “Photoshopped” photographs that hasn’t already been done in the darkroom. It’s probably a lot easier to do it in Photoshop but in the end, both the chemical darkroom and the electronic darkroom serve the same end, that being creating those “Wow” images.

In this series of posts I want to spend more time considering some techniques you can apply in the darkroom that will add impact to your images.

Use the Full Dynamic Range of Your Medium

The first darkroom technique I would like to discuss is the importance of using the full dynamic range of your medium. This is not something new. When Ansel Adams developed the zone system it was precisely for this purpose – to use the full dynamic range of the black and white negative and ultimately the black and white print. But what exactly does it mean to use the full dynamic range of the medium. Let me illustrate with an Ansel Adams image I have loved for many years, one I’m privileged to be able to live with in my home – “Moon and Half Dome.”
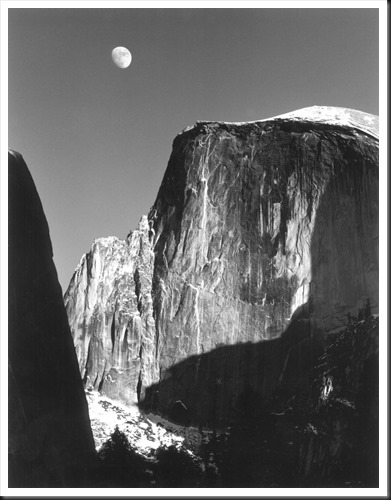
Adams-moon-and-half-dome-1960

In this exquisite photograph if you are able to examine an original closely you will notice that the shadow on the left may look like it is totally black but actually there is subtle detail. However, there are some very small areas that are pure black. Also, the moon and the bright parts of Half Dome may look like they are pure white but a closer look will reveal detail in these areas also. This photograph takes full advantage of the full dynamic range of the paper, from the blackest black to the whitest white.

Continue reading “Creating Images with Impact – Dynamic Range of the Medium”

(4737)

Making a Photograph – Personal Style

Discover your personal style and use it to improve your photography.

Personal style. What is it? I like to bring up the topic of personal style in my workshops. I think it’s important to understand that each of us has a personal style whether we know it or not. It comes from the fact that each of us is a unique individual and sees the world in our own personal way. Our skill levels are different. Our life experiences are different. Our interests are different. And that leads to each of us having our own individual world view.

hidden-valley-130119

Continue reading “Making a Photograph – Personal Style”

(827)

Twelve Tips for Buying Your Next Lens

Know what to look for when purchasing your next lens and get the one that will serve your well for years to come.

A student of mine asked me for help in selecting a telephoto lens – what to look for and what to avoid.  I put down a few ideas for him and thought that maybe you might also find this topic interesting.

Sooner or later we all buy a lens or two or five or six.  I currently have four lenses in my camera bag – a wide angle zoom (17-40 mm, f/4), a mid range zoom (24-70 f/2.8), my workhorse lens (24-105 mm, f/4) and a telephoto zoom (70-200mm, f 2.8).

I have two ground rules for buying lenses that I have shared with many people.

1.  There must be a demonstrated need.  In other words, if you can’t realize your vision because you’re missing a particular lens then it’s time to consider adding one.  Students, friends and colleagues ask me if I think they should buy a hot new lens.  I always ask them, “What would this lens permit you to do that you can’t do with your current lenses?”  Often, the answer is that it does nothing new for them, they just think it’s a cool lens.

2.  Purchase the best glass you can afford.  You will go through several camera bodies in your career but you’ll never outgrow a high quality lens.

So those are the ground rules but what else is there?

death_valley_sunrise_2012

Continue reading “Twelve Tips for Buying Your Next Lens”

(1328)

Making a Photograph – Vision

Develop your vision and express yourself through your photographs.

“This photograph speaks to me.”

The photographs that have a strong impact on us speak to us.  The photographer has created an image that moves us.  Did he or she have something in mind when making the photograph?  Probably so.  Strong images just don’t happen by accident.

As one grows as a photographer one’s vision becomes clearer.  One begins to discover who they are and what they have to say.  And as one’s technical and aesthetic skills develop, skills used in both the field and the darkroom, one’s ability to express their vision becomes stronger.

The artist’s vision is an important element of their art.  The clearer an artist is on what his or her vision is the more expressive their art becomes.

If you’re not clear on what your vision is, live with your photographs.  Become aware of what you associate with them, what stories they are telling you, how they make you feel.  And as your vision emerges nurture it, strengthen it, let it speak through you and your art.  And then your photographs will also speak to others.

death_valley_sunrise_2012

We do photography workshops.  Come on out and join us.  Click here to check us out.

You can also check out our photography.  Click here.

Technorati Tags: ,,,,,,,
WordPress Tags: technical,aesthetic,Photograph,Vision,impact,photographer,skills,artist

(3286)

The Same Ol’ Question

Even Ansel Adams was critisized for ‘manipulating’ his photographs.

Every time I do a show I get asked multiple times if my photographs are manipulated.  My answer is always, ‘Yes, of course.’  The hidden expectation is that photographs are supposed to be accurate depictions of the scene that is photographed.  This expectation is not new.  And any photographer that seeks to make art rather than documentation must face this question.

Take Ansel Adams for instance….

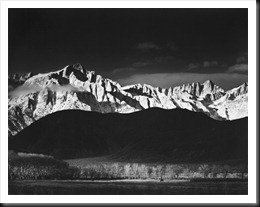
ansel_adams_winter_sunrise

The above iconic Ansel Adams photograph is titled Winter Sunrise.  It is of Mt Whitney and Lone Pine Peak above the Alabama Hills with Adams’ characteristic dramatic lighting.

There’s an interesting excerpt regarding this photograph from his book, “Examples, The Making of 40 Photographs.”

“The enterprising youth of the Lone Pine High School had climbed the rocky slopes of the Alabama Hills and whitewashed a huge white L P for the world to see.  It is a hideous and insulting scar on one of the great vista of our land, and shows in every photograph made of the area.  I ruthlessly removed what I could of the L P from the negative (in the left-hand hill), and have always spotted out any remaining trace in the print.  I have been criticized by some for doing this, but I am not enough of a purist to perpetuate the scar and thereby destroy – for me, at least – the extraordinary beauty and perfection of this scene.”

It seems the debate raged in Adams’ day and continues today.  I guess you know where I stand.  Oh, and for those ‘purists’ that revere Adams, if they only knew.

Winking smile

Go ahead.  Express yourself in your photographs.

Join me on an upcoming workshop.  Click here for more details.

To see more of my photographs click here.

(1548)