Composition – Rule of Thirds

A short discussion of the rule of thirds with examples.

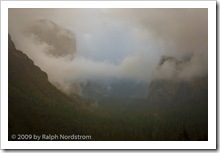
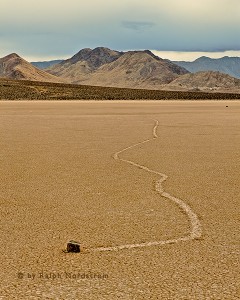
There’s a simple compositional technique you can apply to quickly improve the quality of your pictures.  It’s fun and easy and works in so many situations.  It’s called the “Rule of Thirds,” and it goes a little something like this.

Continue reading “Composition – Rule of Thirds”

(1828)

The Making of a Photograph Part 3 – Photoshop First Round

In part one and two of this series I described how I selected the file to work on and explored the potential of the image in Lightroom.  The treatment I ended up with would be exported into Photoshop and we go from there.

Read Part 1

Read Part 2

After trying several approaches particularly with regard to the color of the light I selected one that was very much like the unadjusted file.  The only change was opening up the shadows in the valley floor a bit.
Yosemite_4Now the fun begins.  While Lightroom 2.x supports local adjustments I prefer to do the local adjustments in Photoshop.  I just feel that I have more control in Photoshop.

The first thing to deal with is the silhouette of the pint tree in the lower left hand corner.  I used the clone stamp tool to get rid of that.  I have no qualms about removing things that distract from the image.  But I draw the line at adding things.  Someone asked me if I added the moon in Bristlecone Moonrise.  No, I was there and that was the moon.  What’s the point of faking it.  The experience in the field would simply not be the same.  It’s so exciting to take an image like this and think you’ve got it.  But there’s always the nagging doubt in the back of your head wondering if you overlooked something and messed it up.   You never know until you get back at your computer to see what you really have.
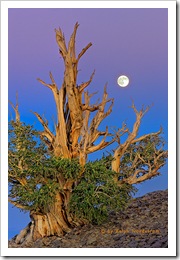
bristlecone_moon_2008

But back to Yosemite.  So the pine tree silhouette had to go.  Also, I checked the image for dust spots and only found one or two.  The spot healing brush took care of them.

The next step was to do some local adjustments with Viveza.  It’s a cool tool from Nik Software that allows you to select an area and control brightness, contrast, saturation and more.  The clouds in the upper right needed contrast enhanced a little.  Next a couple of Curves with layer masks helped open up the valley floor even more.  I tried some vignetting on the bottom and really liked the way it funneled the eye into the center of the image where everything was happening.  I didn’t think I’d need any  vignetting for the top corners but tried it anyway and liked that too.

I made some global adjustments too.  Selective Color helped warm the reds with some yellow, lighten the yellows and darken the blues.  Color Balance also shifted the overall color just a couple points to the yellow.

Sorry I don’t have images of each of the steps along the way but that pretty much finished up the first evening.  The image was starting to get interesting and it was time to sleep on it and come back another day to take a fresh look at it.
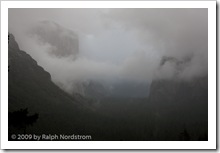
Yosemite_1
Original Capture
Yosemite_Edit_1
After Photoshop Session 1

Here are the two side-by-side.  It’s starting to take shape.  There’s a little hint of warmth in the clouds and they stand out more from the background.  The valley floor is better defined and the trees stand out a bit more.  There’s actually a subtle feeling of warm light down there.  El Cap and Bridle Vail Falls also are more prominent and their warmer tones contrast more with the overall picture’s coolness.  You can click on the images to enlarge them.

Even before I fell asleep that night I was thinking of what needed to be done next.  As you work on an image you become satiated to the colors, tonalities and contrast and you can’t tell if they are good or not.  You also get emotionally involved.  So it’s good to stop, get away from it and return another day.  Sometimes when you return you are pleased and other times you say to yourself, “What was I thinking?”  When I get the latter reaction it usually means starting over from the beginning.  We’ll come back to this technique when you get far enough along to start making proofs.

So come back for #4 in this series to see if I  said, “What was I thinking?” or if I picked up from where I left off.

To see more of my photographs click here.

Join me on an upcoming workshop.

Become a fan on Facebook and follow along.

(1037)

A Photograph from the 2009 Zion Digital Summit

The 2009 Digital Summit was held in Zion National Park this year.  I’ve attended it every year for the past four years now and always come away with several really good new ideas and techniques.  And also a few good photographs.

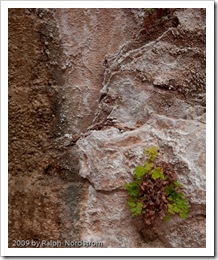
For various reasons I was not overly enthusiastic about the photos this year.  The light failed to materialize for the classic Watchman shot, there are composition issues with the Court of the Patriarch shot and on and on.  But last night I tried something that I’ve been wanting to do for some time now; that being, photograph the calcium deposits at Weeping Rock.

It turned out to be more difficult than I thought but there were actually several good images.  Here is my favorite.

(c) 2009 by Ralph Nordstrom

I’ll definitely be coming back.

To see more of my photographs click here.

Join me on an upcoming workshop.

Become a fan on Facebook and follow along.

(370)

On the Virgin River Bridge at Sunset

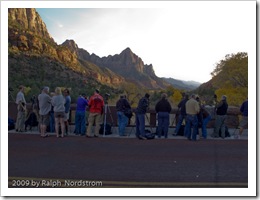
Zion National Park in Southwest Utah has a sundown tradition amongst photographers of all kinds.  We gather on the bridge over the Virgin River in hopes of being there for one of those spectacular sunsets that can only be viewed here.

It doesn’t always happen.  But the ritual continues.  About two hours before sunset we start assembling.  Talk to your fellow photographers and you’ll likely find people from around the world.  Or, someone from your own back yard.

Soon the crowd builds and begins to spread out across the bridge, jockeying for the best locations.  So we tend to bunch up around the premium spots.

(c) 2009 by Ralph Nordstrom

Continue reading “On the Virgin River Bridge at Sunset”

(596)

The Making of a Photograph Part 1 – Selection

I spent a night in Yosemite Valley a few weeks ago.  See 24 Hours in Yosemite.  It was great to be back; no, it was fantastic to be back.  Both sunset and the following sunrise were shot from Tunnel View, the parking area just as you emerge from the tunnel on state highway 41.  You can always count on company, especially for sunset.

I’m working on one of the photographs taken there that weekend.  But before showing you the image, let’s start with some comments about the light.  Sunset was a near cloudless sky.  The only clouds were a few cotton balls floating over Half Dome.  The rest of the sky was clear.  As the sun set the shadows filled the valley, eventually claiming to the tops of the cliff faces.  But as they did beautiful warm light embraced the the mighty granite but gradually gave way to approaching night.

The morning was quite the opposite.  During the night the anticipated storm rolled in and rain started to fall.  The valley was now full of clouds swirling about, shrouding the eternal granite.  And snow flurries came, keeping all of us at Tunnel View on our toes, protecting our camera gear and warming our fingers.

It was an image from the morning shoot that I selected to work on.  There were long periods of waiting.  The snow flurries passed over us and moved on up the valley obscuring most or all of it.  Then they would pass but the clouds wouldn’t be in the right positions.  Eventually a wonderful, exciting light came shortly after sunrise, imparting a very faint warm cast to some of the clouds.  The rest of the scene was cool, both in light quality and air temperature.

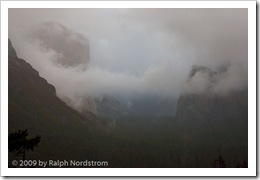
Yosemite_1This is the image I started from as it appears unaltered in Lightroom.  I selected it because of the sense of mystery created by the clouds that just give us glimpses of Bridle Vail Falls and the Cathedral Spires on the right and towering El Capitan on the left.  The hints of the beautiful warm hues in the clouds that I would try to pull from the image are present but not apparent in this image.  Rather, we see the predominantly cool mood.

Over the next several posts I’ll take you through the process of trying to recreate what I saw and felt that morning as well as what I discovered in this image.  There were some wonderful surprises in store.  So stay tuned.

The journey continues – read part 2.

To see more of my photographs click here.

Join me on an upcoming workshop.

Become a fan on Facebook and follow along.

(1090)

2009 Orange County Fair Awards

I was fortunate enough to have all three photographs accepted for the Orange County Fair this year.  And I was very surprised to learn that all three had won awards.  To today I finally made it out to the fair and sure enough they all had ribbons.

Death Valley Reflections had an Honorable Mention ribbon.

Bristlecone Moon also had an Honorable Mention ribbon.

And Virgin River and the Watchman had a 2nd Place ribbon.

You can see more of my work at http://RalphNordstromPhotography.com

(672)

Shoot Till You Can’t Shoot Any More

There’s a lot of talk amongst photographers about shooting in the golden hours – around sunrise and sunset.  There’s no disagreement that the light is wonderful at those times of the day.  The low angle gives excitingly long shadows and the fact that the sunlight has to travel through more of our atmosphere means it’s a bit softer and a lot warmer.

So you often find a lot of photographers lining up for sunset shoots at iconic locations.  The bridge over the Virgin River in Zion is a perfect example.  I’ve got to admit, I love to shoot sunsets from the bridge myself.  Most photographers will arrive early and stay about 20 minutes after the sun disappears below the horizon at which time the pack up and head off to dinner.

I like to stay till I can’t shoot any more.  The light show isn’t over by any means when the glow on the clouds fades.  It’s just a lot more subtle.  As the light fades exposure times increase and when you get up to 30 seconds then ISO starts to bump up.

Why do I like this light so much?  Well, because there is so much going on.  Many complex and intricate things are going on in the sky above.  You end up getting a delicate play of warm and cool light.  Everything is enveloped in a quiet, soft luminance.  It can be a magic unlike any other time of day.

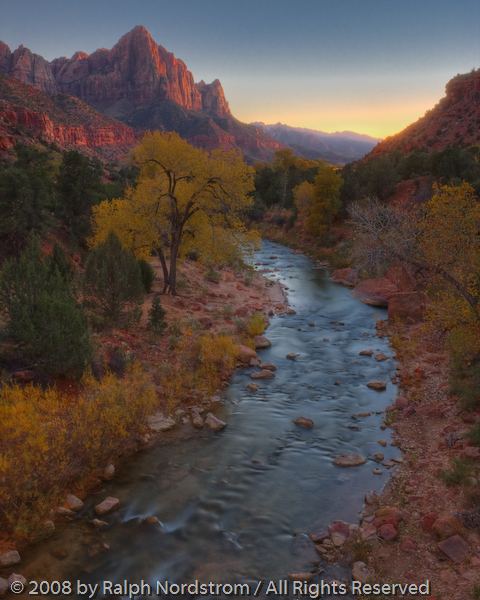
I was shooting on that famous bridge in Zion back in November.  If it hadn’t been for my two friends shooting with me I would have been the only one on the bridge.  Everyone else had long gone.  I was shooting HDR, 5 bracketed shots, something I’ve found to be very effective (don’t forget, the sky stays bright long after the sun disappears).  Each shot was varied by 1 1/3 stop.  Post processing consisted of Photomatix and a little Light Room.  Here’s what I got.  (You can click on these images to enlarge them.)

Watchman at Twilight

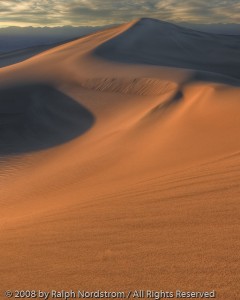
A few weeks before I took this Zion twilight shot I found myself in Death Valley on the Mesquite Flats Dunes, again at sunset.  I set up on this one composition and shot it for about an hour and a half.  Many people like the stark contrast created by the sun playing on the undulating surfaces of the dunes.  I like it too.

Mescuite Dunes Sunset
Mesquite Dunes Sunset

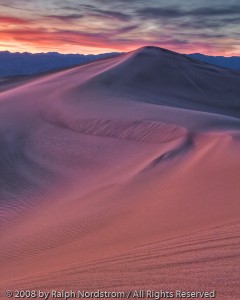
 But a while later comes the real show, at least for my money.  The play of colors becomes outrageous with reds, magentas, purples, oranges, yellows and blues.  And I love the forms and textures of the sand.  It’s truly amazing.

Mesquite Dunes Twilight

So for my money, you’ll see me out there (usually by myself) until I can’t shoot any more.  Hey, why don’t you join me and see for yourself.

Then and only then I’ll pack up my gear and head off for dinner.

Note:  All of the above photographs are HDR, not just Zion.

To see more of my work go to Ralph Nordstrom Photography.

(501)

High Dynamic Range Processing

High Dynamic Range or HDR has become a standard and often used tool when I’m in the field.  For example, a few weeks ago when I was shooting sunrises in Bryce Canyon we would arrive well before sunrise.  Generally I would start shooting when it was light enough to get a good exposure at 30 second, ISO 100 and f/16.  That’s a good 20 to 30 minutes before the sun peeks over the horizon.  In that wonderful pre-sunrise light the dynamic range is very low, maybe a total of four or five stops.  There is no need for HDR because under those circumstances I can get a good 8 and if I want 9 stops of dynamic range from my sensor.

But as soon as the sun is above the horizon all that changes.  The dynamic range jumps to at least 8 stops, probably more.  (I don’t take the time to scintifically measure the dynamic range because things happen so fast in those first few minutes.)  I don’t want to take any chances with that incredible light so I switch to HDR, just for insurance if nothing else.

Continue reading “High Dynamic Range Processing”

(565)

Shooting in Southern Utah

It was a week ago today that I arrived home from a week of shooting in Southern Utah.  As wonderful as California is with its beaches, mountains and deserts, Utah has to be one of the most exciting places on earth.  The air is clear and the vistas, breathtaking.  I remember the first experience with the Grand Staircase part of Utah when I was much younger thinking this was the real West, the likes of which you saw in early Westerns.  And for good reason as a lot of early Westerns were shot in Utah.

Continue reading “Shooting in Southern Utah”

(486)