Photographing the California Central Coast – Day 1

Tag a long on a scouting expedition of the California Central Coast.

It wasn’t long ago that I spend three days along the California Central Coast, scouting good shooting locations for the upcoming Central Coast and Napa Valley workshop.   I’m very familiar with the Big Sur coast but this was my first real exposure to the Central Coast north of San Francisco.  And I am excited with what I found.

My base of operations was the Schoolhouse Canyon Campground, a privately owned campground just east of Guerneville on the Russian River.  Clean, quite – I couldn’t have been more pleased.  But on with the photography….

The plan was to start to the north and work south over the next three day’s.  I was joined by a friend the first day which started out overcast and foggy along the coast.  That’s not a huge surprise as this area is still susceptible to the marine layer in September.  But, in this line of business, you work with what you got.  The first destination was Salt Point.  It’s hard to find because there are no marked turn-offs, just a sign saying you’re entering and another sign a few miles up the road saying you’re leaving.  So we overshot it.  And I’m glad we did because we came upon a creepy house that was falling apart.
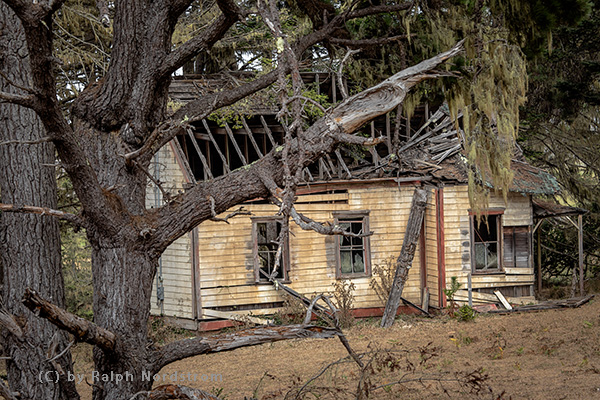
Creeph House

My friend suggested framing the house with moss hanging from the tree.  That was the perfect touch to give it the macabre feeling we were feeling,  And the overcast sky provided the perfect light.

Continue reading “Photographing the California Central Coast – Day 1”

(106)

What Would Happen if Your Hard Drive Failed?

Explore the various ways to back up your important data from a simple solution to a comprehensive one.

Have you ever asked yourself what would happen to your picture files if your hard drive failed?  I ask this question because a week ago, I lost a hard drive.

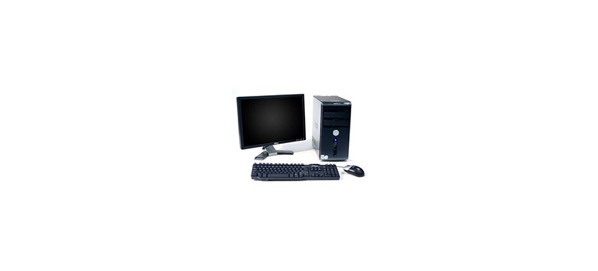
When I was just getting started, I would have lost everything.  I had a desktop computer with a single internal hard drive and everything was on it.

Backup 1

So what did I do?  I went out and invested in an external drive.  Now I could at least back up my important files.  That would include more than just the photo files but it definitely included them.  The advantage was that now I had two copies of my important files and it was unlikely that both the desktop hard drive and the external drive would fail at the same time.  But there was a downside….

Continue reading “What Would Happen if Your Hard Drive Failed?”

(110)

Photographic Gear – Filters

Here are the filters you should have in your camera bag.

This is the fourth in a series of articles that tour the contents of my camera bag. If you missed any of the previous three articles you can catch up with these links:

Photographic Gear – A Tour of a Photographer’s Camera Bag

Photographic Gear – the Camera Body

Photographic Gear – Lenses

In this article I want to discuss filters with you.

An Overview of Filters

Filters are a clear medium that is placed in front of the camera lens. The medium can be glass or, in some cases, a high-quality resin. The purpose of the filter is to enhance the image. Filters are one way in which photographers “get it in the camera,” a point of view that it’s better to get something close to the image you want in the camera so that it doesn’t require so much effort in the darkroom, digital or analog. Continue reading “Photographic Gear – Filters”

(193)

Photographic Gear – the Camera Body

I’m taking you on a tour through my camera bag and the first stop was the bag itself.

Click here to read the article: Photographic Gear – A Tour of a Photographer’s Camera Bag

The next stop is the camera itself. Now, by this, I mean the camera body, not the body and lens. I’ll talk about lenses later.

Like so many of us, my camera got put aside for quite some years. I was very active in photography in the 1970s. I took frequent trips to Yosemite, camping and exploring with camera in hand. I even worked in a photography studio lab for several years, learning the intricacies of color film processing and printing. But then things changed and time for photography dissolved. Until my daughter was about to be born in 1994, that is.

I bought a Canon EOS ELAN with a Tamron 28-200mm lens and shot countless rolls of film, mostly of the new joy in our lives.

clip_image002[4]I resisted the digital movement for a long time, preferring 35mm film. But when I finally joined the movement around 2000, I purchased a digital point and shoot with a big zoom lens. It was a Canon PowerShot Pro90 IS that I cut my digital teeth on with all of its 2.6 megapixels.

I tried to apply what I had learned in the film world for both color slide and negative films to the digital world. I also tried to apply what I had learned in the color darkroom to Photoshop. It took a while to realize that very little of the knowledge and experience I had gained carried over into the digital world. This required a whole new way of thinking, both in the field and in the digital darkroom. For example, with color slides, you normally want to underexpose a little to saturate the colors more. With digital, you overexpose a little to get more detail in the shadows.

clip_image004[4]It was in September of 2004 that I made the jump to a digital SLR when I upgraded to the Canon 10D. With a little over 6 megapixels, I was a big step up from the PowerShot. This is the camera I was carrying around in the duffel bag I mentioned in the previous article.

I did a lot of shooting with the 10D. I was intimidated by RAW processing at first so I shot in JPEG. Sadly, there are a lot of JPEG files that would have been great had I been able to capture them in RAW but, alas…. Eventually, I moved to RAW when I found a software program that made sense. Adobe bought the software when they were developing Lightroom. It made RAW conversion much less intimidating.

Continue reading “Photographic Gear – the Camera Body”

(272)

Thoughts on Art – What Is It?


What is Art?

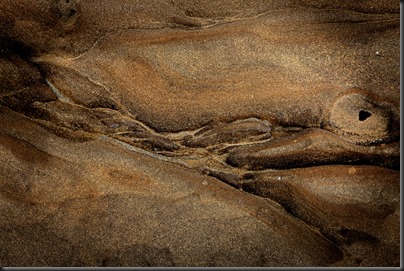
I want to talk about art.point_lobos_abstract_120809

Mind you, I don’t claim to be an expert. I’ve done some reading and talked to a lot of people about art and there are a lot of ideas out there on what art really is.

Some say art is a work that is displayed in a gallery or performed on a stage. I can see that (pun not intended; well, actually it was) although I’m not there – yet.

Others say that art is a work commissioned by a patron. Alas, not there yet either.

Still others say a work is art if the artist says its art. That’s fine as long as the artist can get others to agree.

But none of these definitions help me to grow as an artist. They don’t provide any indication of a path I can take to become an artist (other than perhaps bribing someone to hang one of my photographs in a gallery, at least for a day or two).

I’m looking for a definition of art that will provide some guidance in my quest to become an artist – to grow as an artist.

Continue reading “Thoughts on Art – What Is It?”

(155)

Four Types of Photographs

Explore four different photographic options from the same raw file.

Something hit me the other day on the way into work. That happens quite often. I mean I didn’t get hit by a car or anything. I got hit by an idea. And the idea this time is that there are four types of photographs. In this blog post I want to illustrate what I have in mind by showing you the same raw file rendered four different ways.


Continue reading “Four Types of Photographs”

(285)

Mastering Night Photography – Focusing

Solve your focusing challenges in nighttime photography.

A lot of people are doing nighttime photography these days including yours truly. There are many good sources of information on nighttime photography. I’ve written a few blog posts myself (Exciting Nighttime Photography in 10 Easy Steps). Nighttime photography falls into two categories – star trails and night sky. In this post I want to elaborate on something I’ve discovered recently with regards to night sky photography.

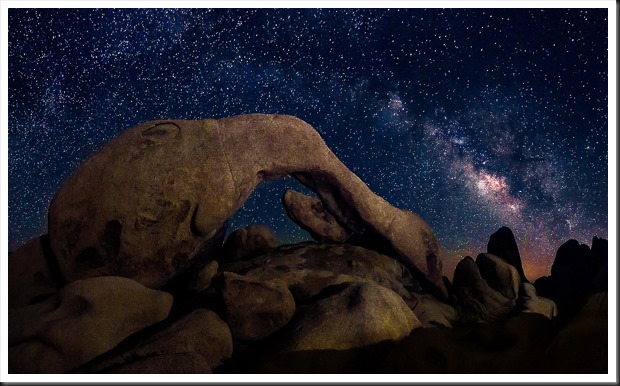
double-arch-joshua-tree-140628Nighttime photography is pretty much like daytime photography. The biggest difference is you can’t see what you’re doing. Let’s run through a quick comparison of camera settings in daytime and nighttime photography.

Continue reading “Mastering Night Photography – Focusing”

(3623)

Making a Photograph – The Technical and the Creative

Exlore the technical and creative sides of fine art photography.

There’s no question about it; photography is very technical. There are many technical skills that must be mastered to become a proficient photographer. And they didn’t all just crop up when digital cameras came on the scene. Film cameras required a great deal of technical know-how also.

If you were taking a grand landscape photograph back in the days of film, a composition that had a very interesting foreground and a spectacular background, you had to know how to control your depth of field so that the foreground and the background and everything in between would be in focus. This required a technical knowledge of the three factors that affect sharpness; those being, focal distance (the distance from the camera to the object you’re focusing on), the focal length of the lens and the f-stop.

Exposure in the film era was perhaps even a little more intimidating. Your ISO was determined by your film and you selected that when you purchased it. But you had to set your shutter speed and your f-stop manually. Shutter speed wasn’t too hard to understand. If you decrease the length of time the shutter was open, you decrease the amount of light that passed through the lens by the same amount. A shutter speed of 1/30 of a second let twice as much light through the lens as 1/60 of a second. Pretty simple.

But f-stop didn’t make any sense at all. If your f-stop was f/8 and you wanted to double the amount of light coming through the lens, you set it to f/5.6. The amount of light was doubled but the number was smaller. And it wasn’t what you might intuitively have expected it to be, namely, f/4. It could be a bit baffling. And the only way to get a grasp on it was to memorize these weird numbers. With film you were stuck with manual exposure and there was no getting around it. With digital you can use one of the automatic exposure modes so you can get away without fully understanding this f/stop stuff. But it’s still best if you do.

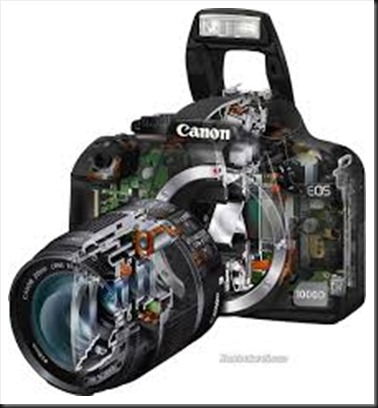
digital-cameraThe coming of the digital camera introduced a whole new level of complexity. In the film age the camera was a simple mechanical device. You were responsible for doing practically everything – deciding where to focus, the shutter speed to use and the f-stop to use. The only role the camera played was to open the shutter for the precise length of time that you specified when you set the shutter speed.

Continue reading “Making a Photograph – The Technical and the Creative”

(2603)

Photo Tips – Getting Great Exposures the Easy Way

Always shooting in Automatic mode? Here’s an easy way to improve your photographs without having to bother with all the technical details.

If you’re a person who’s interested in just taking pictures and don’t want to be bothered with all the technical details, you are probably photographing with your camera set to automatic mode. Often times automatic mode is indicated by a green box. Probably the handiest feature of automatic mode is that the camera makes all the decisions for you. All you have to think about is getting the people you’re photographing in the frame and pressing the shutter. The camera does everything else.

But the problem is that the camera doesn’t always get it right. Often times it will overexpose parts of the image making them look washed out. But there’s a simple way to avoid this without mastering all the complicated technical details of shooting in manual mode. And that is P mode.

Using P Mode

The P and P mode stands for Programmed Automatic. In P mode the camera allows you to make some of the decisions while it makes the rest. You get to choose whether or not to use flash, and set the ISO, exposure compensation and white balance. The camera sets the f-stop and shutter speed.

Let’s take these controls one by one. Let’s start with flash. You can decide whether you want to use flash or not. If you’re shooting in bright daylight or even on a cloudy day you probably don’t need flash. But if it’s a little darker you can always choose to turn the flash on. If you don’t know how to turn your flash on or off you’ll need to consult your camera’s manual.

home_140907_IMG_9704-6 Continue reading “Photo Tips – Getting Great Exposures the Easy Way”

(1996)

Making a Photograph – Personal Style

Discover your personal style and use it to improve your photography.

Personal style. What is it? I like to bring up the topic of personal style in my workshops. I think it’s important to understand that each of us has a personal style whether we know it or not. It comes from the fact that each of us is a unique individual and sees the world in our own personal way. Our skill levels are different. Our life experiences are different. Our interests are different. And that leads to each of us having our own individual world view.

hidden-valley-130119

Continue reading “Making a Photograph – Personal Style”

(825)