Arriving after the Light is Gone

Some photographers don’t seem to understand that the good light in the morning is BEFORE the sun comes up, not an hour or two after.

How often do I see people arriving at a great site about the time I’m packing up and heading back?  It happened again this morning.  I was photographing the West Temple and Alter of Sacrifice from half way up the tunnel road.  Granted, I get to a site a little on the early side.  The 45 minutes before sunrise rule gets stretched a little.  I like to arrive while the stars are still out.  Why?  I just like the quite time.

Continue reading “Arriving after the Light is Gone”

(1081)

A New Lightroom Technique

Explains a Lightroom technique for dealing with difficult lighting conditions, especially with those associated with dawn and twilight.

I love the time in the morning when the eastern sky just begins to show the first hint of the dawn.  The world goes through an amazing transformation up until the sun peeks over the horizon and begins its march across the sky.

My camera and I are very active during that time but I have precious little to show for all the gigabytes of images we’ve captured.  That’s not to say I haven’t tried really hard.  But none have turned out to my satisfaction.  They all seem so heavy-handed and certainly don’t capture the serenity of the moment.

Well, I had an idea today.  It goes back to something I experimented with a couple of years ago and couldn’t get to work.  The basic idea is to work in black and white first and later restore the color.  The thought behind this is to get the tonalities right first without the distraction of color.

What I am about to describe is done in Lightroom and doesn’t use any of the local adjustment features of LR 2.

So, my first approach was to set the image to Grayscale in the Treatment area of the Basic control group in LR.  I wasn’t after anything fancy here, just to get the image into BW.  Next I adjusted tonality – black point, white point, contrast, etc.  In this step I was after a good looking BW image.  Next, back in the Treatment area I set the image back to color.  What I found was the color image was WAY over saturated.  Later I learned that was because I was working in RGB and not Lab.  So I tried Lab but never really got the hang if it.

Then today I had an idea.  I was working on an early morning photo from last month’s Grand Canyon trip and wasn’t happy with the way this one was turning out either.  So I fired up LR again and selected the image I had been working on.  Let me walk you through the process.  It’s the same idea but executed in a much more controlled manner.

Here’s the starting image.  Actually, due to the extreme dynamic range, this is an HDR image.  But this was the starting point.  There’s lots of atmosphere in this image.  And a lot of blue.  You would expect it to be cool because the main source of light is the blue sky.  I like the sense of atmosphere but I’d like to moderate the blue, bring some warmth into the rocks and maybe a little more definition to the cliffs in the middle ground. _A1P1372_0_1_fused-1 The first step is to render the image to black and white.  But instead of using the Grayscale feature, I turned to the HSL control.  You can render colors in gray scale by reducing their saturation.  So I selected Saturation and set the slider for each color to zero.  The result is a BW image.
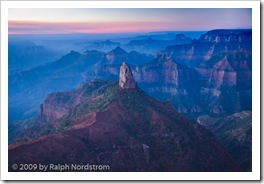
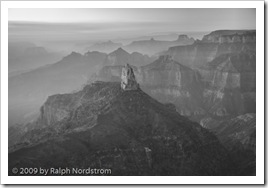
_A1P1372_0_1_fused-2 It looks good this way.  There is still lots of atmosphere in the distant haze.  But I’d like to try to get a little more contrast in the middle ground cliffs without loosing the hazy feeling.  And I’d like to open up the dark area in the center and bottom a bit.  A little playing around with the Basic controls yielded the  following.
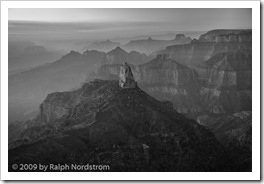
_A1P1372_0_1_fused-3 In this example the differences are pretty subtle but can be seen when you enlarge the two images.

The next step is to reintroduce color by increasing the saturation one color at a time.  The nice thing about this process is that it turns out to be easier to add color than to try to take it away.  You can always add a little of one color, them some of another and jump back and forth until you get close to the effect you want.  So after a few minutes this is what emerged.
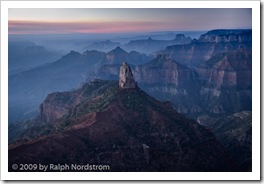
_A1P1372_0_1_fused-4The image is still cool but it’s not the overwhelming blue of the original.  The foreground has a lot more detail and is much more to my liking.  The middle ground has a bit more definition because of the adjustments in the tonality we made in the last step and the reduced intensity of the blue.

But it’s still too blue.  The image would be strengthened if there were some contrasting colors.  It doesn’t have to slap you in the face; there just needs to be some soft oranges and yellows to complement the blues.  This will add a lot of visual interest to the image.  To do that I turned to Color Temperature.  Increasing the color temperature (shifting the color balance to the yellow) produced this image.
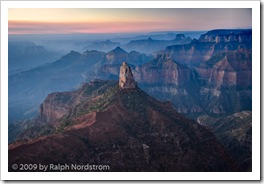
_A1P1372_0_1_fused-5This change produced a very pleasant surprise.  By adding yellow the spire in the center of he picture separated itself from the blue background and the image became much  more three dimensional.  The effect is subtle but very real.

One final change is needed.  The sky in the upper left hand corner is very close to being blown out and very distracting.  I tried several things to darken it, desaturate it and the like.  I considered waiting until I got the image into Photoshop to deal with it.  But then I decided to crop it out.  The sky isn’t needed to make this image work.  It’s really the rows of receding ridges reaching above the blue haze that gives this image its impact.  So out came the crop tool.
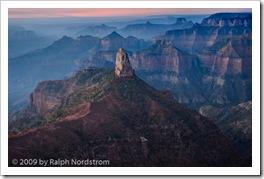
_A1P1372_0_1_fused-6 This is much more pleasant than what I’ve been able to come up with over the past several weeks.  I’ll sleep on this and return to it another day.  I find that I get caught up in what I’m trying to do and when I see it a day or two later I often wonder what I was thinking.  So there may be some more adjustments in Lightroom but it’s very close to being ready to import into Photoshop for the fine tuning.

To make the before and after comparison easier, here they are side-by-side.

_A1P1372_0_1_fused-1 _A1P1372_0_1_fused-6

We conduct photography workshops.  Click here to check them  out.

To see more of my work visit http://RalphNordstromPhotography.com

Finally, we invite you to join us on Facebook and become a fan.

(666)

Default Camera Configuration

When I’m out shooting I often make adjustments to my camera settings to get the right shot.  The problem is it’s easy to forget what you’ve done.  Then the next time you grab your camera and start shooing you might miss the shot because something is configured wrong.  So I have this routine I go through in the hotel room every night.

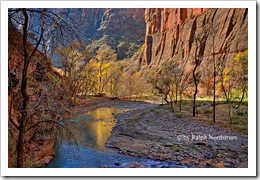
Riverside_Walk_2008

First, I clean everything.  I carry a soft cotton dish towel in my camera bag.  First I wipe down the camera body and all the lenses.  I try to not only wipe off the surfaces but all the nooks and crannies.  I’m very careful not to damage anything.

Next I check the front and back elements of each of the lenses to make sure they are spotless and dust free.  The front element will get blown off first.  I prefer the Giotto Tornado as it’s designed specifically for cameras.  If that doesn’t get everything I’ll use a microfiber lens cleaning cloth.  As a last resort I’ll use a lens cleaning solution.  The best way to do wet cleaning is to put a drop or two on the microfiber cloth, not on the lens element.  The back element gets blown off.  It usually doesn’t need any more than that because it isn’t exposed to the elements near as much as the front element.

I also check my filters, making sure they too are spotless.  I use the same procedure that I use for cleaning the lens elements.

Next I clean the camera sensor.  Again, I blow it off first using the Giotto Tornado.  I remove the lens, pop the mirror out of the way using the camera’s manual clean function and hold the body with the opening pointing down.  I’m really careful how hard I blow on the sensor.  I prefer to use puffs of air, not a tornado blast like the name suggests.  The last thing I want is some microscopic particle of sand to get embedded in the sensor’s filter.

I have a loupe from the Visible Dust people that lets me look at the sensor under magnification.  Its six LCD lights really light it up and if you  look carefully you can see dust and stains.

If there’s still dust that the Giotto didn’t get rid of the next step is to use Visible Dust’s Arctic Butterfly.  You charge the bristles with static electricity by spinning the brush with the built-in motor in the handle.  The static charge is usually enough to remove any clinging  bits of dust.  If that doesn’t work then wet cleaning is necessary.  I’d rather not get into that here.

Once the camera body, sensor and lenses are all cleaned there’s one last step.  I set the configuration of all my camera controls to their default settings.  These are the setting I shoot with most often.  We probably all configure our cameras somewhat differently but  here are my default settings (I have a Canon 1Ds Mark III so some of these settings may be specific to Canon).

  • Lenses – set to auto exposure.  Turn image stabilization (vibration reduction for Nikons) on of the lens has it.
  • Exposure – Aperture priority
  • Exposure compensation – 0 stops
  • ISO – 100
  • Metering – Evaluative
  • Drive – Single shot
  • Auto-focus – One shot
  • Exposure bracketing – 0 stops (off)
  • Highlight tone priority – off
  • Number of bracketed shots – 3
  • High ISO speed noise reduction – off
  • Mirror lockup – off
  • White balance – Automatic
  • File format – RAW

One of the nice features my camera has is a ‘My Menu’ in which I have put the menu options I use most frequently.  This makes resetting the camera to its default configuration much simpler as there’s just one place to go in the labyrinth of menu options.  (It also makes it a lot easier to change options in the field.)

The other part of the nightly ritual is to backup memory cards, preferably in two places.  If I only have one backup I’ll refrain from reformatting the card until I get home.  But if I can make two copies I’ll reformat the card.

Oh yes, there are always a lot of batteries to recharge – camera, laptop, external drive, cell phone, GPS,….  (Hint: I carry a power strip with me because there are never enough available sockets in a hotel room.)  After all that, it’s time to get some sleep because sunrise is coming quickly.

To check out our workshops click here.

To check out our photographs click here.

To join us on Facebook click here.

(777)

Learning to Use Your Camera

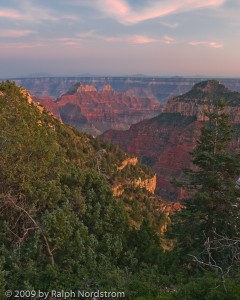
Grand Canyon North Rim

A good friend of mine who conducts workshops tells the story of one of his attendees who showed up with a top-of-the-line camera.  He proceeded to set everything on automatic – exposure, focus, white balance, everything.  When my friend questioned this, suggesting he at least use aperture priority, the person said that he bought the best camera so that the camera could make all the decisions.  He was under the false impression that a great camera would automatically take great pictures.  And, apparently he didn’t want  to have to think about all that stuff that we think about when we’re out shooting.

In my own workshops I notice that some attendees often lack the basic knowledge of the workings of their cameras.  I recall a photographer in the dark passages of Antelope Canyon asking anyone if they knew how to get the camera to take exposures longer than 30 seconds.  It’s a little late to be trying to figure that out when it’s so dark you can barely see your camera.  Or when I talk to people about exposure compensation or bracketing it’s a bit surprising how often they don’t know how to do that.

A great camera is like a great musical instrument or a great golf club.  Having one doesn’t make you a great photographer no more than a great golf club makes you a great golfer.  But, just like the right golf club can imporive the game of a competent golfer,  a great camera in the hands of an accomplished photographer extends the photographer’s range of expression.

A lot of photographers get carried away with their equipment.  They buy the best of this and the best of that.  But not always to they get their money’s worth; that is, they don’t use their equipment to the fullest.

That’s why it’s a good idea to include workshops and other training opportunities in your photography budget.  A quality camera without the knowledge to use it will not produce the images it is capable of creating.  And a workshop is more than being taken to beautiful places.  It is an excellent opportunity to learn to exploit the great features built into your camera.

Workshops are also an excellent opportunity to expand and stretch your creativity.  With an emphasis on composition, light, personal expression and more,  workshops can challenge you to focus on the way you see the world and communicate it to others.

Click here for some workshops to consider.

Click here to see more of my work.

Click here to join me on Facebook.

(726)

Digital Camera Program Modes

Photography Tips – Your Digital Camera’s Program Modes


Modern digital cameras are in reality complex computers.  They have memories, processors, input and output devices.  And, like computers, their capabilities (read ‘processing power’) doubles every 18 months to 2 years. 

One of the advantages of all this progress is the program modes that are available.  In this photography tips article we’re going to take a look at some of these modes and get an idea of what they can do for us.

Often the program functions are accessed via a dial on the computer.  In other cameras they are accessed from the menu.  Or, some cameras use a combination of both.  Your camera manual will spell this out for you.

The modes are divided into three broad categories – automatic, semi-automatic and manual.  Let’s look at each beginning with Automatic. 

Continue reading “Digital Camera Program Modes”

(1253)

180 or 360 ppi?

I print my fine art prints with Image Print, an excellent RIP.  And I print on an Epson 4800.  Image Print gives you the option of printing at 180 or 360 ppi.  I’ve printed a lot of great looking, rather large photographs at 180 ppi.  A lot of my friends are shocked.  They say I’m compromising the quality of the print.  But no matter how close I scrutinize the prints I really can’t see any difference.

Enter Genuine Fractals.  Genuine Fractals really objects if you try to resize an image to 180 ppi.  The smallest it is comfortable going is 240.  To get it to accept 180 ppi I have to fake it out. 

But the fact that it defaults ot 240 raises all sorts of questions.  What if I resize at 240 ppi and print at 180 or 360?  For that matter, is there a difference between 180 and 360.  So the other day I was printing some 16X24 images and decided it was time to finally ran a test. 

Continue reading “180 or 360 ppi?”

(1324)

A Ten-Step Program for Grad ND Filters

I have a couple of Lee graduated neutral density filters in my camera bag.  I don’t use them very much because I’m kind of an HDR guy.  But the past couple of mornings we’ve had some very clear sunrises and given the location of our home in the Southern California foothills this turned out to be a good opportunity to play around with my grad ND filters.

I discovered a few very interesting things.  I’m just going to provide a checklist here without any illustrations.  Hopefully it will make sense.

Continue reading “A Ten-Step Program for Grad ND Filters”

(2310)

The Photoshop Two-Step

I have a good friend who is a very fine photographer who hates Photoshop.  Not me.  I love it and will spend days and weeks on a single image.  But my friend hates Photoshop and wants to get done with it as quickly as possible.

So I showed him a simple two-step approach to Photoshop that gets you a long ways toward a great looking photograph.  And I’d like to share it with you now.

Continue reading “The Photoshop Two-Step”

(1067)