2019 Big Sur Photography Workshop

Explore the Big Sur coast with your camera. Broaden your photographic skills with award winning photographer, Ralph Nordstrom.

After a two-year absence from Big Sur due to the landslides of 2017, it’s past time to return. The Big Sur Photography Workshop is on for next month, November 11-14, 2019 and there’s an opening with your name on it.

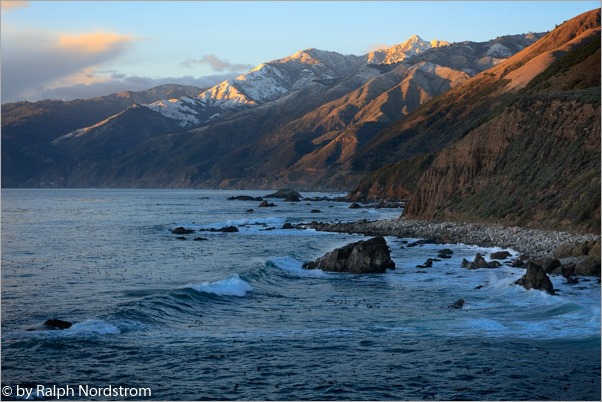
Big Sur holds some of the most stunning coastline in the entire United States. The mile-high Santa Lucia mountains plummet into the Pacific Ocean, creating a scenery seen nowhere else.

Big Sur Coast

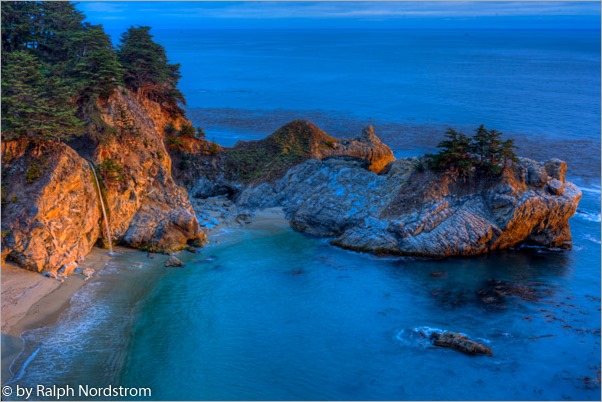
Big Sur is also the home to redwood groves and waterfalls, found in the streams that cascade down the face of the mountains. One particularly famous waterfall spills onto the beach in McWay cove.

big_sur_130806__SM37343_4_5-Edit

Much more awaits along this 100 mile stretch of coast that will challenge and reward you photographically.  Would you like to join me and experience this beautiful coast for yourself? More information can be found on this link – Big Sur Photography Workshop. Or email me at Ralph@RalphNordstromPhotography.com.

See you in Big Sur!

(61)

Super Utah Photography Workshop

Join me for the exciting Super Utah photography workshop.

The Super Utah photography workshop is coming up next month, October 19-25, 2019 and there’s an opening with your name on it. “What’s this,” you say? Take a look.

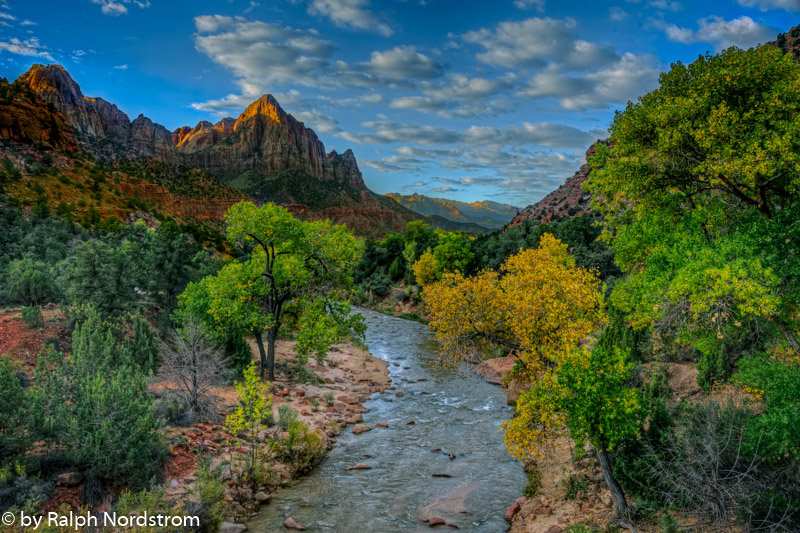
Two of Utah’s most beautiful national parks are Zion and Bryce Canyon and we cover them both in a week of exciting photography. Zion has been described as ‘a red Yosemite’ with its red sandstone cliffs that tower thousands of feet above the Virgin River, lined with cottonwood trees that are painting themselves in fall colors. The canyon itself offers many photographic opportunities but that’s not all there is. Take the Zion tunnel to the top upper reaches of the park where another world awaits. Sandstone cliffs and hoodoos are carved with intricate patterns. And the light in Zion is extraordinary.

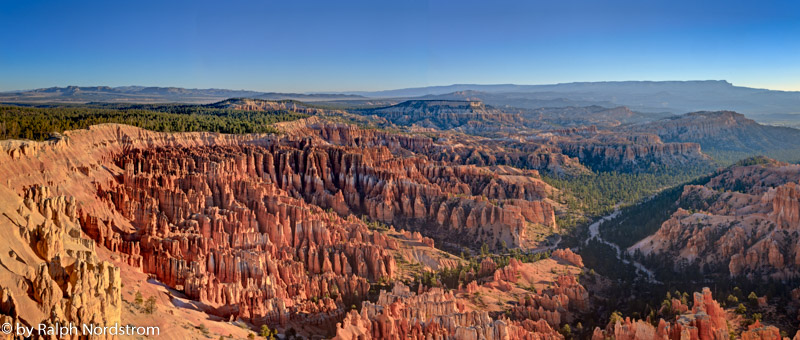
Bryce Canyon National Park is about as different from Zion as you can get. Instead of gazing up, you look down into the vast wonderland of fins, windows and hoodoos carved out of bright red limestone. Sunrise at Bryce Canyon is nothing short of spectacular. You will be hard pressed to find another location as exciting as this.

But that’s not all. From the Kolob Plateau to Devil’s Garden in Grand Staircase Escalante there is a rich supply of fascinating places to photograph.

Would you like to join me and experience these wonders for yourself? There’s an opening just for you. More information can be found on this link – Super Utah Photography Workshop. Or email me at Ralph@RalphNordstromPhotography.com.

See you in Utah!

(108)

The Call of the Redwoods

Photographing the coastal redwoods of Northern California should be on everyone’s bucket list.

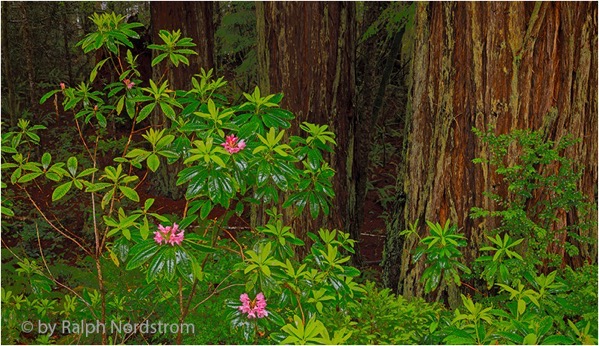
Rhododendron spring 130529

It’s often said that California has everything.  And it’s true.  From the southern border with Mexico to the northern border with Oregon, the state goes from parched desert to lush mountain slopes. 

California also has the oldest living trees in the bristlecone pines of the White Mountains, the most massive trees in the Giant Sequoias of Sequoia and Kings Canyon National Parks, and the tallest trees in the Coastal Redwoods along the California coast.

Can you imagine what it is like to experience these trees?  Just think of it.  The oldest bristlecones were seedlings when the pharos of Egypt were laying massive stone upon stone in Giza.  And both the giant sequoias and coastal redwoods were seedlings when Christ was born in Bethlehem.

The coastal redwoods are the monarchs of these mountains, especially the unlogged old-growth groves….

Continue reading “The Call of the Redwoods”

(183)

Why Lightroom?

A brief rundown on the strengths and weaknesses of Lightroom

I remember when I first tried to process RAW files back in 2002.  I had been shooting JPEG up to that point and heard about RAW files, so I thought I’d give it a try.  I used the only RAW conversion program available to me at the time – Camera RAW in Photoshop 7.1.  It didn’t go well.  I couldn’t figure it out, so I continued to shoot in JPEG. 

Then I heard about a product called RawShooter from a Danish company – Pixmantec.  It had just become available and it was free.  With nothing to lose I downloaded it and checked it out.  It was fantastic.  It was so easy to use.  When the company offered the paid version, RawShooter Premium, I was all in.

Then, on June 26, 2006, Adobe announced they had purchased the ‘technology assets’ of Pixmantec for incorporation into Lightroom which was in the third round of beta testing at the time.  Version 1 was shipped in February of 2007 and us Pixmantec customers were grandfathered in.  With RawShooter Premium no longer available and a free version of Lightroom 1, I switched to it and was pleased to see some of the functionality in RawShooter Premium that I especially liked appear in Lightroom 1 that hadn’t been in any of the beta versions. 

Michael Reichman of Luminous Landscape and Jeff Shewe in the Photoshop Hall of Fame put together a video training course which I grabbed up right away.  And my experience with Lightroom was off to an excellent start.

A Brief History

Lightroom was designed from the start for digital photographers.  The core functionality was to be RAW image conversion.  But digital photographers need a lot more than just that. They needed to be able to organize their image files, edit them, categorize them, tag them, export them, print them and more.  In short, professional digital photographers needed to be able to run all aspects of the creative side of their businesses using Lightroom.  It’s tempting to think of Lightroom as a tool to adjust and enhance our images but as you can see, it’s so much more.

The Heart of Lightroom – the Catalog

With the introduction of layers in Photoshop, the notion of non-destructive enhancements was introduced.  The idea is that the original image is priceless and if adjustments change it and they don’t work out, you’re in trouble.  You can’t start over again.  So, Photoshop introduced layers.  Virtually all of the adjustments you could apply to the original file could be applied in layers stacked one on top of the other.

To give the photographer the ability to make adjustments non-destructively, Lightroom took a different approach.  The developers created a catalog that is at the heart of Lightroom.  Understanding how the catalog works is key to getting the most out of Lightroom.

Simply put, the catalog keeps track of virtually everything about the image files.  First, it knows the location of the file – the hard drive it is on and the folder it is in.  When Lightroom creates a JPEG preview file that it uses when it displays the image on your monitor, the catalog knows the name of the preview file and where it is. If you use the star method of ranking files or you flag them or assign a color to them, all that data is kept in the catalog. 

And when you make adjustments such as Exposure or Contrast or Highlights or Saturation or any of the other available adjustments, every one of them are kept in the catalog as a simple list.  This gives you a full history of all of the adjustments.  If you decide to start over, since the original RAW file hasn’t been changed, you can keep the original list and create a new list.  This gives you the ability to try different approaches for an image.  And the original RAW file remains unchanged.

Continue reading “Why Lightroom?”

(125)

The Qualities of a Powerful Landscape Photograph

When working on a photograph and wondering where to start, it’s helpful to know what is possible.

I think we all understand that serious landscape photography does not document nature but interprets it.  A well-made landscape photograph captures the photographer’s response to what was experienced and is able to convey this response to the viewer.

The Professional Photographers Association has 12 criteria by which they judge their competitions.  Granted, the PPA membership consists of very few fine art landscape photographers but still, the criteria of a great photograph are pretty much the same.

Here are the twelve criteria (the order is my own):

1.    Impact

2.    Composition

3.    Center of Interest

4.    Lighting

5.    Color Balance

6.    Technical Excellence

7.    Story Telling

8.    Creativity

9.    Style

10.  Presentation

11.  Subject Matter

12.  Technique

I mention these because there’s a lot that goes in to making a great photograph and these criteria provide a framework in knowing what to look for.  But rather that exploring these criteria in words, let’s look at a few photographs.  And let’s do it by looking at two examples of the same image – what it looked like when it came out of the camera and what it became when transformed in the digital darkroom.

Image 1

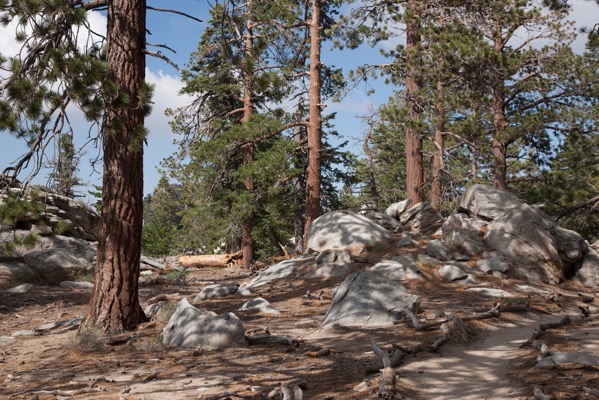
The first image is a scene in the mountains of Southern California.  I was wondering by myself along a remote trail.  The sun was sinking lower and lower in the sky and I was thrilled climbing the trails and walking among the trees and rocks.  I came upon this scene and it just felt right.  I had to capture it.

San jacinto 180720 SM37804

The mid-afternoon light is actually quite nice.  It’s not spectacular but it’s very pleasant and doesn’t pose any exposure challenges. The shadows make for interesting patterns on the forest floor.  And I tried for a composition that captured the energy and harmony I was feeling while at the same time portraying the stately strength of the trees.  And the center of interest is the rocks that form a sort of path that leads up to the trees on the right.  The trail leads out of the frame on the right, inviting the viewer to explore what lies beyond.

It’s a very nice picture but now it’s time to make it even nicer.  An effective way to add impact is to increase the contrast.  (This will be a recurring theme.) The shadows can be darkened along with the midtones.  Care is taken, however, to not lose detail in the shadows.  You also have to be careful with the clouds.  They have more detail that the RAW image doesn’t show, detail that can be coaxed out.

Continue reading “The Qualities of a Powerful Landscape Photograph”

(200)

Finding the Soul of a Photograph

Finding the soul of a photograph is a journey that can take many paths.

I often get asked if I manipulate my photographs.  My answer is always, “Yes, of course!”  But no one has ever asked, “Why?”  And I have an answer for that too.  “Because my camera doesn’t know what I’m feeling.”

For me, making a photograph is making art. I want to do more than capture where I’ve been and what I’ve seen.  I want to share with you what I feel when I’m out there.  And that is often more intense than what my eyes see.

I was in Long Valley last summer preparing for a photography class I was teaching for the Mount San Jacinto Natural History Association.  It was midday and I was walking around wearing my amber tinted Polaroid sun glasses.  Why do I mention my sun glasses?  Because I was getting very excited about what I was seeing.  And for those of you that know about midday light, it is anything but exciting.  But the amber tint of the glasses and the effect of the polarization on the sky and foliage got me excited.  Added to that was how good it felt to be back in these mountains after an absence of 15 years.

I want to share what I feel…. And that is often more intense than what my eyes see.

So, I asked myself if it was OK to make photographs that reflected my mental state when it contradicted the physical reality of what my eyes saw. 

Continue reading “Finding the Soul of a Photograph”

(207)

JPEG or RAW

Which file format is better – JPEG or RAW. Well, it depends….

Our digital cameras give us a choice of two file formats in which our images are stored – JPEG and RAW.  In fact, some digital cameras only store images in JPEG format.  What’s the difference and is one preferred over the other?  Let’s take a look at each.

But before we begin, I was curious what JPEG stands for, so I looked it up.  It’s pretty weird – Joint Photographic Experts Group.  Strange indeed.  But. be that as it may, JPEG is widely used.  Practically every image you see on the web is JPEG although you occasionally see other formats.  If you use a lab to print your photographs, there’s a good chance they will ask you to send them JPEG files.

Continue reading “JPEG or RAW”

(99)

Everyone Can Take a Picture but Few Can Make a Photograph

Making a photograph involves much more than ‘point and shoot.’

“Anything that excites me for any reason, I will photograph; not searching for unusual subject matter, but making the commonplace unusual.”

~ Edward Weston

There are millions of pictures taken every day, every hour even.  They are fun and spontaneous.  They record moments in peoples’ lives.  They are shared on social media and sent in emails. And when viewed later, they bring back memories.

It’s easy to take a picture.  The dominant camera is the smart phone.  Just hold it up and tap the red button.  It takes no time at all and the reward is instantaneous.  It requires no particular skills or training.  It’s easy; anyone can do it.

These pictures will fill the internet’s networks and some may even end up on peoples’ walls or in scrapbooks.  But mostly when shared face to face, it’s from the smart phone’s camera roll.

Making a photograph is not at all like taking a picture.  It’s not easy.  It requires training, experience, special skills and patience.  The rewards are not instantaneous and not everyone can do it.

Continue reading “Everyone Can Take a Picture but Few Can Make a Photograph”

(107)

Photographing Death Valley National Park

Enjoy some of the photographic wonders of Death Valley National Park on an exciting photography workshop.

People sometimes ask me if there’s anything to photograph in Death Valley.  At 5,262 square miles of desert and mountains, it’s one of the largest national parks.  The valley itself is 140 miles long.  Think of it.  It takes three hours to drive from one end to the other.  And surely, in all that space there should be something to photograph.  And yet, most of it is desert.  In fact, the valley itself is the hottest, driest place on earth. It’s also the lowest spot in North America at 282 feet below sea level.  So what’s to photograph?

Mesquite Flats Dunes

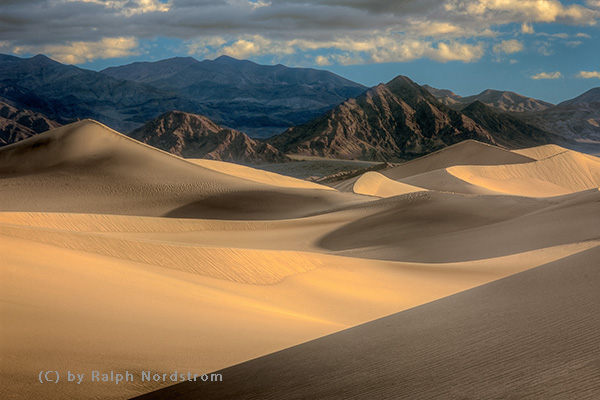
Death valley dunes 2011

Being a desert you might expect sand dunes and you would be right.  The Mesquite Flats Dunes are in the middle of the valley near Stovepipe Wells.  While not excessively high, they cover a large area and provide wonderful photographic opportunities at both sunrise and sunset.  I prefer sunrise which means heading out across the desert while it’s still dark to arrive at the dunes just as it’s starting to get light.  I go to a place that’s not heavily visited.  It’s an exciting experience.

Zabriskie Point

Zabriskie point pano 140211

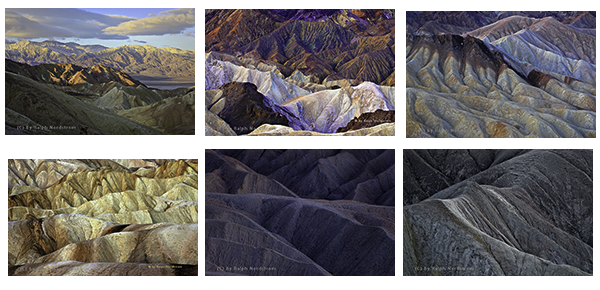
Zabriskie Point is one of the most visited places in Death Valley.  It attracts photographers and tourists alike.  At first it looks like an inhospitable badlands with not much to offer the photographer except a lot of tan wilderness.  But at the right time of day these ‘bad’ lands become extraordinarily beautiful.

Zabriskie collage

It’s all a matter of being there at the right time.

Continue reading “Photographing Death Valley National Park”

(229)

Five Tips for Successful Hand-Held Photography

These five tips will help you improve your hand-held photography and bring home photographs you will be proud of.

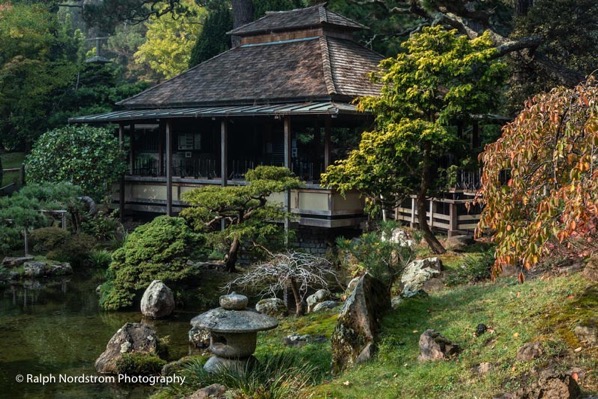
japanese tea garden, golden gate park

As landscape photographers, we prefer to shoot from a tripod. There are a lot of good reasons for this.  Tripods help to ensure a sharp image.  They slow you down so you’re more likely to think through your shot.  They can also keep you from taking so-so shots; if it’s not worth the effort to set up a tripod it’s not worth taking.  And you can dial in very precise compositions.

But when spontaneity is appropriate, tripods simply don’t work. Shooting hand-held gives you the freedom and spontaneity that is required in some situations but it also presents challenges that you don’t even think about when shooting from a tripod.  Fortunately, there are several things you can do to overcome these challenges and create great photographs.

1. Shutter Speed

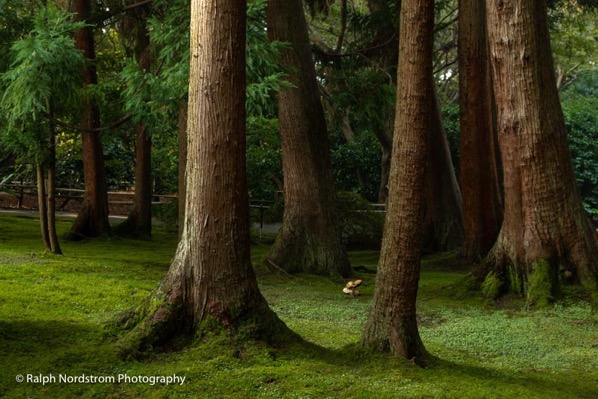
japanese tea garden, golden gate park

With a tripod we don’t worry about shutter speed.  It doesn’t matter if it’s 1/1000 second or 30 seconds.  But when shooting hand-held, the right shutter speed is essential for a sharp image.  If the camera moves ever so slightly while the shutter is open, you have a blur.

Fortunately, there’s a simple way for you to determine what shutter speed will give you a sharp image and it depends on the focal length of your lens.  The formula is simple: 1 / focal length.  If your focal length is 60 mm then a shutter speed of 1/60 second or shorter will give you a sharp image.  But if your focal length is 100 mm then you need a shutter speed of 1/100 second or shorter.

If you have a crop sensor camera then you need to use the effective focal length.  Using a crop sensor Nikon as an example, the conversion factor is 1.5.  In other words, if the lens says 100 mm the effective focal length is 100 x 1.5 or 150 mm.  So, the shutter speed needs to be 1/150 second or shorter.

This photograph above was taken at the Japanese Tea Garden in Golden Gate Park, San Francisco.  It’s an extraordinary experience, especially early in the morning when the crowds are light.  The focal length was 47 mm so a shutter speed of 1/50 second would have been fast enough to get a sharp image.  However,  with image stabilization I was able to shoot it at 1/25 sec.  ISO was bumped to 1600 because of the dark conditions.  And an aperture of f/11 ensured enough depth of field for everything to be sharp.

You still want to hold the camera as steady as possible when taking your shot.  It’s the combination of a steady camera and an appropriate shutter speed that will give you a sharp image.

Continue reading “Five Tips for Successful Hand-Held Photography”

(194)