Photographing the Redwoods

Photographing the coastal redwoods of Northern California is both rewarding and challenging. Explore some of the conditions you will face and how best to capture them.

Walking among the redwoods is an inspirational experience. But wait, if we’re talking about the redwoods in California, the trees I am thinking about could be 600 miles from the trees that are conjured up in your mind’s eye. That’s because there are two species of redwoods in California – the massive giants found in Sequoia and Kings Canyon National Parks on the western slope of the Sierra Nevada Mountains and the tall ones that hug 450 miles of the fog-shrouded California coast, culminating in the Redwoods National and State Parks of Northern California. While both species are spectacular, each is unique in its own way and photographing them presents dramatically different challenges and opportunities. In this post, I will be taking you through the Coastal Redwoods of Northern California.

The Redwoods National Park was established in 1968. California had already created three state parks, beginning in the 1920s, that encompassed some of the remaining redwood old growth groves – Jedediah Smith, Del Norte Coast and Prairie Creek.  The two park systems were joined in 1994 to create the Redwoods National and State Parks.  Now 139,000 acres of the Northern California coast are under the joint management and protection of the National Park Service and the California Department of Parks and Recreation.

Being along the Northern California coast, temperatures are moderate throughout the year and moisture is plentiful, not only from winter storms but also from life-giving fogs that roll in year-round from the Pacific Ocean.

Fog is an ever-present possibility in the groves and presents unique challenges and opportunities. The light in the groves is soft and delicate and contrasts and, tp some extent, masks the strength and power of the trees. This light is perfect for capturing this more delicate mood of the redwoods. Slightly overexposed images best capture the lite airiness of the fog.  Compositions with strong foregrounds enhance the feeling of depth created by the fog.
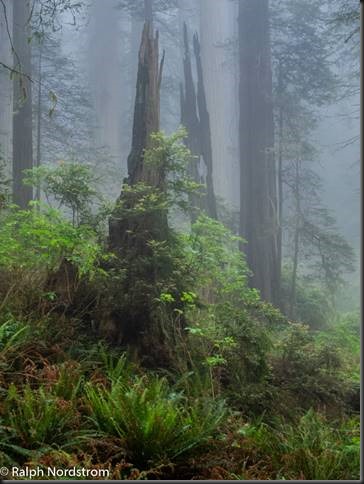
Castles in the fog
‘Castles’ in the fog

Continue reading “Photographing the Redwoods”

(382)

The Call of the Redwoods

Photographing the coastal redwoods of Northern California should be on everyone’s bucket list.

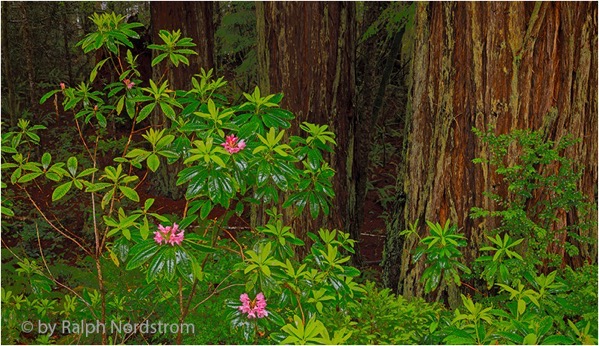
Rhododendron spring 130529

It’s often said that California has everything.  And it’s true.  From the southern border with Mexico to the northern border with Oregon, the state goes from parched desert to lush mountain slopes. 

California also has the oldest living trees in the bristlecone pines of the White Mountains, the most massive trees in the Giant Sequoias of Sequoia and Kings Canyon National Parks, and the tallest trees in the Coastal Redwoods along the California coast.

Can you imagine what it is like to experience these trees?  Just think of it.  The oldest bristlecones were seedlings when the pharos of Egypt were laying massive stone upon stone in Giza.  And both the giant sequoias and coastal redwoods were seedlings when Christ was born in Bethlehem.

The coastal redwoods are the monarchs of these mountains, especially the unlogged old-growth groves….

Continue reading “The Call of the Redwoods”

(180)

The Redwoods Are Calling Me

A journey from the craziness of the city to the serenity of the magnificent coastal redwoods.

It’s 6:00 in the morning.  I’m in my car, leaving our Southern California neighborhood and making my way to the freeway.  I’m heading north and have to cross the LA basin which, at this time of day, is not  easy.  But I have a destination that is calling me.  I’m on my way to the redwoods of Northern California, 800 miles from home.  I’m looking forward to feeling small and insignificant and renewed among these magnificent trees.

There are two types of redwood trees in North America and practically all of them are in California.  The coastal redwoods, where I’m headed, are the tallest living organisms on the planet with the tallest topping out at 379 feet.  They are found in groves that span over 450 miles from Big Sur in the south to just across the Oregon border in the north.  They thrive on the fogs that are common along the coast.

The other redwood tree is the Giant Sequoia that grows on the western slopes of the Sierra Nevada mountains.  Where the coastal redwoods are tall and slender, the giant sequoia are of enormous girth.  They are considered to be the most massive living organism on the planet.  (But a rumor is spreading that a coastal redwood was found recently that is more massive than the largest giant sequoia, and thereby giving the coastal redwoods both titles.)

I made it out of the LA basin, crossed over the Grapevine on I-5 and into the great central valley of California.  This stretch of I-5 is considered by many to be the most boring highway in the country with mile after mile of pretty much the same, barren landscape.  After what seems like endless hours I turn west towards the Bay Area.  This will be anything but uneventful.

Making it through the East Bay is more than 100 miles of congestion and is not something I look forward to.  In fact, it’s fair to say that I dread it.  I enjoy the Richmond Bridge; I think I like it more than Golden Gate.  But getting there usually requires navigating mile upon mile of stop and go traffic and once it is crossed, there’s more of the same on the other side.  Arg.

But when it’s finally behind me the promise of the serene redwoods comes over me and I’m excited again, re-energized and eager to continue.

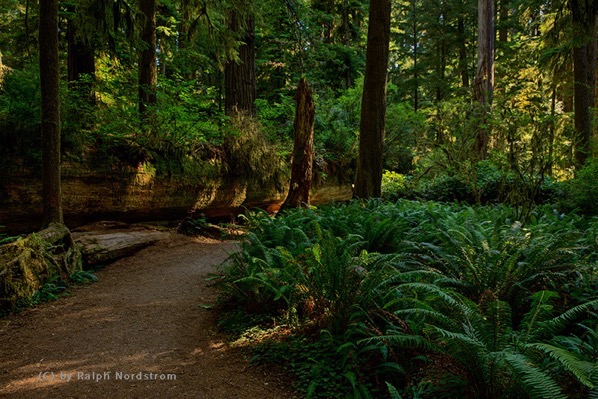
Peaceful moment redwoods 160803 SM3129
Reed Simpson Grove in Jedediah Smith State Park.

Continue reading “The Redwoods Are Calling Me”

(91)

Focus Stacking – First Impressions

A practical guide to focus stacking

Background

Depth of Field (DOF) is a staple of near-far landscape photography.  It is used when the composition contains object that are very near to the lens as well as objects that are distant.  Traditionally, it has been achieved by using a wide-angle lens with a small aperture or a tilt-shift lens.  Using this technique, it is possible to have the nearest object one or two feet from the lens and everything is in focus from the object to infinity. 

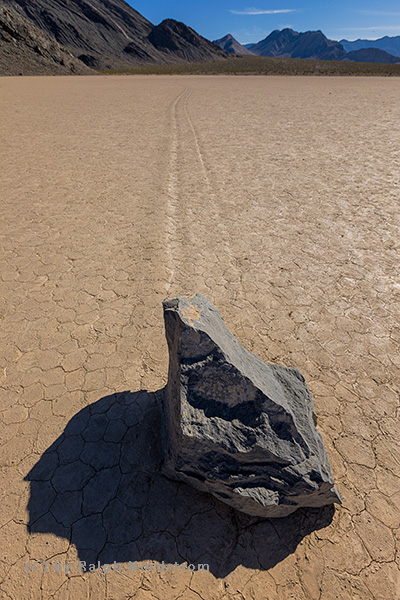
Racetrack rocks death valley 160222 39731
Depth of field example. The rock is 18″ from the lens but with a wide focal length (16 mm) and a stopped down aperture (f/11) everything is in focus.

The disadvantage of this method is you must use a wide-angle or tilt-shift lens, preferably on a full-frame sensor camera body, and a small aperture.  (In this image, the rock was 18” from the lens.  I used a 16mm lens on a camera with a full-frame sensor and was able to get the needed DOF at f/11.). But small apertures introduce lens diffraction which work against you by softening the entire image.  And what if you don’t have a wide enough lens.  You couldn’t get this shot with a 24mm lens.  And getting any kind of DOF with a telephoto lens is virtually impossible, even with fairly distant subjects.

Continue reading “Focus Stacking – First Impressions”

(436)

The Qualities of a Powerful Landscape Photograph

When working on a photograph and wondering where to start, it’s helpful to know what is possible.

I think we all understand that serious landscape photography does not document nature but interprets it.  A well-made landscape photograph captures the photographer’s response to what was experienced and is able to convey this response to the viewer.

The Professional Photographers Association has 12 criteria by which they judge their competitions.  Granted, the PPA membership consists of very few fine art landscape photographers but still, the criteria of a great photograph are pretty much the same.

Here are the twelve criteria (the order is my own):

1.    Impact

2.    Composition

3.    Center of Interest

4.    Lighting

5.    Color Balance

6.    Technical Excellence

7.    Story Telling

8.    Creativity

9.    Style

10.  Presentation

11.  Subject Matter

12.  Technique

I mention these because there’s a lot that goes in to making a great photograph and these criteria provide a framework in knowing what to look for.  But rather that exploring these criteria in words, let’s look at a few photographs.  And let’s do it by looking at two examples of the same image – what it looked like when it came out of the camera and what it became when transformed in the digital darkroom.

Image 1

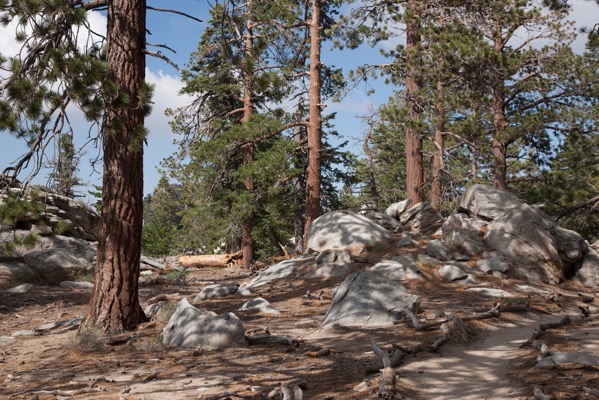
The first image is a scene in the mountains of Southern California.  I was wondering by myself along a remote trail.  The sun was sinking lower and lower in the sky and I was thrilled climbing the trails and walking among the trees and rocks.  I came upon this scene and it just felt right.  I had to capture it.

San jacinto 180720 SM37804

The mid-afternoon light is actually quite nice.  It’s not spectacular but it’s very pleasant and doesn’t pose any exposure challenges. The shadows make for interesting patterns on the forest floor.  And I tried for a composition that captured the energy and harmony I was feeling while at the same time portraying the stately strength of the trees.  And the center of interest is the rocks that form a sort of path that leads up to the trees on the right.  The trail leads out of the frame on the right, inviting the viewer to explore what lies beyond.

It’s a very nice picture but now it’s time to make it even nicer.  An effective way to add impact is to increase the contrast.  (This will be a recurring theme.) The shadows can be darkened along with the midtones.  Care is taken, however, to not lose detail in the shadows.  You also have to be careful with the clouds.  They have more detail that the RAW image doesn’t show, detail that can be coaxed out.

Continue reading “The Qualities of a Powerful Landscape Photograph”

(197)

JPEG or RAW

Which file format is better – JPEG or RAW. Well, it depends….

Our digital cameras give us a choice of two file formats in which our images are stored – JPEG and RAW.  In fact, some digital cameras only store images in JPEG format.  What’s the difference and is one preferred over the other?  Let’s take a look at each.

But before we begin, I was curious what JPEG stands for, so I looked it up.  It’s pretty weird – Joint Photographic Experts Group.  Strange indeed.  But. be that as it may, JPEG is widely used.  Practically every image you see on the web is JPEG although you occasionally see other formats.  If you use a lab to print your photographs, there’s a good chance they will ask you to send them JPEG files.

Continue reading “JPEG or RAW”

(98)

Everyone Can Take a Picture but Few Can Make a Photograph

Making a photograph involves much more than ‘point and shoot.’

“Anything that excites me for any reason, I will photograph; not searching for unusual subject matter, but making the commonplace unusual.”

~ Edward Weston

There are millions of pictures taken every day, every hour even.  They are fun and spontaneous.  They record moments in peoples’ lives.  They are shared on social media and sent in emails. And when viewed later, they bring back memories.

It’s easy to take a picture.  The dominant camera is the smart phone.  Just hold it up and tap the red button.  It takes no time at all and the reward is instantaneous.  It requires no particular skills or training.  It’s easy; anyone can do it.

These pictures will fill the internet’s networks and some may even end up on peoples’ walls or in scrapbooks.  But mostly when shared face to face, it’s from the smart phone’s camera roll.

Making a photograph is not at all like taking a picture.  It’s not easy.  It requires training, experience, special skills and patience.  The rewards are not instantaneous and not everyone can do it.

Continue reading “Everyone Can Take a Picture but Few Can Make a Photograph”

(107)

Photographing the California Central Coast – Day 1

Tag a long on a scouting expedition of the California Central Coast.

It wasn’t long ago that I spend three days along the California Central Coast, scouting good shooting locations for the upcoming Central Coast and Napa Valley workshop.   I’m very familiar with the Big Sur coast but this was my first real exposure to the Central Coast north of San Francisco.  And I am excited with what I found.

My base of operations was the Schoolhouse Canyon Campground, a privately owned campground just east of Guerneville on the Russian River.  Clean, quite – I couldn’t have been more pleased.  But on with the photography….

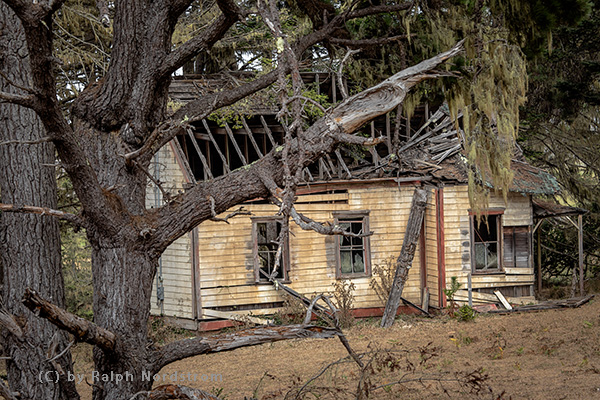
The plan was to start to the north and work south over the next three day’s.  I was joined by a friend the first day which started out overcast and foggy along the coast.  That’s not a huge surprise as this area is still susceptible to the marine layer in September.  But, in this line of business, you work with what you got.  The first destination was Salt Point.  It’s hard to find because there are no marked turn-offs, just a sign saying you’re entering and another sign a few miles up the road saying you’re leaving.  So we overshot it.  And I’m glad we did because we came upon a creepy house that was falling apart.

Creeph House

My friend suggested framing the house with moss hanging from the tree.  That was the perfect touch to give it the macabre feeling we were feeling,  And the overcast sky provided the perfect light.

Continue reading “Photographing the California Central Coast – Day 1”

(106)

Why Do I Need an HDR App when Lightroom Has It?

Lightroom is good for basic HDR but for full creative control, HDR applications have an important role to play.

I was recently in the redwoods of Northern California.  One of the groves I love is the Lady Bird Johnson Grove in Prairie Creek State Park.  In it is a Western hemlock growing next to a massive redwood.  The hemlock’s roots spread out across the ground, making an interesting and photo-worthy pattern.  I’ve photographed it a number of times in the past but never liked what I got.

This year was different.  I finally saw a composition that excited me.  The sky was overcast and a bright mist hung in the forest.  I knew I was going to have a dynamic range problem so I shot HDR – 5 shots bracketed 1 1/3 stops.

I knew I was going to have a dynamic range problem so I shot HDR….

I was eager to see what it looked like so when I got back to my hotel room I ran it through the Lightroom HDR.  One thing about the Lightroom HDR feature is that it is convenient, quick and creates a DNG file.  But its drawback is that you don’t have a lot of control.  Besides alignment and de-ghosting, you have the Auto function, the same Auto found in the Basic group in Lightroom.  That’s it.

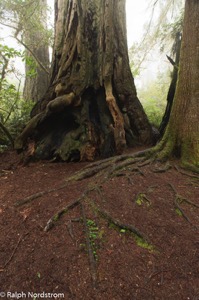
I ran my five files through Lightroom HDR, but the results were disappointing.  The foreground was rendered well but the forest in the background was blown out.   I tried my best to recover what I could, but it was too far gone.  Another year gone by and I still don’t have this photograph.

Redwoods 180522 SM37414 HDR

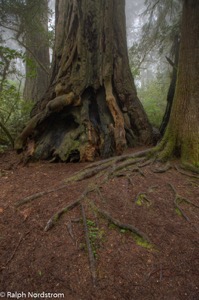
It wasn’t until sometime later that I was browsing my redwood images and came across this shot.  I decided to have another go at it but this time using my tried and true Photomatix Pro 6.0.  I’ve been using Photomatix Pro since version 1 and it has always produced for me.  Photomatix Pro is extremely versatile, giving the photographer a wide range of expressions from natural to surreal.  And with over 40 presets, it’s easy to find one that is very close to what you’re looking for.  I always prefer the more natural look.

An image that I thought was lost came back to life with Photomatix Pro.

I imported the five files, selected one of the more natural presents and what a difference.  An image that I thought was lost came back to life with Photomatix Pro.  Not only was the foreground beautifully rendered but so was the background.  A few small tweaks and the photograph was ready for the rest of the workflow.

Redwoods 180522 SM37414 5 6 7 8 Enhancer

I finished my normal workflow by completing the Lightroom adjustments once Photomatix Pro had imported the TIFF file back into the Lightroom catalog.  That was followed by the fine tuning I always do in Photoshop.

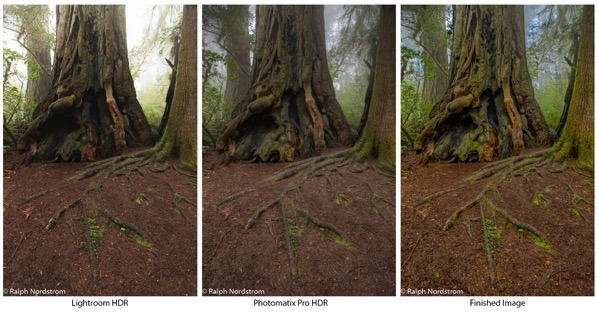
I thought you might like to see the HDR outputs from Lightroom and Photomatix Pro along with the finished photograph side-by-side.

Redwoods hdr comparison

Lightroom HDR still has a role to play for me.  When I’ve just uploaded my files from a shoot and am browsing through them to select the ones I want to work on, I find the Lightroom HDR very handy to get a sense of if I’ve captured the dynamic range or not.  But if I later decide I want to print the image and add it to my portfolio I’ll redo the HDR blending in Photomatix Pro where I have so much more control.  Lightroom HDR doesn’t come close to providing the artistic control that I need.  Photomatix Pro continues to fill that gap and remains an essential tool in my HDR workflow.

You can see for yourself and give Photomatix Pro a spin by downloading a trial version from their website.

(34)