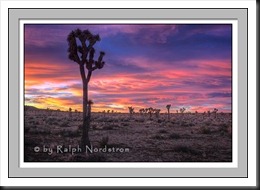
Here are some tips on nighttime photography from an informative article by Dan Richards in a recent issue Popular Photography. Credit for these tips goes to three great photographers – Matt Walker, Darren White and Mashahiro Miyasaka. Here is the heart of what they shared…
- Use a fast, wide lens. Wide lenses slow the apparent motion of the stars. Fast lenses gather more of the faint light.
- Use a tripod. The shortest practical exposure is 30 seconds. Star trails require anything from tens of minutes to an hour or more.
- Use an intervalometer. This is essential for exposures greater than 30 seconds or if you plan to take a sequence of 30 second exposures.
- Be aware of the weather. An overcast sky will foil nighttime photography plans and a wind will wreak havoc with long exposures.
- Be careful. Scout the location ahead of time. Use a headlamp, especially one that has a red light so as not to destroy your night vision.
- Include interesting foregrounds. They can be silhouettes or you can light paint them. You also have the option of creating a composite image by capturing a well exposed image of the foreground at low ISO and a high ISO image of the sky and then blending the two.
- Focusing is really difficult. Autofocus doesn’t work so you must use manual focus. Pick the brightest star in the sky and use live view to focus on it (don’t change your focal length to focus; use the focal length you’ll be using for your image). Another alternative is to focus on an object at infinity during the day and then marking the focus point with fluorescent tape so you can reset the same focus at night. Again, use the focal length you will be shooting with as the infinity focus point changes as you zoom in and out.
- Exposure is critical. If you’re going to shoot starry night photographs your exposure length will be 30 seconds (with a 24 mm lens or wider). Shoot wide open and run tests with different ISO settings. If you’re going to use a long exposure to get star trails determine the ISO setting your 30 second exposure and then adjust ISO and f/stop to compensate for the length of exposure. If your ISO is 6400 at f/2.8 and 30 seconds, if you want a 60 second exposure reduce your ISO to 3200. A two-minute exposure requires an ISO of 1600.
- Take a workshop. That’s always good advice, no matter how experienced you are. There’s always more to learn.
- Don’t get disheartened. This is not easy stuff but practice pays off.
- Get in shape. Good locations for night photography are going to be where there’s minimal light pollution and that’s a long ways away from city lights.
- When the temperature is cold wrap a hand warmer around your lens to keep it from fogging over on those long half hour to hour exposures.
Well, that’s it. Yea, and I confess; I threw in a couple of my tips too.
Hey, here are a couple of blog posts I’ve done on nighttime photography a while back there.
Exciting Nighttime Photography in 10 Easy steps
So, go on out there and give it a try. Have fun and be careful.
We always enjoy hearing from you so please feel free to leave a comment and share your experiences with us.
Also sharing this post on Google+, Facebook, Twitter and the like is also appreciated.
Join me on an upcoming workshop. Click here for more details.
To see more of my photographs click here.
(919)

