How Many Megapixels Do You Need?

How many megapixels do you need? That depends….

Let’s face it, megapixels have been a great marketing tool. “The more there are, all the better,” or so the logic goes. And when a camera manufacturer announces another big jump in megapixels, the photography world sits up takes notice. The question, however, is, ‘How many megapixels do you really need?” Admittedly, this may be different from, “How many megapixels do you want?” The answer to the second question kind of depends on your financial resources and the desire to stay on top of new technology developments. But there is an objective answer to the first question (although it may not be gratifying). But to answer it we need to start at the beginning…

What is a Pixel?

A pixel, or picture element, is a term commonly used across many media – camera sensors, monitors, TVs, etc. But each has its own design. We will stick to the camera sensors.

A single pixel is made up of four elements called pixel sensors arranged in a square pattern. And each element has a colored filter – one red, one blue and two green. It’s called the Bayer pattern.

image

Cambridge in Color has a great article titled Digital Camera Sensors, if you care to take a deeper look. The high-level overview begins with colored light coming through the lens and falling on the sensor. At each pixel element the intensity of red, green or blue light is captured. The intensity is voltages that capture a continuous range of brightness, something like dimming or brightening a light bulb. The computer’s processor, among other things, converts the continuous signal from each element into 32,766 discrete digital steps (14 bits). And that is what gets saved on your memory card as a RAW file.

The important takeaway, however, is that each pixel is made up of four elements – one red, one blue and two green.

By the way, you’re probably asking, “Why two green elements?” Well, as it turns out, that mimics the color sensitivity in our eyes. You see, the cones in our retina are sensitive to red, green and blue light. But it turns out that our eyes are more sensitive to green than red or blue. So, making the sensors with two green elements mirrors what the way our eyes work.

Moving on….

Continue reading “How Many Megapixels Do You Need?”

(1060)

The Qualities of a Powerful Landscape Photograph

When working on a photograph and wondering where to start, it’s helpful to know what is possible.

I think we all understand that serious landscape photography does not document nature but interprets it.  A well-made landscape photograph captures the photographer’s response to what was experienced and is able to convey this response to the viewer.

The Professional Photographers Association has 12 criteria by which they judge their competitions.  Granted, the PPA membership consists of very few fine art landscape photographers but still, the criteria of a great photograph are pretty much the same.

Here are the twelve criteria (the order is my own):

1.    Impact

2.    Composition

3.    Center of Interest

4.    Lighting

5.    Color Balance

6.    Technical Excellence

7.    Story Telling

8.    Creativity

9.    Style

10.  Presentation

11.  Subject Matter

12.  Technique

I mention these because there’s a lot that goes in to making a great photograph and these criteria provide a framework in knowing what to look for.  But rather that exploring these criteria in words, let’s look at a few photographs.  And let’s do it by looking at two examples of the same image – what it looked like when it came out of the camera and what it became when transformed in the digital darkroom.

Image 1

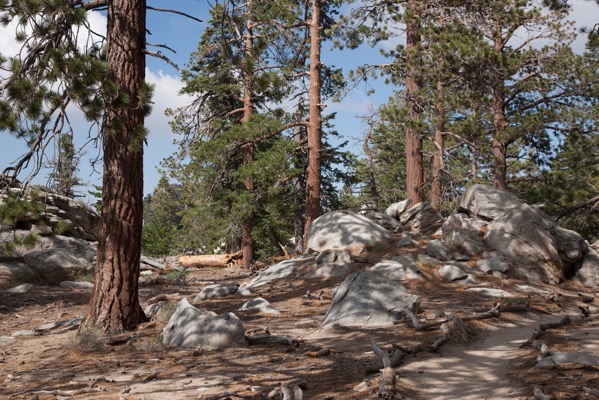
The first image is a scene in the mountains of Southern California.  I was wondering by myself along a remote trail.  The sun was sinking lower and lower in the sky and I was thrilled climbing the trails and walking among the trees and rocks.  I came upon this scene and it just felt right.  I had to capture it.

San jacinto 180720 SM37804

The mid-afternoon light is actually quite nice.  It’s not spectacular but it’s very pleasant and doesn’t pose any exposure challenges. The shadows make for interesting patterns on the forest floor.  And I tried for a composition that captured the energy and harmony I was feeling while at the same time portraying the stately strength of the trees.  And the center of interest is the rocks that form a sort of path that leads up to the trees on the right.  The trail leads out of the frame on the right, inviting the viewer to explore what lies beyond.

It’s a very nice picture but now it’s time to make it even nicer.  An effective way to add impact is to increase the contrast.  (This will be a recurring theme.) The shadows can be darkened along with the midtones.  Care is taken, however, to not lose detail in the shadows.  You also have to be careful with the clouds.  They have more detail that the RAW image doesn’t show, detail that can be coaxed out.

Continue reading “The Qualities of a Powerful Landscape Photograph”

(197)

Photographing Death Valley National Park

Enjoy some of the photographic wonders of Death Valley National Park on an exciting photography workshop.

People sometimes ask me if there’s anything to photograph in Death Valley.  At 5,262 square miles of desert and mountains, it’s one of the largest national parks.  The valley itself is 140 miles long.  Think of it.  It takes three hours to drive from one end to the other.  And surely, in all that space there should be something to photograph.  And yet, most of it is desert.  In fact, the valley itself is the hottest, driest place on earth. It’s also the lowest spot in North America at 282 feet below sea level.  So what’s to photograph?

Mesquite Flats Dunes

Death valley dunes 2011

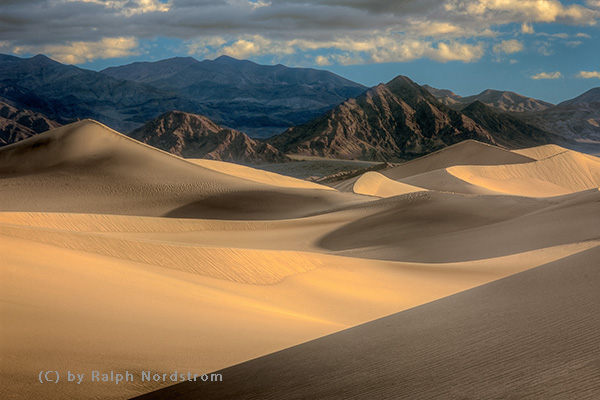
Being a desert you might expect sand dunes and you would be right.  The Mesquite Flats Dunes are in the middle of the valley near Stovepipe Wells.  While not excessively high, they cover a large area and provide wonderful photographic opportunities at both sunrise and sunset.  I prefer sunrise which means heading out across the desert while it’s still dark to arrive at the dunes just as it’s starting to get light.  I go to a place that’s not heavily visited.  It’s an exciting experience.

Zabriskie Point

Zabriskie point pano 140211

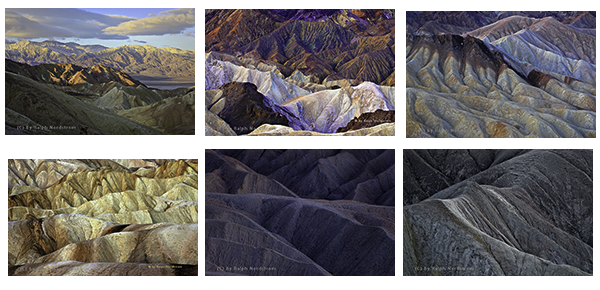
Zabriskie Point is one of the most visited places in Death Valley.  It attracts photographers and tourists alike.  At first it looks like an inhospitable badlands with not much to offer the photographer except a lot of tan wilderness.  But at the right time of day these ‘bad’ lands become extraordinarily beautiful.

Zabriskie collage

It’s all a matter of being there at the right time.

Continue reading “Photographing Death Valley National Park”

(223)

5 Tips to Bring Home Great Travel Memories

Use these tips to improve your travel photographs.

Do you love to travel?  Of course and when you do, I bet you have at lease one camera with you, whether it’s a smart phone, a high-end DSLR or mirrorless camera with at least one lens or something in-between.  You bring your camera so that you can capture the memories of the places you visited and experiences you had.  And with a little bit of advanced preparation and thought, you can bring back pictures that are even more memorable and that enable you to relive some of those fond moments.

Where are many tips that can be given about travel photography.  Here are five that I think you will find very useful.

1. Be Prepared

Advanced preparation can dramatically enrich your travel experience,  And this can lead to more meaningful photographs because you have a better idea of what you will encounter and what to look for.

Often a big trip is a powerful excuse to convince your partner you need a new camera.   But don’t make the mistake of dashing out a week before you depart to buy it.  Rather, purchase it at least a month in advance, preferably two, so you have time to become familiar with it.  Learn its features and how to use them to improve the quality of your pictures.  Practice so that they start to become second nature.  Even if you already have a camera you’re familiar with, purchasing a new one, even one of the same brand, is often different enough that the things you normally do with your old camera have changed in the new one. You don’t want to be fumbling around with camera settings as a fleeting moment passes you by.

Another good thing to do before you leave is to read up on the areas you’ll be visiting.  Get a sense of the history and culture.  Become familiar with the architecture.  Look at photographs.  Discover events that may be going on while you’re there.  The more you know about your destination the more you will see and experience.

By all means, take selfies in your favorite places but don’t stop there.  Take city tours to get an overview of a city but then go off the beaten tourist path to see the people as they really live.  Eat in restaurants that cater to locals.  Maps can be a great help in preparing for a more wanderlust adventure.

Another good idea is to keep a travel journal.  Jot down the places you visit, dates and times and the impressions you have. This can be a big help when you’er going through your photographs after you return home.

Continue reading “5 Tips to Bring Home Great Travel Memories”

(134)

Photographing the California Central Coast – Day 3

Tag a long on a scouting expedition of the California Central Coast.

I’m on a three-day scouting trip to photograph the central coast of California from the Sonoma Coast north of San Francisco down to Santa Cruz to the south.  I am preparing for the 2018 Central Coast and Napa photography workshop.  The first two days covered the coast north of Frisco. Today would continue south, picking up the coast at Half Moon Bay.  You can read about the first to days here:

Unlike the prior day where I didn’t roll out of my sleeping bag until 8:00, this day the alarm was set for 5:00.  That’s more consistent with what I’m used to when photographing.  I arose in the dark, took a quick hot shower and broke camp as silently as possible.  When I left the campground it was still dark.

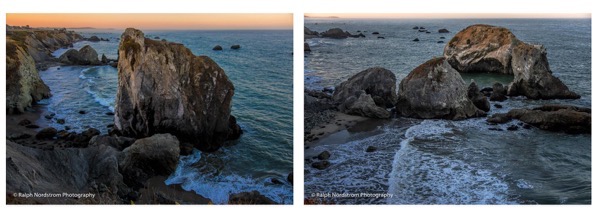
Gleason Beach, which I had photographed the day before, grabbed my attention in the morning light and I had to stop for it again.

Gleason Beach Morning

These two sea stacks that hadn’t impressed me in the afternoon stood out in the soft morning light.  As with the first two days, there were occasional splashes of large waves.  But, from this distance what impressed the eye didn’t impress the camera.  So I was more intent on photographing the patterns made by the surf after the waves broke.

Continue reading “Photographing the California Central Coast – Day 3”

(47)

Photographing the California Central Coast – Day 2

Tag a long on a scouting expedition of the California Central Coast.

I’m continuing a three-day photography scouting trip along California’s Central Coast.  I’m preparing to lead a group here in November for the 2018 Central Coast and Napa Valley workshop.  In the previous post (Photographing the California Central Coast – Day 1), I was joined by a friend and we covered the north end of the Sonoma Coast.

Today is the second day and I’m on my own.  I enjoyed the company yesterday but today will be a more typical experience.

I started out by sleeping in.  It was almost 8:00 when I finally rolled out of my sleeping bag and emerged from my tent to a blue sky.   After yesterday’s overcast and foggy start, this was good news.   A quick breakfast and a hot shower and I was ready to go.  This day was going to cover more mileage than the day before but with fewer stops.

Gleason Beach was the first.

Gleason Beach

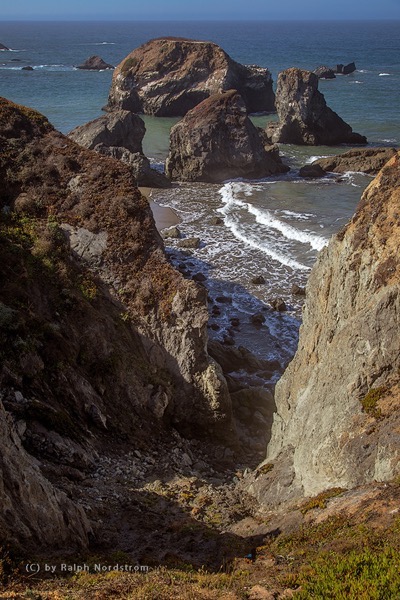
There were some sea stacks at this stop but they didn’t stand out.  The severe gash in the cliff that led down to the cluster of sea stacks just off shore, however, was far more interesting. I timed the shot to get two concentric rings of surf which added the grace of curved lines to an overall rugged composition.

Continue reading “Photographing the California Central Coast – Day 2”

(56)

Photographing the California Central Coast – Day 1

Tag a long on a scouting expedition of the California Central Coast.

It wasn’t long ago that I spend three days along the California Central Coast, scouting good shooting locations for the upcoming Central Coast and Napa Valley workshop.   I’m very familiar with the Big Sur coast but this was my first real exposure to the Central Coast north of San Francisco.  And I am excited with what I found.

My base of operations was the Schoolhouse Canyon Campground, a privately owned campground just east of Guerneville on the Russian River.  Clean, quite – I couldn’t have been more pleased.  But on with the photography….

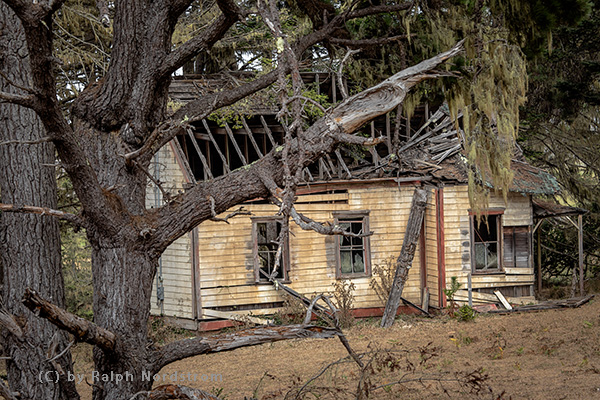
The plan was to start to the north and work south over the next three day’s.  I was joined by a friend the first day which started out overcast and foggy along the coast.  That’s not a huge surprise as this area is still susceptible to the marine layer in September.  But, in this line of business, you work with what you got.  The first destination was Salt Point.  It’s hard to find because there are no marked turn-offs, just a sign saying you’re entering and another sign a few miles up the road saying you’re leaving.  So we overshot it.  And I’m glad we did because we came upon a creepy house that was falling apart.

Creeph House

My friend suggested framing the house with moss hanging from the tree.  That was the perfect touch to give it the macabre feeling we were feeling,  And the overcast sky provided the perfect light.

Continue reading “Photographing the California Central Coast – Day 1”

(106)

Photography Class on Mt San Jacinto

I recently taught a photography class for the Mt San Jacinto Natural History Association.  At an elevation of 10,834 feet, San Jacinto is the second highest peak in Southern California.  The Natural History Association operates in conjunction with the Mt San Jacinto State Park and has a rich program of mountain activities.  I was fortunate to be invited to teach the first-ever photography class for the association.

The class would consist of lectures and demonstrations, and be conducted in one of the meeting rooms in the mountain station of the Palm Springs Ariel Tram.  We would have a morning and afternoon shoot in nearby Long Valley,

In preparing for the class, I anticipated that there would be a large cross-section of experience and abilities, with gear ranging from smart photos to high-end digital cameras,  And that proved to be true.  So rather than getting into the technical aspects of photography, the emphasis was on the creative.  This normally consists of talking about light and composition which we took a bit of time to cover.  But the main emphasis was On Seeing.

I wasn’t sure what there was to actually See in Long Valley.  It was always something to pass through on the way to more exciting places like Round Valley or the summit,  So, to find worthwhile things to photograph, our quest became to find and capture the essence, the soul of Long Valley.

And here’s what we found…

Continue reading “Photography Class on Mt San Jacinto”

(105)

Making a Photograph – Witch’s Hat

It’s no surprise that Bandon Beach in Oregon is a powerful attraction for photographers. It has one of the largest concentrations of sea stacks on the entire Oregon coast. This makes it a prime sunset destination. Read the story behind the making of a sunset photograph on one special afternoon.

clip_image002

The Pacific coast at Bandon, Oregon is graced with a generous collection of sea stacks of various shapes and sizes. It has the potential for dramatic sunsets and is on many photographers’ bucket lists. Some go so far as to crown it the best stretch of shore on the entire Oregon coast.

The day began about 80 miles to the south and we made our way north, stopping along the way in the Samuel H. Bordman Scenic Corridor and other locations that demanded our attention. It was overcast as we moved up the coast. But that didn’t dampen our enthusiasm for the many wonderful places to shoot. As the day continued, the clouds gave away to hazy sun. But by the time we got to Bandon Beach, the marine layer with its bank of clouds was again encroaching on to the shore.

Still, our motto is, ‘You work with what you got.’ So we gathered our gear and descended the long stairway leading from the overlook to the beach below.

Continue reading “Making a Photograph – Witch’s Hat”

(264)

The Gems of Oregon Photography Workshop

Come explore the wonderful gems that wait to be discovered in the southwest corner of Oregon. Photograph the stunning Oregon coast, magnificent waterfalls, wild rivers and incredible Crater Lake. Join our photography workshop.

I knew Crater Lake would be exciting.  Just think of it. Volcanic Mount Mazama emptied its huge magma chamber in a colossal eruption about 7,500 years ago. When the fireworks were over, the empty magma chamber collapsed, swallowing the mountain top and creating a crater over 2000 feet deep. Then the winter snows slowly but inexorably filled the crater with beautiful deep blue, crystal clear water.

My first experience of the lake was not with camera in hand but on a family trip as we paused for an evening while on or way to Seattle, Washington to visit more family. It was in June and the snow drifts were still piled high, preventing travel but to a small portion of the rim. And yet the experience was profound.

When I conceived of the Oregon photography workshop I knew Creator Lake had to be the culmination, the grand finale of the experience. From Wizard Island (a volcanic cone within the crater), Phantom Ship (the skeleton of a volcano that has long since passed), the Pinnacles (mysterious towers piercing the atmosphere) and the hard-to-imagine blue of the lake itself, Crater Lake is in truth a fitting highlight of the other wonders in this corner of Oregon.

Continue reading “The Gems of Oregon Photography Workshop”

(73)