Photographing in a Wine Cellar

How to get good photographs from photographing hand-held in dark conditions.

I was at a fabulous winery in Napa Valley, California.  (If you’re a wine lover like I am, you don’t need me to tell you that Napa Valley is in California so my apologies.)  The winery was Castello de Amorosa – the Castle of Love.  It is a replica of a medieval Italian castle.

Now let me clarify a misperception about the castle.  A rumor is going around that the castle was dismantled in Italy and reassembled in Napa Valley.  Not true.  Some pieces of the castle were brought over from Italy but the bulk of it is local stones.  Nevertheless, it’s a beautiful and authentic replica of the real thing.  It has a great room, chapel, a torture chamber, and honest to goodness wine cellars lined with hundreds of barrels of aging wine, which, by the way, is quite good.  (Don’t look for this wine in markets or gourmet restaurants however.  The only place it is sold is at the winery.  But if you would like to tour it, give me a call and I’ll meet you there.)

I was with a group, participants in the workshop I was leading, and we got a private tour.  We all had our cameras at the ready and were photographing just about everything, even the torture chamber (especially the torture chamber?).  The wine cellars were very dark, however, and the aisles extended for hundreds of feet.  There were dim light bulbs sparsely scattered the length of the aisles.  Some of the barrels had labels on them.  Celebrities frequently bought an entire barrel of aging wine, so these barrels were set aside for them.

I was eager to photograph the wine cellars but there was an exposure problem to solve.  I don’t have a tripod, I’m shooting hand-held, so I can’t rely on a lengthy shutter speeds for a good exposures.  So, each side of the exposure triangle posed a challenge and required a solution.  Let’s start with shutter speed.

What shutter speed should I use for handheld shooting?  Well, that depends on the focal length of the lens.  After all, the rule of thumb for sharp handheld images is 1/focal length.  OK, I knew that.  The lens I was using was my go-to 24mm to 105mm lens.  I didn’t want to have to change my shutter speed every time I zoomed to a different focal length, so I chose a speed of 1/120 sec that covers all the zooms up to and including the longest.  Now that’s really fast for a dark environment.  But hold on.  The lens has image stabilization which is good for 1 to 2 stops.  In other words, I can increase the exposure time by 1 to 2 stops and still get a sharp image.  So, being the cautious guy I am, I chose 1/60 sec.

But wait, I normally shoot Aperture Priority where the camera chooses the shutter speed.  Gotta switch to Manual.  OK, that’s done, and I set the shutter speed to 1/60 sec.

The next decision to make is the aperture.  If I shoot wide open, which for this lens is f/4.5, I don’t get the depth of field I need for shooting down the long dim aisles.  Now the depth of field will vary with the focal length so if I’m shooting at 24mm then I can use a fairly wide-open aperture but if I’m shooting at 105mm I need to stop way down, say f/11.  Once again, I didn’t want to have to change the aperture for every shot, so I went with f/11.

But a relatively fast shutter speed and a smaller aperture severely reduces the amount of light that passes through the lens and falls on the sensor.  That leads to the final decision.  What ISO should I use?  And not having eyes that work like light meters, I don’t have a clue.  Furthermore, something has to change from one lighting condition to another.  And since I’m setting and forgetting shutter speed and aperture, that adjustment falls on ISO.  Let the camera set the ISO.  Fortunately, my camera has Auto ISO, so I switched from ISO 100 to Auto.  And I’m all set.

Since the cellar is much darker than a sunny day at noon, the camera selected the higher ISOs and in the really dark places, maxed out the ISO.  As a result, many of the photographs have lots and lots of noise.  At the time I took these photographs, Lightroom’s noise reduction was state of the art, but state of the art then was not very good.  But that has all changed as a result of the AI tsunami and how everyone is going bonkers over it.  Lightroom now employs AI in their noise reduction function and it’s like magic.  The only thing is it can take a long time to do its magic, sometimes as much as 10 minutes and even more.  Oh well, it’s a small price to pay for a dramatically improved image.

So, here’s the camera’s setup.

  • Manual camera mode
  • Shutter speed = 1/max focal length but compensated for taking the lens’ or camera body’s image stabilization (vibration reduction for you Nikon folks) into account
  • F/stop that gives the desired depth of field for your longest focal length, such as, f/11.
  • Auto ISO

In the digital darkroom, Lightroom now has the power to deal effectively with the noise that the highest ISOs will invariably generate.  You may want to use third party noise reduction tools such as Topaz DeNoise AI which is faster than Lightroom and works as well with light to moderate noise.  But it’s more expensive than Lightroom, given that you’re already paying $10/month to use it.

OK, so that’s it as far as the photography aspect of Castello de Amoroso goes.  We ended up in the tasting room of course and I bought a rather expensive bottle of cabernet – 3 figures.  It was so good I couldn’t resist.  When I got home, we prepared a very special meal and opened the bottle.  Both wife and daughter said it was the best wine they had ever tasted.  I must confess, it was awfully good!

(112)

Polarizing Filters and Blue Skies

Polarizing filters are fantastic but they have their limitations that can get you into trouble if you’re not aware of them.

What comes to mind when you think of a polarizing filter? It’s probably how it can darken blue skies. This is just one of the many things this versatile polarizer can do. Many photographers swear by them and some go so far as to keep them on their lenses all the time. But as far as darkening blue skies are concerned, polarizers can create more problems than they solve if you’re not careful.

But before getting into all that, just exactly what does a polarizing filter do? How does it darken blue skies?

It all starts with the fact that light is a wave. We speak of the color of light in terms of the frequency of the wave, just as we speak of the pitch of a sound in terms of its frequency. Red light has a lower frequency and blue light, a higher frequency. It’s as if light vibrates – up and down. And most light vibrates in all directions. But some forms of light vibrate in a single direction. This is called polarized light. For example, glaring light bouncing off the highway can be polarized in a horizontal direction. That’s why Polaroid sunglasses work. They block horizontally polarized light while allowing light polarized in the other directions to pass.

The same is true of a blue sky, or at least some of it. Depending on where the sun is, blue sky light is polarized to a greater or lesser extent. If you stand facing the sun and look through your polarizer, you will notice that it has no effect – the sky is not darkened. But if you continue to look through the polarizer and slowly turn away from the sun you will notice the sky gets darker and darker until the sun is directly over your shoulder. Continuing your turn, the sky will get lighter and lighter until the sun is directly behind you.

…as far as darkening blue skies are concerned, polarizers can create more problems than they solve if you’re not careful.

You can tell in which direction the effect is the greatest with this simple trick.

Continue reading “Polarizing Filters and Blue Skies”

(2039)

Finding the Soul of a Photograph

Finding the soul of a photograph is a journey that can take many paths.

I often get asked if I manipulate my photographs.  My answer is always, “Yes, of course!”  But no one has ever asked, “Why?”  And I have an answer for that too.  “Because my camera doesn’t know what I’m feeling.”

For me, making a photograph is making art. I want to do more than capture where I’ve been and what I’ve seen.  I want to share with you what I feel when I’m out there.  And that is often more intense than what my eyes see.

I was in Long Valley last summer preparing for a photography class I was teaching for the Mount San Jacinto Natural History Association.  It was midday and I was walking around wearing my amber tinted Polaroid sun glasses.  Why do I mention my sun glasses?  Because I was getting very excited about what I was seeing.  And for those of you that know about midday light, it is anything but exciting.  But the amber tint of the glasses and the effect of the polarization on the sky and foliage got me excited.  Added to that was how good it felt to be back in these mountains after an absence of 15 years.

I want to share what I feel…. And that is often more intense than what my eyes see.

So, I asked myself if it was OK to make photographs that reflected my mental state when it contradicted the physical reality of what my eyes saw. 

Continue reading “Finding the Soul of a Photograph”

(207)

JPEG or RAW

Which file format is better – JPEG or RAW. Well, it depends….

Our digital cameras give us a choice of two file formats in which our images are stored – JPEG and RAW.  In fact, some digital cameras only store images in JPEG format.  What’s the difference and is one preferred over the other?  Let’s take a look at each.

But before we begin, I was curious what JPEG stands for, so I looked it up.  It’s pretty weird – Joint Photographic Experts Group.  Strange indeed.  But. be that as it may, JPEG is widely used.  Practically every image you see on the web is JPEG although you occasionally see other formats.  If you use a lab to print your photographs, there’s a good chance they will ask you to send them JPEG files.

Continue reading “JPEG or RAW”

(99)

Making a Photograph – Fort Point

Not long ago I was in San Francisco for some photography. I was interested in photographing Fort Point because it would be a good opportunity to emphasize design elements and abstractions. Fort Point is part of the National Park system and situated at the mouth of the San Francisco Bay. Its intent was to protect the bay from attack. Construction was completed in 1861. It never fired a shot.

If you’re interested in learning more about the fort, here are a couple of interesting links.

https://en.wikipedia.org/wiki/Fort_Point,_San_Francisco

https://www.nps.gov/fopo/learn/historyculture/index.htm

These “Making a Photograph” articles generally take a single, successful photograph and walk through the process of its creation from the moment of inspiration in the field to the finished product. What that doesn’t show is the scores of rejects that ended up in my memory card, what I was trying to do with them and how and why it didn’t work. I think there’s as much to be learned from the rejects as there is from the keepers.

So in this post I want to ‘air my dirty laundry’ so to speak and share with you not only the keepers but the rejects. I also want to take you through the process of looking deeper into the rejects in an effort to learn from my mistakes.

So come along with me as I share my flubs and successes at Fort Point. Continue reading “Making a Photograph – Fort Point”

(138)

Making a Photograph – Witch’s Hat

It’s no surprise that Bandon Beach in Oregon is a powerful attraction for photographers. It has one of the largest concentrations of sea stacks on the entire Oregon coast. This makes it a prime sunset destination. Read the story behind the making of a sunset photograph on one special afternoon.

clip_image002

The Pacific coast at Bandon, Oregon is graced with a generous collection of sea stacks of various shapes and sizes. It has the potential for dramatic sunsets and is on many photographers’ bucket lists. Some go so far as to crown it the best stretch of shore on the entire Oregon coast.

The day began about 80 miles to the south and we made our way north, stopping along the way in the Samuel H. Bordman Scenic Corridor and other locations that demanded our attention. It was overcast as we moved up the coast. But that didn’t dampen our enthusiasm for the many wonderful places to shoot. As the day continued, the clouds gave away to hazy sun. But by the time we got to Bandon Beach, the marine layer with its bank of clouds was again encroaching on to the shore.

Still, our motto is, ‘You work with what you got.’ So we gathered our gear and descended the long stairway leading from the overlook to the beach below.

Continue reading “Making a Photograph – Witch’s Hat”

(264)

Making a Photograph – Primal Dawn

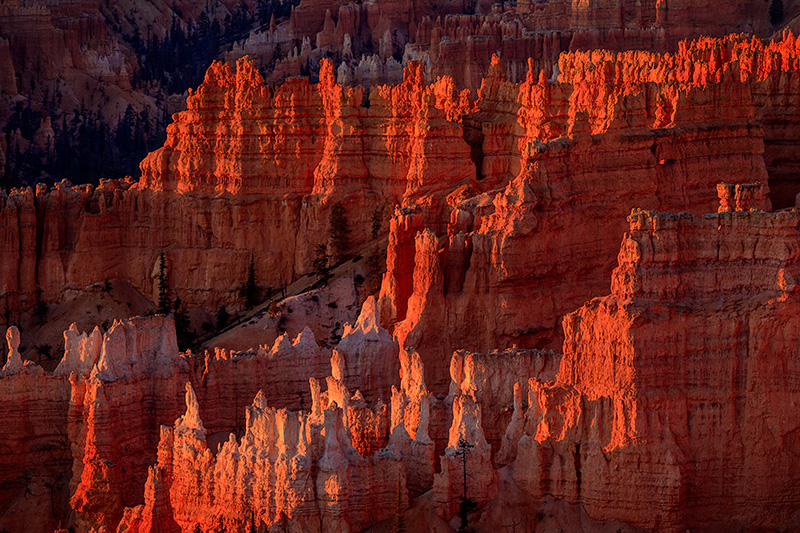
Bryce Canyon National Park, Utah

I’m  fortunate to be able to return to Bryce Canyon National Park every October. It’s a wonderful time to be there. The air is clear and cold and the sun rising above the San Francisco peaks on the eastern horizon (the western boundary of Dinétah, the Navajo ancestral homeland given to them by the Holy People) is like the beginning of time itself.

Bryce Canyon sunrises are to be savored, every moment of them. Bryce Canyon is not a canyon but an enormous amphitheater that faces the rising sun. There is nothing between the hoodoos and fins of Bryce and the approaching sun other than the curvature of the earth. It’s best to arrive early while it is still dark. The last stars are still twinkling above as the light begins to gather on the horizon. As the minutes slip by, the faint gray light struggles to push back the dark. As it gains strength, it gradually turns to first a pale orange and then an intense orange, crowned by the dark blue of the still, night sky. It is thrilling to experience and it continues to get even better.

The glow on the horizon continues to grow, becoming a blinding yellow as the night quickly recedes. Just when you think the glow couldn’t get any more intense, a fiery sliver appears and continues to grow inexorably into the brilliant orange disk of our very own star. That’s when the hoodoos, arrayed in the soft, gentle light of dawn, change their robes for the glorious first light of morning. Continue reading “Making a Photograph – Primal Dawn”

(157)

Making a Photograph – Sheep Pass Morning (2016)

The making of a photograph of monrning in Joshua Tree National Park.

When you get up early and leave at 4:30 in the morning for a sunrise shoot there are no guarantees. You pick a location that has potential and, by getting out so early, you up the potential for great light.  It might, and then it might not happen.  But you’re out there anyway.

When you arrive, the desert is still dark. You stand by your car, talking quietly with friends, sipping hot coffee and watching the emerging light on the eastern horizon. There is a sense of eagerness balanced with patience. Often, however, just being there is its own reward and coming home with a keeper is icing on the cake.

The earth brightens quickly this time of day and soon you grab your gear and head out into the desert. For me, just wandering and not looking for anything in particular is the best approach.

I prefer to let images come to me rather than hunting them down. When something I see stops me in my tracks, these turn out to be the best photographs. It’s not because I’m searching for leading lines or applying the rule of thirds or any other of the many ‘rules’ of composition. I don’t like to think when I’m photographing; I prefer to become quiet and simply experience. And when I’m in that state of mind I stop in my tracks because it just feels right. And the stop is usually followed closely by an utterance of surprise and joy – “Oh Wow!”.

Such was the case with “Sheep Pass Morning.” The morning shoot was winding down, meaning the sunrise had come and gone and the wonderful golden hour light was quickly fading. I wandered aimlessly and “Boom,” there it was. I was excited. This just felt right.  And yes, I did say, “Oh wow!”

I set up my camera and composed the shot. I was conscious of the cluster of rocks in the lower right corner and their relationship with the Joshua trees on the right edge. I was conscious of outcrop of rocks on the left, the mountain range in the background (Queen Mountain) and the clouds. All these elements were in my mind but mostly I was seeking balance and harmony. During that time, distant Queen mountain into shadow so I waited for the light to came back, cheering it along. Then the moment came and I tripped the shutter.

Continue reading “Making a Photograph – Sheep Pass Morning (2016)”

(144)

Dust, Darn Dust

Safely remove dust from your digital SLR sensor.

Dust spots. How annoying. They can give a blue sky chickenpox.

Dust spots on your sensor can mean hours of laborious effort removing them one by one in the digital darkroom. But, because they are on the sensor, that most sensitive component of our digital cameras, we are sometimes terrified to attempt removing them. So we either put up with them or we send our cameras out to a repair guy and pay good money to have him remove them.

Oh yeah, our cameras do the dust removal shake thing every time you turn them on and off. But some cameras work better than others. And there are conditions where the camera can shake the sensor as much as it wants but it won’t get rid of all the dust.

As frightening as it seems, removing dust from your sensor doesn’t have to be all that dangerous. As it turns out, there are three levels of dust removal – which are performed in that order. Any one of us can do the first level. And most of us would have enough confidence to do the second. The most stouthearted of us will even attempt the third but that’s not a level that needs to be resorted to very often. So what are these levels?  Let’s take a look at them one by one.

Level 1 – Blowing

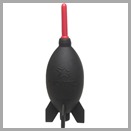
When the camera is turned on there’s a small static charge on the sensor that can attract particles of dust. They are held to the sensor by the static electricity and typically the attraction is fairly weak. So the first level involves giotto rocketblowing the dust particles off the sensor with a gentle stream of air. The trick is to use the right source for the gentle stream of air. One thing you absolutely do not want to use is canned air. The aerosols contain propellants which can squirt out solvents along with the air. And that’s not very good because the solvents will get on your sensor and create an even worse problem. But there are blowers that are specifically designed just for this purpose. The Giotto Rocket is one excellent example. The thing that makes the Giotto and others like it so special is that it draws the air in from the back and blows it out the front. That way it doesn’t inadvertently pull in a particle of dust that it just dislodged, only to shoot it right back out at the sensor – and at high velocity. Smart.

To blow the dust off your sensor, check your camera’s manual and find the menu option for manual sensor cleaning. Remove the lens from your camera body and activate the option. When you do this, the mirror will flip out of the way and expose the sensor. Hold the camera body so the lens opening is facing down and gently (with emphasis on the word ‘gently’) blow a stream of air against the sensor. I like to direct the air not only to the center of the sensor but the edges and the corners. When you’re done turn off the camera and the mirror will drop back in place. (Of course, if you have a mirrorless camera there is no mirror to flip out of the way. When you take the lens off the sensor is already exposed.) Many digital SLRs will not allow you to do a manual cleaning if the battery does not have enough charge. I think that is so that the camera will not run out of juice before the mirror is put back in its place. This process is  pretty easy isn’t it.  Nothing touches the sensor but air. Continue reading “Dust, Darn Dust”

(265)

Images with Impact – Contrast in Nature

Explore how haze affects the contrast in distant objects, how humans respond and how that knowledge can be used in your photographs.

Last year I started a series of articles under the general theme of Images with Impact. In it we are discussing things you can do with your images in Lightroom and Photoshop to enhance their impact. When I got to the topic of contrast I came to an abrupt halt. The more I thought about contrast, the more I wanted to begin that discussion with some real examples from nature. But to do that, I needed some photographs that illustrated what I wanted to share with you. And in Southern California, the types of photographs I wanted are only possible in winter. But it’s winter now. And I’ve been able to capture the photographs that I want, so now we’re picking up the series again.

What distinguishes a photograph created by the serious student of photography from one taken by a casual photographer? Many things to be sure. But one thing that stands out is a sense of clarity, a clear quality. The casual photographers’ photographs are just what the camera captures and are often like looking through a bit of haze and I don’t mean that they are out of focus. It’s the light. The effect may be subtle but it is very real. A more accomplished photographers’ photographs have a special quality to them, a quality that engages us, that draws us in and holds our attention. You might describe it as a crisp quality.  (You can click on the photographs to enlarge them.)

CRW_9603

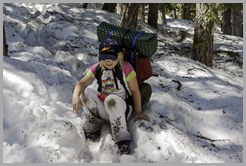
(My daughter some years ago as we hiked out of a late spring backpacking trip in the local mountains.)

The serious student of photography skillfully applies contrast in the digital darkroom to achieve this look. But before getting in to how this is done, let’s step back and take a look at how we respond to contrast not only in photographs but also in nature.

In the following discussion I will use examples from nature to illustrate the affect contrast has on us. The idea is to understand how it works so that we can more effectively apply this knowledge to our photographs.

Continue reading “Images with Impact – Contrast in Nature”

(361)