Photography Class on Mt San Jacinto

I recently taught a photography class for the Mt San Jacinto Natural History Association.  At an elevation of 10,834 feet, San Jacinto is the second highest peak in Southern California.  The Natural History Association operates in conjunction with the Mt San Jacinto State Park and has a rich program of mountain activities.  I was fortunate to be invited to teach the first-ever photography class for the association.

The class would consist of lectures and demonstrations, and be conducted in one of the meeting rooms in the mountain station of the Palm Springs Ariel Tram.  We would have a morning and afternoon shoot in nearby Long Valley,

In preparing for the class, I anticipated that there would be a large cross-section of experience and abilities, with gear ranging from smart photos to high-end digital cameras,  And that proved to be true.  So rather than getting into the technical aspects of photography, the emphasis was on the creative.  This normally consists of talking about light and composition which we took a bit of time to cover.  But the main emphasis was On Seeing.

I wasn’t sure what there was to actually See in Long Valley.  It was always something to pass through on the way to more exciting places like Round Valley or the summit,  So, to find worthwhile things to photograph, our quest became to find and capture the essence, the soul of Long Valley.

And here’s what we found…

Continue reading “Photography Class on Mt San Jacinto”

(105)

Making a Photograph – The Technical and the Creative

Exlore the technical and creative sides of fine art photography.

There’s no question about it; photography is very technical. There are many technical skills that must be mastered to become a proficient photographer. And they didn’t all just crop up when digital cameras came on the scene. Film cameras required a great deal of technical know-how also.

If you were taking a grand landscape photograph back in the days of film, a composition that had a very interesting foreground and a spectacular background, you had to know how to control your depth of field so that the foreground and the background and everything in between would be in focus. This required a technical knowledge of the three factors that affect sharpness; those being, focal distance (the distance from the camera to the object you’re focusing on), the focal length of the lens and the f-stop.

Exposure in the film era was perhaps even a little more intimidating. Your ISO was determined by your film and you selected that when you purchased it. But you had to set your shutter speed and your f-stop manually. Shutter speed wasn’t too hard to understand. If you decrease the length of time the shutter was open, you decrease the amount of light that passed through the lens by the same amount. A shutter speed of 1/30 of a second let twice as much light through the lens as 1/60 of a second. Pretty simple.

But f-stop didn’t make any sense at all. If your f-stop was f/8 and you wanted to double the amount of light coming through the lens, you set it to f/5.6. The amount of light was doubled but the number was smaller. And it wasn’t what you might intuitively have expected it to be, namely, f/4. It could be a bit baffling. And the only way to get a grasp on it was to memorize these weird numbers. With film you were stuck with manual exposure and there was no getting around it. With digital you can use one of the automatic exposure modes so you can get away without fully understanding this f/stop stuff. But it’s still best if you do.

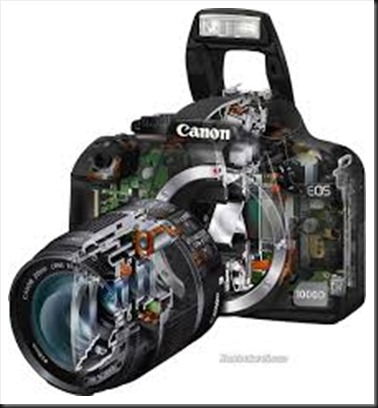
digital-cameraThe coming of the digital camera introduced a whole new level of complexity. In the film age the camera was a simple mechanical device. You were responsible for doing practically everything – deciding where to focus, the shutter speed to use and the f-stop to use. The only role the camera played was to open the shutter for the precise length of time that you specified when you set the shutter speed.

Continue reading “Making a Photograph – The Technical and the Creative”

(2607)

Making a Photograph – Two Sides of the Coin

Landscape photography in the digital age requires an unlikely but necessary blending of technical and creative skills. But keep life simple; don’t let the technical drown out the creative.

I recently read an article by William Neill in the September Outdoor Photography magazine titled “Need to Know” that really resonated with me.  His main point is, don’t let the acquisition of gear and techniques interfere with the experience.  There’s so much information out there, so many people offering advice on techniques for composing, exposing and post processing.  But in Neill’s journey he has developed what he calls, ‘… a simple but effective tool set.”

A foundation of gear and technique is important in capturing the experience.  But it is the experience that is what we’re out there for, not histograms or depth of field or leading lines.

joshua_tree_140920__SM32515_6_7_8_9-Edit


Continue reading “Making a Photograph – Two Sides of the Coin”

(784)

Mastering Sharpness – Fuzzy Photos

How many things can go wrong that can render an image fuzzy.

How many times have you returned from a shoot with some photographs you are really excited about only to find out they are out of focus.  That’s always very disappointing and often frustrating.  And it happens all too often to me.  At the Joshua Tree Gathering this past March someone asked the question, ”How many ways can a photograph be out of focus,” and that got me thinking.  This would be a fun article to write.

But let’s get something straight from the start.  Not all ‘out of focus’ photographs are out of focus.  They may not be sharp but that can come from two causes.  They can actually be out of focus or they can be blurry.  This may seem like a subtle distinction but it’s an important one.  So let’s take them one by one and explore their causes and solutions.

But before we do, I want to make another very important point.  A photograph that is out of focus or blurry is not always a bad thing.  Often times the artist does it intentionally because that is his or her artistic vision.  When it’s done intentionally to create an expressive photograph then it’s not only OK, it’s necessary.  It’s when it’s unintentional that we get frustrated and loose great moments.

But now, let’s get into the details.  We’ll talk about blurs first.

Continue reading “Mastering Sharpness – Fuzzy Photos”

(1073)

Mastering Sharpness – Depth of Field

One of the Four Pillars of a successful landscape photograph is Appropriate Sharpness. This article explains how to get sharp images and illustrates how a useful app – Lens*Lab – can help.

A topic that receives a lot of attention in our workshops is focus.  It’s incredibly important, so important that I consider Appropriate Sharpness to be one of the four pillars of a successful landscape photograph.  (For more, read Making a Photograph – The Four Pillars.)  Most of the questions center around depth of field and hyperfocal distance.  In fact, this is so important that I give a class on Appropriate Sharpness during just about every workshop.  Let’s start the discussion with Depth of Field

Depth of Field

This is the range, if you will, of objects in the view of your camera that are in focus.  Objects in front of this range are out of focus as well as objects behind the range.  A deep depth of field would have the flowers just a few feet from you camera and the distant mounts miles away all in focus.  The depth of field would then extend from a couple of feet to infinity and for all practical purposes would be infinitely deep.  This is often referred to as a ‘near-far composition.’

death_valley_sunrise_2012_rrpm_rc0A shallow depth of field may be just a couple of inches deep with nearer and more distant objects out of focus.  This is referred to as ‘Selective Focus.’

sego_palm_130629__SM36636

Continue reading “Mastering Sharpness – Depth of Field”

(3434)

Mastering Composition – Rule of Thirds

Use the Rule of Thirds to create visual tension in your images and stimulate the viewer’s interest.

The Rule of Thirds is a compositional principle that is widely used. And for good reason because, well, it works.  At least, it works in a lot of situations.

What is the Rule of Thirds? You superimpose a tic-tac-toe grid on your image, two vertical lines equally spaced and two horizontal lines equally spaced. Then you place the key elements of your image on or near those lines, or at one of their intersections.  They don’t have to be exactly on the lines or intersections, just near them.  This is art, not engineering, so it’s important that it feels right.  But the Rule of Thirds gives us positions that are visually very strong and command the viewer’s attention.  That’s why you want to use this principle for the key elements of your composition, the elements you want to draw the viewer’s eye to.

clip_image002

One should be cautious in overusing the Rule of Thirds. It should not be applied mechanically and certainly not universally.  It does not apply to all compositions.  After all, aren’t our ‘Rules’ of composition made to be broken?  But on the other hand, sometimes a composition gets just a little bit stronger when you move the key element just a tiny bit to place it closer to or right on a 1/3rd line.

The fact is it works so well in so many situations that the camera manufacturers give us the ability to display the grid on our camera’s LCD screens and viewfinders. Also, software publishers like Adobe display the grid when we use the crop tool. This is true of Elements, Lightroom and Photoshop. And these aids can be very helpful in achieving strong compositions.

Why does the Rule of Thirds work so well? To answer that let’s talk about Visual Tension.

Continue reading “Mastering Composition – Rule of Thirds”

(2804)

Mastering Composition – What?

Asking yourself, ‘What am I photographing?’ can lead to stronger images that communicate the excitement and inspiration you feel.

Composition is one of the four pillars of a strong landscape photograph (See Making a Photograph – The Four Pillars).  There are many approaches to mastering composition and certainly countless excellent books on the topic.  Many books discuss the elements of design and how they relate to composition – line, shape, form, texture, pattern and color.  Others go into the various rules of composition – rule of thirds, golden rule, leading lines, near / far, layers, frames, etc.

All of these rules or principles are very analytical and, I think, are necessary and useful building blocks.  Often creating a strong composition is very much of a problem-solving endeavor.  But in the end I believe the goal of the composition is to support what the artist wants to communicate through the image.  And this comes more from compositions that just feel right, not ones that are mechanically created from the rules.  That’s not to say that one is not aware of these principles as the composition is being worked out.  Rather these principles are like words in a sentence.  They are carefully chosen so that the sentence as a whole communicates the author’s message.  There are several techniques that lead us to this goal.  And one of them is to ask yourself, ‘’”What am I photographing?”

Continue reading “Mastering Composition – What?”

(1700)

Getting Great Landscape Photographs – Tripods

How I came to own the tripod I now use.

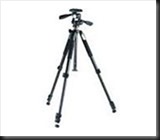
Like many of us I was passionate about photography when I was in college and for a while afterwards.  Then the effort seriously building a career started consuming all my time and photography got pushed aside.  But I bought a new camera when my daughter was born and that kick started my return to photography.  It wasn’t long after that that I started getting back into landscape photography and I went out to purchase a tripod.  I didn’t have a lot to spend so I picked up one in the $125 range and said ‘Ouch’ when I put it on my credit card.  It was something like this one.

tripod-under-200

Every time I wanted to use it I had to screw the camera on to the camera mount.  It wasn’t very tall so I find myself extending the center post all the time and still I had to hunch over to look through the viewfinder.  But it was light weight and I thought all the handles and nobs used to aim and adjust your camera were pretty cool, even if they were a bit awkward.

I got a lot of use out of it – until I set it down at Mt Rushmore, forgot it, and walked off.  When I discovered my mistake we want back to check with the rangers to see if anyone had turned it in.  Of course it was gone.  So we rushed into Rapid City, South Dakota to find a camera store and buy another one for the rest of the trip.  I got the same kind.

It took awhile but it eventually became apparent that a $125 tripod just wasn’t going to do the trick.  It wasn’t very solid and was pretty awkward to use.  So I started reading up on them.  I came across the blog article that explained how you can save $2000 on a tripod by spending $2000 on your first tripod.  That still seemed like a lot of money.  But if that is what it was going to take, ….  So, working from the bottom up I started putting together what I needed.

Continue reading “Getting Great Landscape Photographs – Tripods”

(2041)

Be Prepared

Don’t be caught without that one piece of camera gear you need to get the shot.

Often times when out shooting with other photographers I hear them say, “I wish I had brought my grad ND filter.”  Or maybe they didn’t have the lens they needed.  “Where is it?” I ask.  “It’s back in my hotel room,” is their response.  “Why didn’t you bring it with you?”  “I didn’t think I would need it,” or “It’s too heavy.”

Truth to tell, I don’t understand the rationale of selecting the gear you think you might need when going out on a shoot.  Why not take it all?  I suppose if you have 20 lenses (I exaggerate) you can’t take them all with you.  But a normal complement of gear that gives you the flexibility you need isn’t that hard to pack and carry.

Continue reading “Be Prepared”

(1074)

What Else Things Are

What do your photographs say – about the things you photograph and about you? What do your photographs trigger in your viewers’ minds and imaginations?

Brooks Jensen published a very provocative article in the current issue of Lenswork.  He delves into a topic that I’ve thought about ever since I first picked up a digital camera.  It relates to the question of whether or not it is OK to manipulate photographs.  I’ve always contended that it is not only OK but, at least for the kind of photography I do, it is required.  The photographs I create reflect my interpretation of the natural world around us.  Therefore, their subjects and contents are going to reflect something of me.

Jensen goes several steps farther by identifying three major types of photography – Documentary, Personal Narrative and Imaginative.  Jensen describes Documentary photography as telling “someone else’s story.”  What a great way of describing it.  Clearly, then, in documentary photography, the photographer strives to be as true to the subject as possible and minimize or eliminate his or her own coloration or bias.  The goal is total objectivity.

Continue reading “What Else Things Are”

(972)