Five Tips for Successful Hand-Held Photography

These five tips will help you improve your hand-held photography and bring home photographs you will be proud of.

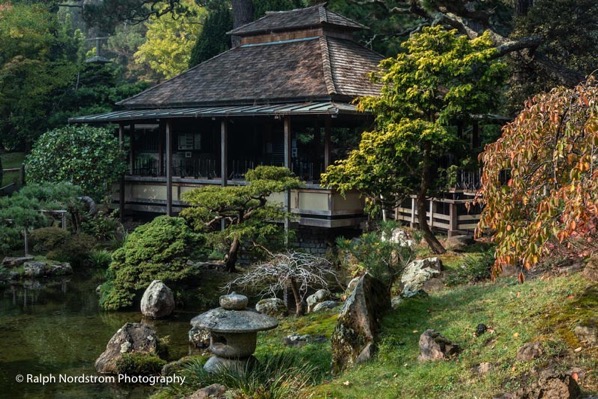
japanese tea garden, golden gate park

As landscape photographers, we prefer to shoot from a tripod. There are a lot of good reasons for this.  Tripods help to ensure a sharp image.  They slow you down so you’re more likely to think through your shot.  They can also keep you from taking so-so shots; if it’s not worth the effort to set up a tripod it’s not worth taking.  And you can dial in very precise compositions.

But when spontaneity is appropriate, tripods simply don’t work. Shooting hand-held gives you the freedom and spontaneity that is required in some situations but it also presents challenges that you don’t even think about when shooting from a tripod.  Fortunately, there are several things you can do to overcome these challenges and create great photographs.

1. Shutter Speed
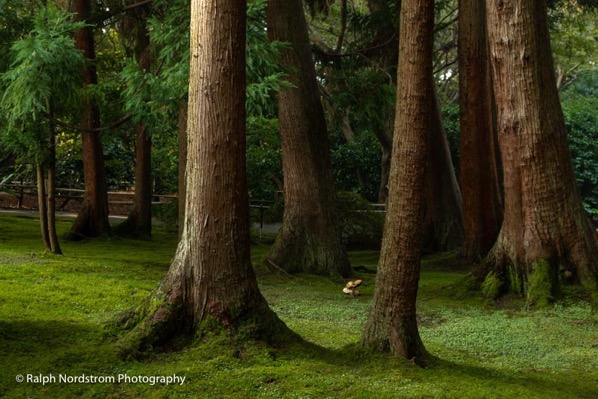
japanese tea garden, golden gate park

With a tripod we don’t worry about shutter speed.  It doesn’t matter if it’s 1/1000 second or 30 seconds.  But when shooting hand-held, the right shutter speed is essential for a sharp image.  If the camera moves ever so slightly while the shutter is open, you have a blur.

Fortunately, there’s a simple way for you to determine what shutter speed will give you a sharp image and it depends on the focal length of your lens.  The formula is simple: 1 / focal length.  If your focal length is 60 mm then a shutter speed of 1/60 second or shorter will give you a sharp image.  But if your focal length is 100 mm then you need a shutter speed of 1/100 second or shorter.

If you have a crop sensor camera then you need to use the effective focal length.  Using a crop sensor Nikon as an example, the conversion factor is 1.5.  In other words, if the lens says 100 mm the effective focal length is 100 x 1.5 or 150 mm.  So, the shutter speed needs to be 1/150 second or shorter.

This photograph above was taken at the Japanese Tea Garden in Golden Gate Park, San Francisco.  It’s an extraordinary experience, especially early in the morning when the crowds are light.  The focal length was 47 mm so a shutter speed of 1/50 second would have been fast enough to get a sharp image.  However,  with image stabilization I was able to shoot it at 1/25 sec.  ISO was bumped to 1600 because of the dark conditions.  And an aperture of f/11 ensured enough depth of field for everything to be sharp.

You still want to hold the camera as steady as possible when taking your shot.  It’s the combination of a steady camera and an appropriate shutter speed that will give you a sharp image.

Continue reading “Five Tips for Successful Hand-Held Photography”

(190)

Tripod or Hand-Held

Take a closer look at the advantages of hand-held photography versus shooting from a tripod,

I was talking with a friend the other day in Joshua Tree about the differences between shooting landscape photography from a tripod versus hand-held.  He had been faithfully photographing from a tripod but did some shooting hand-held, apparently for the first time, and was excited with the sense of freedom he experienced.  We had a brief conversation on the advantages and disadvantages of both methods.  I’d like to share the conversation with you.

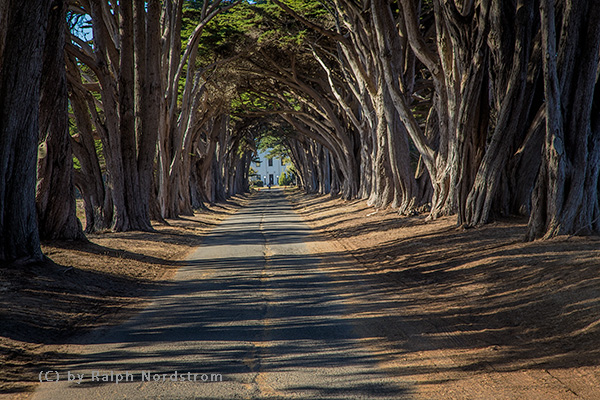
Cypress tunnel long central coast 180919 B0A1117 Edit 2

Continue reading “Tripod or Hand-Held”

(263)

Making a Photograph – Two Sides of the Coin

Landscape photography in the digital age requires an unlikely but necessary blending of technical and creative skills. But keep life simple; don’t let the technical drown out the creative.

I recently read an article by William Neill in the September Outdoor Photography magazine titled “Need to Know” that really resonated with me.  His main point is, don’t let the acquisition of gear and techniques interfere with the experience.  There’s so much information out there, so many people offering advice on techniques for composing, exposing and post processing.  But in Neill’s journey he has developed what he calls, ‘… a simple but effective tool set.”

A foundation of gear and technique is important in capturing the experience.  But it is the experience that is what we’re out there for, not histograms or depth of field or leading lines.

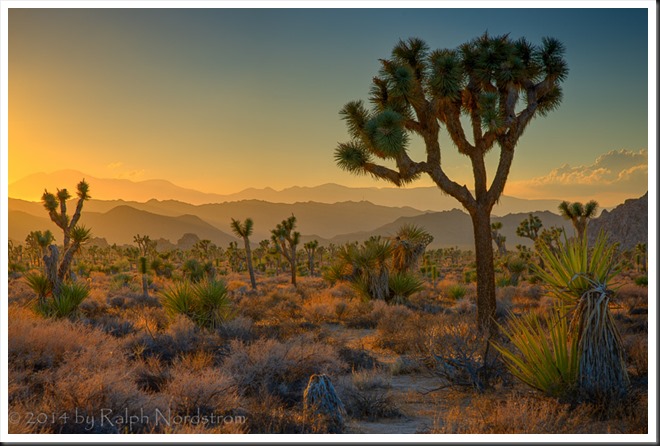
joshua_tree_140920__SM32515_6_7_8_9-Edit


Continue reading “Making a Photograph – Two Sides of the Coin”

(784)

Mastering Sharpness – Fuzzy Photos

How many things can go wrong that can render an image fuzzy.

How many times have you returned from a shoot with some photographs you are really excited about only to find out they are out of focus.  That’s always very disappointing and often frustrating.  And it happens all too often to me.  At the Joshua Tree Gathering this past March someone asked the question, ”How many ways can a photograph be out of focus,” and that got me thinking.  This would be a fun article to write.

But let’s get something straight from the start.  Not all ‘out of focus’ photographs are out of focus.  They may not be sharp but that can come from two causes.  They can actually be out of focus or they can be blurry.  This may seem like a subtle distinction but it’s an important one.  So let’s take them one by one and explore their causes and solutions.

But before we do, I want to make another very important point.  A photograph that is out of focus or blurry is not always a bad thing.  Often times the artist does it intentionally because that is his or her artistic vision.  When it’s done intentionally to create an expressive photograph then it’s not only OK, it’s necessary.  It’s when it’s unintentional that we get frustrated and loose great moments.

But now, let’s get into the details.  We’ll talk about blurs first.

Continue reading “Mastering Sharpness – Fuzzy Photos”

(1073)

Ten Reasons to Take a Photography Workshop

Ten good reasons to take a photogrpahy workshop.

We all love photography.  Perhaps you are a casual photographer, using your smart phone or point-and-shoot camera to capture the precious moments in life you cherish and want to remember.  Perhaps you admire the work of others and would like to be able to capture scenes or moments like they do.  Or maybe you are skilled and have been passionate about your own photography for quite some time now.

For those that seek to develop themselves as photographers there are a couple of approaches you can take.  You can learn on your own by reading and photographing.  And if you are able to devote the time and energy to this process you will surely be successful.  However, it is more of a trial-and-error approach to learning photography and, let’s face it, we don’t all have the time or energy to adequately feed our passion.

Or, you can learn from someone who has already mastered the challenges you encounter along the way.  And one of the most effective and affordable ways of accomplishing this is through a workshop.

So I would like to share with you my top ten reasons for attending a workshop.

1.     Inspiration

Photography workshops give you the opportunity to focus just on photography and capturing the beauty that surrounds you.  The complications of your busy life are left at home or at work and for several stimulating days your existence is focused on one thing – capturing the beauty that surrounds you.

eastern_sierra_130712__SM36935_6_7_8-Edit

Continue reading “Ten Reasons to Take a Photography Workshop”

(973)

Mastering Sharpness – Depth of Field

One of the Four Pillars of a successful landscape photograph is Appropriate Sharpness. This article explains how to get sharp images and illustrates how a useful app – Lens*Lab – can help.

A topic that receives a lot of attention in our workshops is focus.  It’s incredibly important, so important that I consider Appropriate Sharpness to be one of the four pillars of a successful landscape photograph.  (For more, read Making a Photograph – The Four Pillars.)  Most of the questions center around depth of field and hyperfocal distance.  In fact, this is so important that I give a class on Appropriate Sharpness during just about every workshop.  Let’s start the discussion with Depth of Field

Depth of Field

This is the range, if you will, of objects in the view of your camera that are in focus.  Objects in front of this range are out of focus as well as objects behind the range.  A deep depth of field would have the flowers just a few feet from you camera and the distant mounts miles away all in focus.  The depth of field would then extend from a couple of feet to infinity and for all practical purposes would be infinitely deep.  This is often referred to as a ‘near-far composition.’

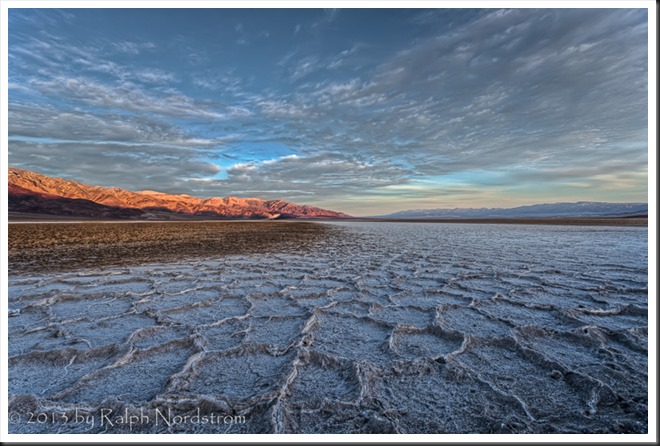
death_valley_sunrise_2012_rrpm_rc0A shallow depth of field may be just a couple of inches deep with nearer and more distant objects out of focus.  This is referred to as ‘Selective Focus.’

sego_palm_130629__SM36636

Continue reading “Mastering Sharpness – Depth of Field”

(3434)

12 Tips on Nighttime Photography

Nighttime photography poses its own challenges. Here are some helpful tips on preparing for and getting the most out of your hours spent in the dark.

Here are some tips on nighttime photography from an informative article by Dan Richards in a recent issue Popular Photography.  Credit for these tips goes to three great photographers – Matt Walker, Darren White and Mashahiro Miyasaka.  Here is the heart of what they shared…

  • Use a fast, wide lens.  Wide lenses slow the apparent motion of the stars.  Fast lenses gather more of the faint light.
  • Use a tripod.  The shortest practical exposure is 30 seconds.  Star trails require anything from tens of minutes to an hour or more.
  • Use an intervalometer.  This is essential for exposures greater than 30 seconds or if you plan to take a sequence of 30 second exposures.
  • Be aware of the weather.  An overcast sky will foil nighttime photography plans and a wind will wreak havoc with long exposures.
  • Be careful.  Scout the location ahead of time.  Use a headlamp, especially  one that has a red light so as not to destroy your night vision.
  • Include interesting foregrounds.  They can be silhouettes or you can light paint them.  You also have the option of creating a composite image by capturing a well exposed image of the foreground at low ISO and a high ISO image of the sky and then blending the two.
  • Focusing is really difficult.  Autofocus doesn’t work so you must use manual focus.  Pick the brightest star in the sky and use live view to focus on it (don’t change your focal length to focus; use the focal length you’ll be using for your image).  Another alternative is to focus on an object at infinity during the day and then marking the focus point with fluorescent tape so you can reset the same focus at night.  Again, use the focal length you will be shooting with as the infinity focus point changes as you zoom in and out.
  • Exposure is critical.  If you’re going to shoot starry  night photographs your exposure length will be 30 seconds (with a 24 mm lens or wider).  Shoot wide open and run tests with different ISO settings.  If  you’re going to use a long exposure to get star trails determine the ISO setting your 30 second exposure and then adjust ISO and f/stop to compensate for the length of exposure.  If your ISO is 6400 at f/2.8 and 30 seconds, if you want a 60 second exposure reduce your ISO to 3200.  A two-minute exposure requires an ISO of 1600.
  • Take a workshop.  That’s always good advice, no matter how experienced you are.  There’s always more to learn.
  • Don’t get disheartened.  This is not easy stuff but practice pays off.
  • Get in shape.  Good locations for night photography are going to be where there’s minimal light pollution and that’s a long ways away from city lights.
  • When the temperature is cold wrap a hand warmer around your lens to keep it from fogging over on those long half hour to hour exposures.

Well, that’s it.  Yea, and I confess; I threw in a couple of my tips too.

Hey, here are a couple of blog posts I’ve done on nighttime photography a while back there.

Exciting Nighttime Photography in 10 Easy steps

Nighttime Photography

So, go on out there and give it a try.  Have fun and be careful.


We always enjoy hearing from you so please feel free to leave a comment and share your experiences with us.

Also sharing this post on Google+, Facebook, Twitter and the like is also appreciated.

Join me on an upcoming workshop.  Click here for more details.

To see more of my photographs click here.

(914)

Two Minutes of Light

Luck favors those who are parepared – and patient.

You read this story again and again.  The setting may be different but the plot is always the same.

It’s a dreary, overcast day.  You had planned this photo session for months, scouting it on Google Earth for the best location, checked the sun position on TPE (The Photographer’s Ephemeris), and received inspiration from the photographs of other photographers.  You made travel plans and booked lodging.

You arrived early at the iconic location, having traveled across the country and driven many miles in a rental car to get there.  But as you approach the sky turns dark with low hanging, gray clouds.  The light is a disappointment but you walk out to a viewpoint and set up anyway.  You keep telling yourself that good fortune happens to those who are prepared.

The minutes tick by and the sun, unseen behind a thick cloak of clouds, continues its inexorable decent to the horizon.  Other photographers join you and you ask each other, “Will it happen?”  Most shrug their shoulders and reply, “It doesn’t look like it will.”  It turns chilly and a cold breeze starts blowing.  Many photographers mutter, “It’s not going to happen,” pack up their gear and head back to their cars and a warm meal waiting them in the comfort of a nearby restaurant.

Continue reading “Two Minutes of Light”

(1173)

A Conversation about Fine Art

Listen in on a conversation about the nature of fine art photography.

What’s on your mind?

I’ve been thinking about ‘fine art.’

You’ve got to be kidding. I mean there are PhDs that study this sort of thing, masters of the arts that won’t touch the topic. What makes you think you can think about ‘fine art?’

I don’t know. I just wonder about it. I’m trying to be an artist and I wonder what it all means, if I’m truly an artist or if I’m getting any closer.

Ok, you’re a photographer, aren’t you? So you must be thinking about fine art photography. You must be nuts! Nobody agrees on what fine art photography is.

Yea, fine art photography, that’s it. What do you think? Do you have any ideas of what it really is? I mean I’ve heard people say that if you want your photography to be art all you have to do is to call it art and it is so. ‘My photographs are fine art.’ Lord knows you hear that enough. But that seems a bit too simplistic, a bit too easy. It seems like it should be more than that.  I mean, can you snap a picture, run down to Costco to get a large print and call it art?


Continue reading “A Conversation about Fine Art”

(1128)

Making a Photograph – The Four Pillars

Explore the four things that make a great landscape photograph – Fantastic Light, Strong Composition, Appropriate Sharpness and Optimum Exposure.

I’ve been giving a lot of thought recently to what goes in to making a great landscape photograph. It turns out there are four things, four pillars if you will.  Four, that’s a good number.  There are the four legs of a table or the four wheels of a car.  And not to forget the four sacred directions of the Native Americans.

In landscape photography the four pillars are evenly divided between the aesthetics and the technical.  So what are they?  The two aesthetic pillars are Fantastic Light and Strong Composition.  No surprise there.  The two technical pillars are Appropriate Sharpness and Optimum Exposure.  No surprise there either.  If just one of those pillars is missing, well, the table collapses, the image suffers.

Let’s look at them one by one….

joshua_tree_spring_sunrise_2011
Joshua Tree Spring Sunrise (2011)
(click on the images to enlarge them)

Continue reading “Making a Photograph – The Four Pillars”

(7186)