Tripod or Hand-Held

Take a closer look at the advantages of hand-held photography versus shooting from a tripod,

I was talking with a friend the other day in Joshua Tree about the differences between shooting landscape photography from a tripod versus hand-held.  He had been faithfully photographing from a tripod but did some shooting hand-held, apparently for the first time, and was excited with the sense of freedom he experienced.  We had a brief conversation on the advantages and disadvantages of both methods.  I’d like to share the conversation with you.

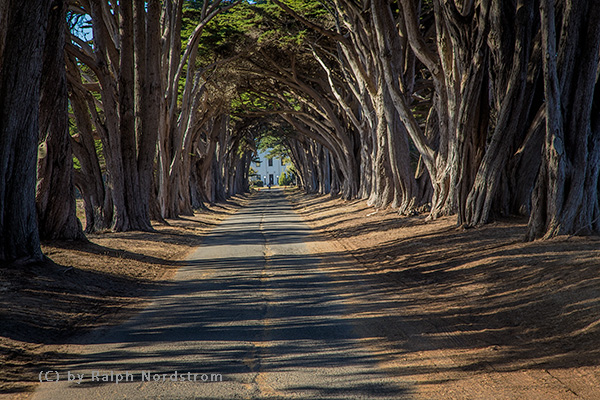
Cypress tunnel long central coast 180919 B0A1117 Edit 2

Continue reading “Tripod or Hand-Held”

(263)

Photographic Gear – Tripods

Five things to look for in a good tripod.

We’ve been taking a tour through my camera bag and so far, we’ve covered the bag itself, camera bodies, lenses, filters and miscellaneous. If you haven’t seen one or more of these articles, here are the links.

Photographic Gear – A Tour of a Photographer’s Camera Bag

Photographic Gear – the Camera Body

Photographic Gear – Lenses

Photographic Gear – Filters

Photographic Gear – Miscellaneous

This article completes the tour, but we now move outside the camera bag to the bag’s exterior where the tripod is often mounted.tripod

Most good camera bags have provisions for mounting your tripod. This is extremely handy when you have longer distances to travel or you need to work your way through the brush to get to where you want to shoot. And any discussion of photographic gear is incomplete without including the tripod, at least for us landscape photographers.

Sharp Images

When we talked about camera bodies and lenses, we talked about technology that reduces or eliminates blur caused by slight camera movements when shooting hand-held. It goes by various names depending on the manufacturer but the goal is always the same – sharper images.

The tripod has always been the mainstay of sharp images for the landscape photographer. A camera mounted on a sturdy tripod will not move when the shutter fires although that statement is not absolute. There are circumstances when even on a tripod images can be blurry due to camera motion.

Continue reading “Photographic Gear – Tripods”

(157)

Mastering Sharpness – Fuzzy Photos

How many things can go wrong that can render an image fuzzy.

How many times have you returned from a shoot with some photographs you are really excited about only to find out they are out of focus.  That’s always very disappointing and often frustrating.  And it happens all too often to me.  At the Joshua Tree Gathering this past March someone asked the question, ”How many ways can a photograph be out of focus,” and that got me thinking.  This would be a fun article to write.

But let’s get something straight from the start.  Not all ‘out of focus’ photographs are out of focus.  They may not be sharp but that can come from two causes.  They can actually be out of focus or they can be blurry.  This may seem like a subtle distinction but it’s an important one.  So let’s take them one by one and explore their causes and solutions.

But before we do, I want to make another very important point.  A photograph that is out of focus or blurry is not always a bad thing.  Often times the artist does it intentionally because that is his or her artistic vision.  When it’s done intentionally to create an expressive photograph then it’s not only OK, it’s necessary.  It’s when it’s unintentional that we get frustrated and loose great moments.

But now, let’s get into the details.  We’ll talk about blurs first.

Continue reading “Mastering Sharpness – Fuzzy Photos”

(1073)

12 Tips on Nighttime Photography

Nighttime photography poses its own challenges. Here are some helpful tips on preparing for and getting the most out of your hours spent in the dark.

Here are some tips on nighttime photography from an informative article by Dan Richards in a recent issue Popular Photography.  Credit for these tips goes to three great photographers – Matt Walker, Darren White and Mashahiro Miyasaka.  Here is the heart of what they shared…

  • Use a fast, wide lens.  Wide lenses slow the apparent motion of the stars.  Fast lenses gather more of the faint light.
  • Use a tripod.  The shortest practical exposure is 30 seconds.  Star trails require anything from tens of minutes to an hour or more.
  • Use an intervalometer.  This is essential for exposures greater than 30 seconds or if you plan to take a sequence of 30 second exposures.
  • Be aware of the weather.  An overcast sky will foil nighttime photography plans and a wind will wreak havoc with long exposures.
  • Be careful.  Scout the location ahead of time.  Use a headlamp, especially  one that has a red light so as not to destroy your night vision.
  • Include interesting foregrounds.  They can be silhouettes or you can light paint them.  You also have the option of creating a composite image by capturing a well exposed image of the foreground at low ISO and a high ISO image of the sky and then blending the two.
  • Focusing is really difficult.  Autofocus doesn’t work so you must use manual focus.  Pick the brightest star in the sky and use live view to focus on it (don’t change your focal length to focus; use the focal length you’ll be using for your image).  Another alternative is to focus on an object at infinity during the day and then marking the focus point with fluorescent tape so you can reset the same focus at night.  Again, use the focal length you will be shooting with as the infinity focus point changes as you zoom in and out.
  • Exposure is critical.  If you’re going to shoot starry  night photographs your exposure length will be 30 seconds (with a 24 mm lens or wider).  Shoot wide open and run tests with different ISO settings.  If  you’re going to use a long exposure to get star trails determine the ISO setting your 30 second exposure and then adjust ISO and f/stop to compensate for the length of exposure.  If your ISO is 6400 at f/2.8 and 30 seconds, if you want a 60 second exposure reduce your ISO to 3200.  A two-minute exposure requires an ISO of 1600.
  • Take a workshop.  That’s always good advice, no matter how experienced you are.  There’s always more to learn.
  • Don’t get disheartened.  This is not easy stuff but practice pays off.
  • Get in shape.  Good locations for night photography are going to be where there’s minimal light pollution and that’s a long ways away from city lights.
  • When the temperature is cold wrap a hand warmer around your lens to keep it from fogging over on those long half hour to hour exposures.

Well, that’s it.  Yea, and I confess; I threw in a couple of my tips too.

Hey, here are a couple of blog posts I’ve done on nighttime photography a while back there.

Exciting Nighttime Photography in 10 Easy steps

Nighttime Photography

So, go on out there and give it a try.  Have fun and be careful.


We always enjoy hearing from you so please feel free to leave a comment and share your experiences with us.

Also sharing this post on Google+, Facebook, Twitter and the like is also appreciated.

Join me on an upcoming workshop.  Click here for more details.

To see more of my photographs click here.

(914)

Getting Great Landscape Photographs – Tripods

How I came to own the tripod I now use.

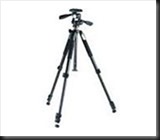
Like many of us I was passionate about photography when I was in college and for a while afterwards.  Then the effort seriously building a career started consuming all my time and photography got pushed aside.  But I bought a new camera when my daughter was born and that kick started my return to photography.  It wasn’t long after that that I started getting back into landscape photography and I went out to purchase a tripod.  I didn’t have a lot to spend so I picked up one in the $125 range and said ‘Ouch’ when I put it on my credit card.  It was something like this one.

tripod-under-200

Every time I wanted to use it I had to screw the camera on to the camera mount.  It wasn’t very tall so I find myself extending the center post all the time and still I had to hunch over to look through the viewfinder.  But it was light weight and I thought all the handles and nobs used to aim and adjust your camera were pretty cool, even if they were a bit awkward.

I got a lot of use out of it – until I set it down at Mt Rushmore, forgot it, and walked off.  When I discovered my mistake we want back to check with the rangers to see if anyone had turned it in.  Of course it was gone.  So we rushed into Rapid City, South Dakota to find a camera store and buy another one for the rest of the trip.  I got the same kind.

It took awhile but it eventually became apparent that a $125 tripod just wasn’t going to do the trick.  It wasn’t very solid and was pretty awkward to use.  So I started reading up on them.  I came across the blog article that explained how you can save $2000 on a tripod by spending $2000 on your first tripod.  That still seemed like a lot of money.  But if that is what it was going to take, ….  So, working from the bottom up I started putting together what I needed.

Continue reading “Getting Great Landscape Photographs – Tripods”

(2041)

Ansel Adams – The Making of 40 Photographs: Nevada Falls

Get insight into how Ansel Adams worked a scene to come up with his flawless and powerful compositions.

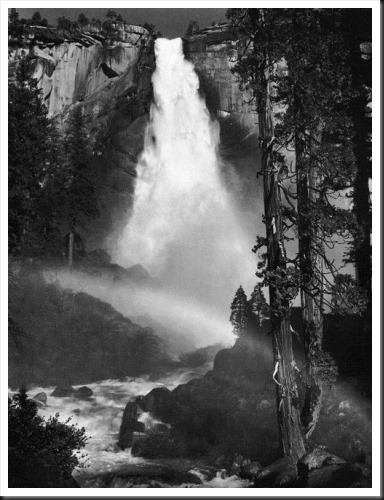
There’s so much to learn from studying Ansel Adams’ photographs, especially when you read what he has to say about them in “Examples – The Making of 40 Photographs”.  Each narrative seems to have its own distinct lesson.  The narrative associated with Nevada Falls is a study in working a composition.

nevada_falls


Continue reading “Ansel Adams – The Making of 40 Photographs: Nevada Falls”

(2685)

Mastering Composition – Working the Shot

How can you create a strong composition? Here’s one method that really works.

There’s no doubt that composition is one of the key elements of a successful image.  You can have all the other factors of a great shot – fantastic light, optimum exposure and appropriate sharpness – but with a weak composition you have a weak photograph. 

I know photographers that work slowly enough to work out the strongest composition before they press the shutter.  I admire these people immensely.  But I don’t work that way, especially in an area I’m unfamiliar with.

A short while ago I was driving south through Utah on beautiful highway 89 traveling between Bryce Canyon and Zion National Parks after wrapping up a successful photography workshop.  I came upon a stand of cottonwood trees that were in full autumn splendor.  I had to pull over.

I grabbed my point and shoot (Canon G11) and started scouting for photographs.  I like to use the G11 for that, scouting for compositions that are worth the effort of setting up my big Canon.  I found two compositions that were promising.

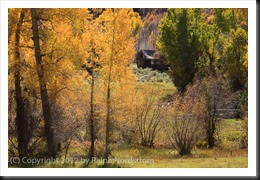
The second proved to be the most interesting, at least in terms of how the final composition evolved.  Behind the cottonwoods was a meadow with a dilapidated shack.  It was so Utah!  I set up what I thought would be an interesting composition.
bryce_121019__SM33931

(Click on the images to enlarge them.)

I positioned my camera so that there would be a narrow opening to the meadow and the shack.  It is a tight composition that draws the viewers eye to the shack which is placed in a very strong position within the frame.  It has a feeling of depth with a strong foreground opening up to the shack in the background.

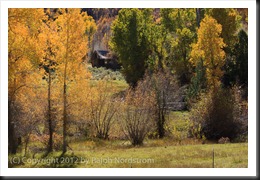
I was feeling good about this composition and then I noticed a glowing cottonwood just outside the frame to the right so I moved the camera a couple of feet to the right and created this image.
bryce_121019__SM33935

The golden cottonwoods on the left are balanced by the single, smaller cottonwood to the right.  This arrangement has the effect of placing more emphasis on the autumnal trees.  The eye makes three stops, first at the cottonwoods on the left, then to the right and finally works its way back to the shack in the back.

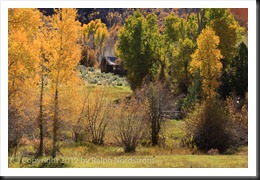
I was pretty  pleased with these two compositions and thought I had something to work with when I got home.  So I disassembled everything and put  it back in my camera bag, collapsed the tripod and started back toward the car.  I hadn’t gone 5 steps when I looked back up toward the shack and saw there was another blaze of cottonwoods right next to it.  So I swung my backpack back down to the ground and set up again for this shot.
bryce_121019__SM33939

Now there are three sources of golden light for the eye to explore – the cottonwoods to the left, the one a little further back on the right and the ones way in the back by the shack.  (Odd numbers of things are always good.)  The image is well balanced and every element in it contributes to the entire impression.

There’s a story here, a story of living in this beautiful valley during a time that is gone and will probably never return.  It must not have been an easy life but one of honest, hard work and the satisfaction of living in a place of such splendid beauty.  We would do it differently today with more conveniences and comforts.  And maybe, just maybe, miss out on the more intimate connection with Mother Earth that living in such a simple shack must have provided.


I’d be interested to hear which of the three compositions you like the most.  Please leave a comment saying which one you like and why.  It will make for a very interesting dialog.

If you enjoyed this post please feel free to Like it and share it with your friends.  You can use the links at the top.

Join me on an upcoming workshop.  Click here for more details.

To see more of my photographs click here.

WordPress Tags: Composition,Shot,image,exposure,area,Utah,highway,Bryce,Canyon,Zion,National,Parks,photography,workshop,trees,splendor,Canon,worth,effort,Behind,shack,Click,images,viewers,depth,foreground,background,arrangement,emphasis,tripod,steps,backpack,numbers,element,valley,life,satisfaction,conveniences,connection,Mother,Earth,factors,compositions,feet,cottonwood,cottonwoods,camera,three

(1287)

HDR for Every Day

How can you get great color photographs in the middle of the day? Read this post to find out.

We landscape photographers tend to avoid photographing during the middle of a sunny day.  The light is harsh with no color.  We prefer golden hour or twilight.

But there are times when we have no choice as to when we can shoot.  When we’re on vacation with family we can’t wait until sunset at every location that sparks our interest.  So we get the shot and hope for the best.  But there’s a technique we can use that will greatly enhance our chances of capturing a more compelling photograph.

Continue reading “HDR for Every Day”

(1831)