Polarizing Filters and Blue Skies

Polarizing filters are fantastic but they have their limitations that can get you into trouble if you’re not aware of them.

What comes to mind when you think of a polarizing filter? It’s probably how it can darken blue skies. This is just one of the many things this versatile polarizer can do. Many photographers swear by them and some go so far as to keep them on their lenses all the time. But as far as darkening blue skies are concerned, polarizers can create more problems than they solve if you’re not careful.

But before getting into all that, just exactly what does a polarizing filter do? How does it darken blue skies?

It all starts with the fact that light is a wave. We speak of the color of light in terms of the frequency of the wave, just as we speak of the pitch of a sound in terms of its frequency. Red light has a lower frequency and blue light, a higher frequency. It’s as if light vibrates – up and down. And most light vibrates in all directions. But some forms of light vibrate in a single direction. This is called polarized light. For example, glaring light bouncing off the highway can be polarized in a horizontal direction. That’s why Polaroid sunglasses work. They block horizontally polarized light while allowing light polarized in the other directions to pass.

The same is true of a blue sky, or at least some of it. Depending on where the sun is, blue sky light is polarized to a greater or lesser extent. If you stand facing the sun and look through your polarizer, you will notice that it has no effect – the sky is not darkened. But if you continue to look through the polarizer and slowly turn away from the sun you will notice the sky gets darker and darker until the sun is directly over your shoulder. Continuing your turn, the sky will get lighter and lighter until the sun is directly behind you.

…as far as darkening blue skies are concerned, polarizers can create more problems than they solve if you’re not careful.

You can tell in which direction the effect is the greatest with this simple trick.

Continue reading “Polarizing Filters and Blue Skies”

(2031)

The Qualities of a Powerful Landscape Photograph

When working on a photograph and wondering where to start, it’s helpful to know what is possible.

I think we all understand that serious landscape photography does not document nature but interprets it.  A well-made landscape photograph captures the photographer’s response to what was experienced and is able to convey this response to the viewer.

The Professional Photographers Association has 12 criteria by which they judge their competitions.  Granted, the PPA membership consists of very few fine art landscape photographers but still, the criteria of a great photograph are pretty much the same.

Here are the twelve criteria (the order is my own):

1.    Impact

2.    Composition

3.    Center of Interest

4.    Lighting

5.    Color Balance

6.    Technical Excellence

7.    Story Telling

8.    Creativity

9.    Style

10.  Presentation

11.  Subject Matter

12.  Technique

I mention these because there’s a lot that goes in to making a great photograph and these criteria provide a framework in knowing what to look for.  But rather that exploring these criteria in words, let’s look at a few photographs.  And let’s do it by looking at two examples of the same image – what it looked like when it came out of the camera and what it became when transformed in the digital darkroom.

Image 1

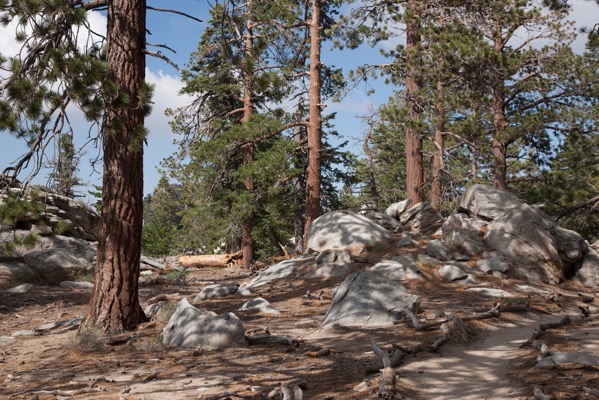
The first image is a scene in the mountains of Southern California.  I was wondering by myself along a remote trail.  The sun was sinking lower and lower in the sky and I was thrilled climbing the trails and walking among the trees and rocks.  I came upon this scene and it just felt right.  I had to capture it.

San jacinto 180720 SM37804

The mid-afternoon light is actually quite nice.  It’s not spectacular but it’s very pleasant and doesn’t pose any exposure challenges. The shadows make for interesting patterns on the forest floor.  And I tried for a composition that captured the energy and harmony I was feeling while at the same time portraying the stately strength of the trees.  And the center of interest is the rocks that form a sort of path that leads up to the trees on the right.  The trail leads out of the frame on the right, inviting the viewer to explore what lies beyond.

It’s a very nice picture but now it’s time to make it even nicer.  An effective way to add impact is to increase the contrast.  (This will be a recurring theme.) The shadows can be darkened along with the midtones.  Care is taken, however, to not lose detail in the shadows.  You also have to be careful with the clouds.  They have more detail that the RAW image doesn’t show, detail that can be coaxed out.

Continue reading “The Qualities of a Powerful Landscape Photograph”

(197)

Tripod or Hand-Held

Take a closer look at the advantages of hand-held photography versus shooting from a tripod,

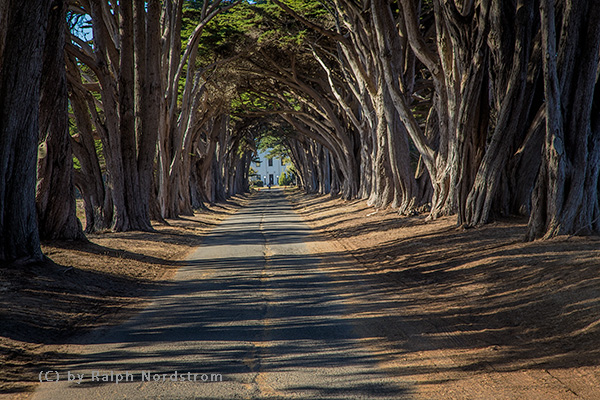
I was talking with a friend the other day in Joshua Tree about the differences between shooting landscape photography from a tripod versus hand-held.  He had been faithfully photographing from a tripod but did some shooting hand-held, apparently for the first time, and was excited with the sense of freedom he experienced.  We had a brief conversation on the advantages and disadvantages of both methods.  I’d like to share the conversation with you.

Cypress tunnel long central coast 180919 B0A1117 Edit 2

Continue reading “Tripod or Hand-Held”

(263)

Photographing the California Central Coast – Day 3

Tag a long on a scouting expedition of the California Central Coast.

I’m on a three-day scouting trip to photograph the central coast of California from the Sonoma Coast north of San Francisco down to Santa Cruz to the south.  I am preparing for the 2018 Central Coast and Napa photography workshop.  The first two days covered the coast north of Frisco. Today would continue south, picking up the coast at Half Moon Bay.  You can read about the first to days here:

Unlike the prior day where I didn’t roll out of my sleeping bag until 8:00, this day the alarm was set for 5:00.  That’s more consistent with what I’m used to when photographing.  I arose in the dark, took a quick hot shower and broke camp as silently as possible.  When I left the campground it was still dark.

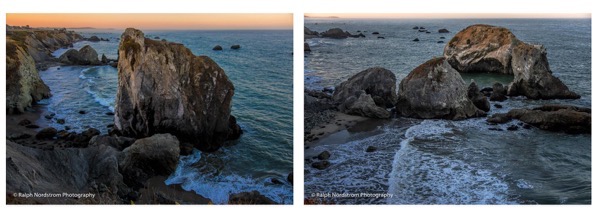
Gleason Beach, which I had photographed the day before, grabbed my attention in the morning light and I had to stop for it again.

Gleason Beach Morning

These two sea stacks that hadn’t impressed me in the afternoon stood out in the soft morning light.  As with the first two days, there were occasional splashes of large waves.  But, from this distance what impressed the eye didn’t impress the camera.  So I was more intent on photographing the patterns made by the surf after the waves broke.

Continue reading “Photographing the California Central Coast – Day 3”

(47)

Photographing the California Central Coast – Day 2

Tag a long on a scouting expedition of the California Central Coast.

I’m continuing a three-day photography scouting trip along California’s Central Coast.  I’m preparing to lead a group here in November for the 2018 Central Coast and Napa Valley workshop.  In the previous post (Photographing the California Central Coast – Day 1), I was joined by a friend and we covered the north end of the Sonoma Coast.

Today is the second day and I’m on my own.  I enjoyed the company yesterday but today will be a more typical experience.

I started out by sleeping in.  It was almost 8:00 when I finally rolled out of my sleeping bag and emerged from my tent to a blue sky.   After yesterday’s overcast and foggy start, this was good news.   A quick breakfast and a hot shower and I was ready to go.  This day was going to cover more mileage than the day before but with fewer stops.

Gleason Beach was the first.

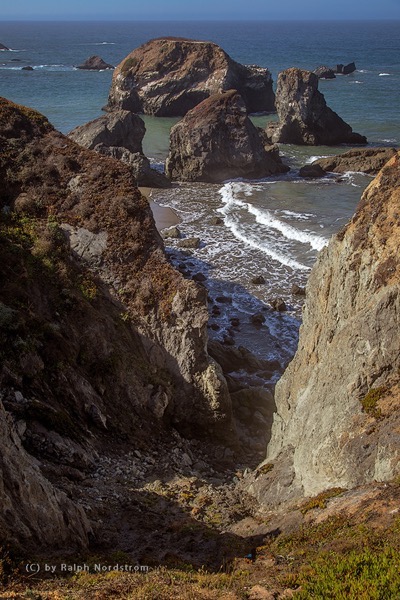
Gleason Beach

There were some sea stacks at this stop but they didn’t stand out.  The severe gash in the cliff that led down to the cluster of sea stacks just off shore, however, was far more interesting. I timed the shot to get two concentric rings of surf which added the grace of curved lines to an overall rugged composition.

Continue reading “Photographing the California Central Coast – Day 2”

(56)

Photographing the California Central Coast – Day 1

Tag a long on a scouting expedition of the California Central Coast.

It wasn’t long ago that I spend three days along the California Central Coast, scouting good shooting locations for the upcoming Central Coast and Napa Valley workshop.   I’m very familiar with the Big Sur coast but this was my first real exposure to the Central Coast north of San Francisco.  And I am excited with what I found.

My base of operations was the Schoolhouse Canyon Campground, a privately owned campground just east of Guerneville on the Russian River.  Clean, quite – I couldn’t have been more pleased.  But on with the photography….

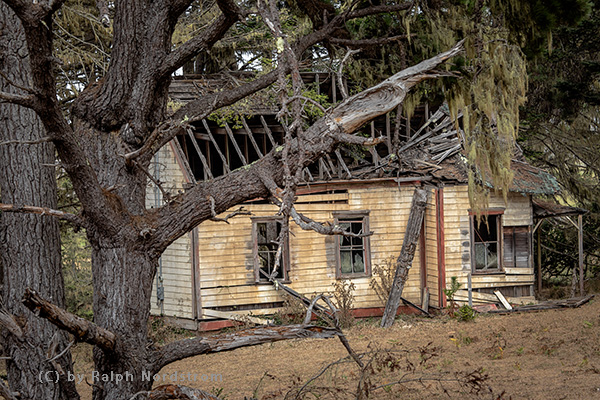
The plan was to start to the north and work south over the next three day’s.  I was joined by a friend the first day which started out overcast and foggy along the coast.  That’s not a huge surprise as this area is still susceptible to the marine layer in September.  But, in this line of business, you work with what you got.  The first destination was Salt Point.  It’s hard to find because there are no marked turn-offs, just a sign saying you’re entering and another sign a few miles up the road saying you’re leaving.  So we overshot it.  And I’m glad we did because we came upon a creepy house that was falling apart.

Creeph House

My friend suggested framing the house with moss hanging from the tree.  That was the perfect touch to give it the macabre feeling we were feeling,  And the overcast sky provided the perfect light.

Continue reading “Photographing the California Central Coast – Day 1”

(106)

Photography Class on Mt San Jacinto

I recently taught a photography class for the Mt San Jacinto Natural History Association.  At an elevation of 10,834 feet, San Jacinto is the second highest peak in Southern California.  The Natural History Association operates in conjunction with the Mt San Jacinto State Park and has a rich program of mountain activities.  I was fortunate to be invited to teach the first-ever photography class for the association.

The class would consist of lectures and demonstrations, and be conducted in one of the meeting rooms in the mountain station of the Palm Springs Ariel Tram.  We would have a morning and afternoon shoot in nearby Long Valley,

In preparing for the class, I anticipated that there would be a large cross-section of experience and abilities, with gear ranging from smart photos to high-end digital cameras,  And that proved to be true.  So rather than getting into the technical aspects of photography, the emphasis was on the creative.  This normally consists of talking about light and composition which we took a bit of time to cover.  But the main emphasis was On Seeing.

I wasn’t sure what there was to actually See in Long Valley.  It was always something to pass through on the way to more exciting places like Round Valley or the summit,  So, to find worthwhile things to photograph, our quest became to find and capture the essence, the soul of Long Valley.

And here’s what we found…

Continue reading “Photography Class on Mt San Jacinto”

(105)

Making a Photograph – Personal Style

Discover your personal style and use it to improve your photography.

Personal style. What is it? I like to bring up the topic of personal style in my workshops. I think it’s important to understand that each of us has a personal style whether we know it or not. It comes from the fact that each of us is a unique individual and sees the world in our own personal way. Our skill levels are different. Our life experiences are different. Our interests are different. And that leads to each of us having our own individual world view.

hidden-valley-130119

Continue reading “Making a Photograph – Personal Style”

(827)

Ten Reasons to Take a Photography Workshop

Ten good reasons to take a photogrpahy workshop.

We all love photography.  Perhaps you are a casual photographer, using your smart phone or point-and-shoot camera to capture the precious moments in life you cherish and want to remember.  Perhaps you admire the work of others and would like to be able to capture scenes or moments like they do.  Or maybe you are skilled and have been passionate about your own photography for quite some time now.

For those that seek to develop themselves as photographers there are a couple of approaches you can take.  You can learn on your own by reading and photographing.  And if you are able to devote the time and energy to this process you will surely be successful.  However, it is more of a trial-and-error approach to learning photography and, let’s face it, we don’t all have the time or energy to adequately feed our passion.

Or, you can learn from someone who has already mastered the challenges you encounter along the way.  And one of the most effective and affordable ways of accomplishing this is through a workshop.

So I would like to share with you my top ten reasons for attending a workshop.

1.     Inspiration

Photography workshops give you the opportunity to focus just on photography and capturing the beauty that surrounds you.  The complications of your busy life are left at home or at work and for several stimulating days your existence is focused on one thing – capturing the beauty that surrounds you.

eastern_sierra_130712__SM36935_6_7_8-Edit

Continue reading “Ten Reasons to Take a Photography Workshop”

(973)

Mastering Sharpness – Depth of Field

One of the Four Pillars of a successful landscape photograph is Appropriate Sharpness. This article explains how to get sharp images and illustrates how a useful app – Lens*Lab – can help.

A topic that receives a lot of attention in our workshops is focus.  It’s incredibly important, so important that I consider Appropriate Sharpness to be one of the four pillars of a successful landscape photograph.  (For more, read Making a Photograph – The Four Pillars.)  Most of the questions center around depth of field and hyperfocal distance.  In fact, this is so important that I give a class on Appropriate Sharpness during just about every workshop.  Let’s start the discussion with Depth of Field

Depth of Field

This is the range, if you will, of objects in the view of your camera that are in focus.  Objects in front of this range are out of focus as well as objects behind the range.  A deep depth of field would have the flowers just a few feet from you camera and the distant mounts miles away all in focus.  The depth of field would then extend from a couple of feet to infinity and for all practical purposes would be infinitely deep.  This is often referred to as a ‘near-far composition.’

death_valley_sunrise_2012_rrpm_rc0A shallow depth of field may be just a couple of inches deep with nearer and more distant objects out of focus.  This is referred to as ‘Selective Focus.’

sego_palm_130629__SM36636

Continue reading “Mastering Sharpness – Depth of Field”

(3434)