Photographing in a Wine Cellar

How to get good photographs from photographing hand-held in dark conditions.

I was at a fabulous winery in Napa Valley, California.  (If you’re a wine lover like I am, you don’t need me to tell you that Napa Valley is in California so my apologies.)  The winery was Castello de Amorosa – the Castle of Love.  It is a replica of a medieval Italian castle.

Now let me clarify a misperception about the castle.  A rumor is going around that the castle was dismantled in Italy and reassembled in Napa Valley.  Not true.  Some pieces of the castle were brought over from Italy but the bulk of it is local stones.  Nevertheless, it’s a beautiful and authentic replica of the real thing.  It has a great room, chapel, a torture chamber, and honest to goodness wine cellars lined with hundreds of barrels of aging wine, which, by the way, is quite good.  (Don’t look for this wine in markets or gourmet restaurants however.  The only place it is sold is at the winery.  But if you would like to tour it, give me a call and I’ll meet you there.)

I was with a group, participants in the workshop I was leading, and we got a private tour.  We all had our cameras at the ready and were photographing just about everything, even the torture chamber (especially the torture chamber?).  The wine cellars were very dark, however, and the aisles extended for hundreds of feet.  There were dim light bulbs sparsely scattered the length of the aisles.  Some of the barrels had labels on them.  Celebrities frequently bought an entire barrel of aging wine, so these barrels were set aside for them.

I was eager to photograph the wine cellars but there was an exposure problem to solve.  I don’t have a tripod, I’m shooting hand-held, so I can’t rely on a lengthy shutter speeds for a good exposures.  So, each side of the exposure triangle posed a challenge and required a solution.  Let’s start with shutter speed.

What shutter speed should I use for handheld shooting?  Well, that depends on the focal length of the lens.  After all, the rule of thumb for sharp handheld images is 1/focal length.  OK, I knew that.  The lens I was using was my go-to 24mm to 105mm lens.  I didn’t want to have to change my shutter speed every time I zoomed to a different focal length, so I chose a speed of 1/120 sec that covers all the zooms up to and including the longest.  Now that’s really fast for a dark environment.  But hold on.  The lens has image stabilization which is good for 1 to 2 stops.  In other words, I can increase the exposure time by 1 to 2 stops and still get a sharp image.  So, being the cautious guy I am, I chose 1/60 sec.

But wait, I normally shoot Aperture Priority where the camera chooses the shutter speed.  Gotta switch to Manual.  OK, that’s done, and I set the shutter speed to 1/60 sec.

The next decision to make is the aperture.  If I shoot wide open, which for this lens is f/4.5, I don’t get the depth of field I need for shooting down the long dim aisles.  Now the depth of field will vary with the focal length so if I’m shooting at 24mm then I can use a fairly wide-open aperture but if I’m shooting at 105mm I need to stop way down, say f/11.  Once again, I didn’t want to have to change the aperture for every shot, so I went with f/11.

But a relatively fast shutter speed and a smaller aperture severely reduces the amount of light that passes through the lens and falls on the sensor.  That leads to the final decision.  What ISO should I use?  And not having eyes that work like light meters, I don’t have a clue.  Furthermore, something has to change from one lighting condition to another.  And since I’m setting and forgetting shutter speed and aperture, that adjustment falls on ISO.  Let the camera set the ISO.  Fortunately, my camera has Auto ISO, so I switched from ISO 100 to Auto.  And I’m all set.

Since the cellar is much darker than a sunny day at noon, the camera selected the higher ISOs and in the really dark places, maxed out the ISO.  As a result, many of the photographs have lots and lots of noise.  At the time I took these photographs, Lightroom’s noise reduction was state of the art, but state of the art then was not very good.  But that has all changed as a result of the AI tsunami and how everyone is going bonkers over it.  Lightroom now employs AI in their noise reduction function and it’s like magic.  The only thing is it can take a long time to do its magic, sometimes as much as 10 minutes and even more.  Oh well, it’s a small price to pay for a dramatically improved image.

So, here’s the camera’s setup.

  • Manual camera mode
  • Shutter speed = 1/max focal length but compensated for taking the lens’ or camera body’s image stabilization (vibration reduction for you Nikon folks) into account
  • F/stop that gives the desired depth of field for your longest focal length, such as, f/11.
  • Auto ISO

In the digital darkroom, Lightroom now has the power to deal effectively with the noise that the highest ISOs will invariably generate.  You may want to use third party noise reduction tools such as Topaz DeNoise AI which is faster than Lightroom and works as well with light to moderate noise.  But it’s more expensive than Lightroom, given that you’re already paying $10/month to use it.

OK, so that’s it as far as the photography aspect of Castello de Amoroso goes.  We ended up in the tasting room of course and I bought a rather expensive bottle of cabernet – 3 figures.  It was so good I couldn’t resist.  When I got home, we prepared a very special meal and opened the bottle.  Both wife and daughter said it was the best wine they had ever tasted.  I must confess, it was awfully good!

(106)

Focus Stacking – First Impressions

A practical guide to focus stacking

Background

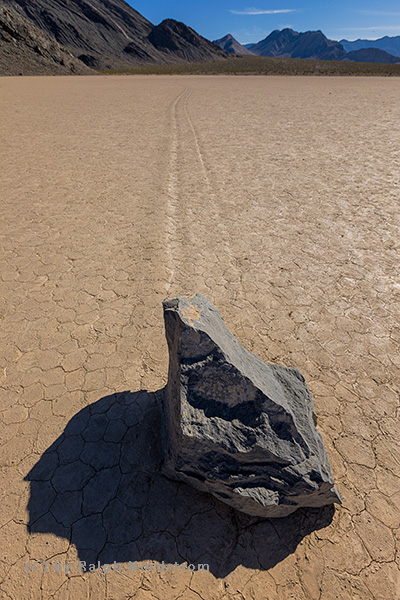
Depth of Field (DOF) is a staple of near-far landscape photography.  It is used when the composition contains object that are very near to the lens as well as objects that are distant.  Traditionally, it has been achieved by using a wide-angle lens with a small aperture or a tilt-shift lens.  Using this technique, it is possible to have the nearest object one or two feet from the lens and everything is in focus from the object to infinity. 

Racetrack rocks death valley 160222 39731
Depth of field example. The rock is 18″ from the lens but with a wide focal length (16 mm) and a stopped down aperture (f/11) everything is in focus.

The disadvantage of this method is you must use a wide-angle or tilt-shift lens, preferably on a full-frame sensor camera body, and a small aperture.  (In this image, the rock was 18” from the lens.  I used a 16mm lens on a camera with a full-frame sensor and was able to get the needed DOF at f/11.). But small apertures introduce lens diffraction which work against you by softening the entire image.  And what if you don’t have a wide enough lens.  You couldn’t get this shot with a 24mm lens.  And getting any kind of DOF with a telephoto lens is virtually impossible, even with fairly distant subjects.

Continue reading “Focus Stacking – First Impressions”

(436)

Images with Impact – Contrast in Nature

Explore how haze affects the contrast in distant objects, how humans respond and how that knowledge can be used in your photographs.

Last year I started a series of articles under the general theme of Images with Impact. In it we are discussing things you can do with your images in Lightroom and Photoshop to enhance their impact. When I got to the topic of contrast I came to an abrupt halt. The more I thought about contrast, the more I wanted to begin that discussion with some real examples from nature. But to do that, I needed some photographs that illustrated what I wanted to share with you. And in Southern California, the types of photographs I wanted are only possible in winter. But it’s winter now. And I’ve been able to capture the photographs that I want, so now we’re picking up the series again.

What distinguishes a photograph created by the serious student of photography from one taken by a casual photographer? Many things to be sure. But one thing that stands out is a sense of clarity, a clear quality. The casual photographers’ photographs are just what the camera captures and are often like looking through a bit of haze and I don’t mean that they are out of focus. It’s the light. The effect may be subtle but it is very real. A more accomplished photographers’ photographs have a special quality to them, a quality that engages us, that draws us in and holds our attention. You might describe it as a crisp quality.  (You can click on the photographs to enlarge them.)

CRW_9603

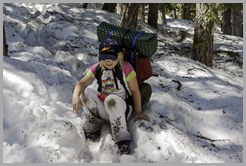
(My daughter some years ago as we hiked out of a late spring backpacking trip in the local mountains.)

The serious student of photography skillfully applies contrast in the digital darkroom to achieve this look. But before getting in to how this is done, let’s step back and take a look at how we respond to contrast not only in photographs but also in nature.

In the following discussion I will use examples from nature to illustrate the affect contrast has on us. The idea is to understand how it works so that we can more effectively apply this knowledge to our photographs.

Continue reading “Images with Impact – Contrast in Nature”

(356)

Mastering Night Photography – Focusing

Solve your focusing challenges in nighttime photography.

A lot of people are doing nighttime photography these days including yours truly. There are many good sources of information on nighttime photography. I’ve written a few blog posts myself (Exciting Nighttime Photography in 10 Easy Steps). Nighttime photography falls into two categories – star trails and night sky. In this post I want to elaborate on something I’ve discovered recently with regards to night sky photography.

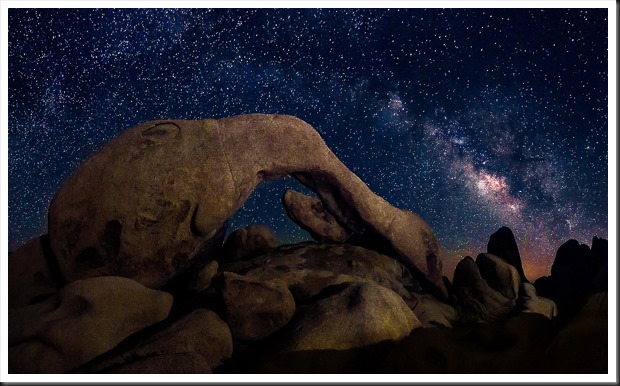
double-arch-joshua-tree-140628Nighttime photography is pretty much like daytime photography. The biggest difference is you can’t see what you’re doing. Let’s run through a quick comparison of camera settings in daytime and nighttime photography.

Continue reading “Mastering Night Photography – Focusing”

(3625)

Mastering Light – Sunrise and Sunset

Getting the most out of sunrises and sunsets.

We all love a beautiful sunset, especially when the clouds glow with color. The same happens with sunrise although there may not be as many of us up to enjoy it. There’s something special about sunsets and sunrises that bring joy and wonder to our hearts.

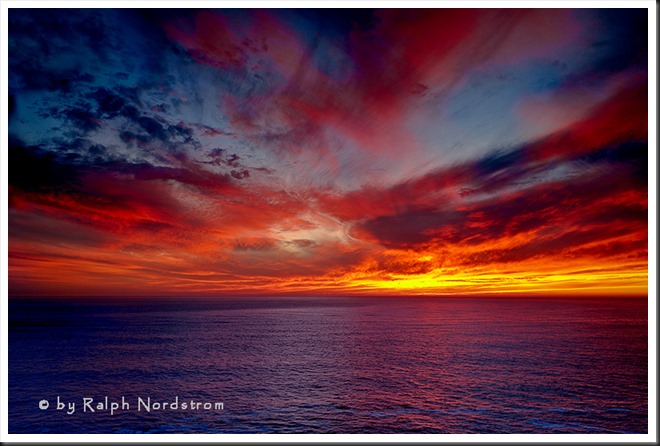
sunset_marin_headlands_2010

My personal favorite is sunrise. I like to arrive while it’s still dark and set up my camera in the cold, crisp morning air. I like standing under the fading stars waiting for the sun to come. I like the stillness of the earth at that time of day. For me, it’s magical.

To get the most out of sunrises and sunsets, it’s helpful to know what’s going on in the sky. (I’ll talk just about sunrises now but much of the same things apply to sunsets.) A lot depends on the clouds. If the sky is completely overcast then you’re not likely to have much of a sunrise or sunset. If the sky is clear then you’ll have a totally different experience. But if the sky is strewn with scattered clouds you may be in for a wonderful experience.  And yet it’s hard to predict.

Continue reading “Mastering Light – Sunrise and Sunset”

(4826)

12 Tips on Nighttime Photography

Nighttime photography poses its own challenges. Here are some helpful tips on preparing for and getting the most out of your hours spent in the dark.

Here are some tips on nighttime photography from an informative article by Dan Richards in a recent issue Popular Photography.  Credit for these tips goes to three great photographers – Matt Walker, Darren White and Mashahiro Miyasaka.  Here is the heart of what they shared…

  • Use a fast, wide lens.  Wide lenses slow the apparent motion of the stars.  Fast lenses gather more of the faint light.
  • Use a tripod.  The shortest practical exposure is 30 seconds.  Star trails require anything from tens of minutes to an hour or more.
  • Use an intervalometer.  This is essential for exposures greater than 30 seconds or if you plan to take a sequence of 30 second exposures.
  • Be aware of the weather.  An overcast sky will foil nighttime photography plans and a wind will wreak havoc with long exposures.
  • Be careful.  Scout the location ahead of time.  Use a headlamp, especially  one that has a red light so as not to destroy your night vision.
  • Include interesting foregrounds.  They can be silhouettes or you can light paint them.  You also have the option of creating a composite image by capturing a well exposed image of the foreground at low ISO and a high ISO image of the sky and then blending the two.
  • Focusing is really difficult.  Autofocus doesn’t work so you must use manual focus.  Pick the brightest star in the sky and use live view to focus on it (don’t change your focal length to focus; use the focal length you’ll be using for your image).  Another alternative is to focus on an object at infinity during the day and then marking the focus point with fluorescent tape so you can reset the same focus at night.  Again, use the focal length you will be shooting with as the infinity focus point changes as you zoom in and out.
  • Exposure is critical.  If you’re going to shoot starry  night photographs your exposure length will be 30 seconds (with a 24 mm lens or wider).  Shoot wide open and run tests with different ISO settings.  If  you’re going to use a long exposure to get star trails determine the ISO setting your 30 second exposure and then adjust ISO and f/stop to compensate for the length of exposure.  If your ISO is 6400 at f/2.8 and 30 seconds, if you want a 60 second exposure reduce your ISO to 3200.  A two-minute exposure requires an ISO of 1600.
  • Take a workshop.  That’s always good advice, no matter how experienced you are.  There’s always more to learn.
  • Don’t get disheartened.  This is not easy stuff but practice pays off.
  • Get in shape.  Good locations for night photography are going to be where there’s minimal light pollution and that’s a long ways away from city lights.
  • When the temperature is cold wrap a hand warmer around your lens to keep it from fogging over on those long half hour to hour exposures.

Well, that’s it.  Yea, and I confess; I threw in a couple of my tips too.

Hey, here are a couple of blog posts I’ve done on nighttime photography a while back there.

Exciting Nighttime Photography in 10 Easy steps

Nighttime Photography

So, go on out there and give it a try.  Have fun and be careful.


We always enjoy hearing from you so please feel free to leave a comment and share your experiences with us.

Also sharing this post on Google+, Facebook, Twitter and the like is also appreciated.

Join me on an upcoming workshop.  Click here for more details.

To see more of my photographs click here.

(914)

Mastering Strong Photographs – Optimum Exposure

Get optimum exposures in your photographs by mastering these basic techniques.

One of the four qualities of a strong landscape photograph is Optimum Exposure. (The other three are Appropriate Sharpness, Fantastic Light and Strong Composition).  While all four qualities are essential to a strong photograph, the foundation is always and always has been a spot on exposure (did you catch the pun?).  An optimum exposure starts in the field and ends in the darkroom.  Here is an overview, a checklist if you will, of the camera skills you need.

Basic Exposure Controls

One of the greatest advances provided by the digital camera is instant exposure feedback on the photograph you just took.  There are two settings that provide this.  The first and most important is the Histogram.  It can alert you not only to whether your image is over exposed, under exposed or exposed just right but can also alert you to serious exposure problems that require special techniques.  (You can read the series of posts on the histogram here:  Mastering Exposure – Histograms Part 4.)  So configuring your camera to display the histogram (and checking it after every shot) is one essential technique to have.

Related to the histogram is the “blinkies” or Highlight Warning.  This setting causes any areas that have highlight clipping to blink when the image is displayed on the LCD screen immediately after it is captured.  This provides instant warning of the most fateful flaw of all – highlight clipping.

Aperture Priority is the exposure mode I use more than 90% of the time when out shooting.  There are times I use Shutter Priority and Manual but most of the time I turn to Aperture Priority.  This is because depth of field is often the primary consideration (remember the second of the four essential qualities – Appropriate Sharpness?).  And aperture priority is one of the key factors that affects depth of field.

When the histogram tells you that you have over or under exposed your image you need to correct and re-shoot.  And to do that you need to know about Exposure Compensation.  This control overrides your camera by increasing or decreasing the exposure your camera’s light meter calculated.  In this way if your camera has overexposed the image a little, you can apply negative exposure compensation to decrease the exposure.

ISO controls the sensitivity of the cameras sensor.  Lower ISOs decrease sensitivity requiring more light for an optimum exposure.  But the image quality is better.  Higher ISOs increase the sensitivity which is good for low light situations because they require less light.  But the trade-off is poorer image quality.  I normally set ISO to 100 and only change it when I can’t get the exposure I want.

Advanced Exposure Controls

There is one situation in particular that the camera simply can’t handle.  It is referred to as High Dynamic Range.  This occurs when the dynamic range of the scene you are photographing exceeds the dynamic range that your camera’s sensor is capable of capturing.  When this occurs you have four choices.

1. You can choose not to photograph the scene.  This was a fairly commonly chosen option in the film days because there was literally no way of capturing the image without it suffering from highlight clipping.

2. You can underexpose the image so that the highlights are rendered without clipping.  This makes the shadows totally black and you end up with silhouettes, often times a very nice effect.  You can use exposure compensation to accomplish this.

3. You can use a graduated neutral density filter to darken the bright parts of the image without darkening the shadows.  This works well when the sky is bright, the foreground is dark and there’s pretty much of a straight line between the two.

4. You can take multiple bracketed exposures that span the dynamic range of the scene and then blend them together in the darkroom on your computer.  To do this you need to know how to set up Automatic Exposure Bracketing (or AEB) on your camera.

Summary of Camera Techniques

So here is a summary of the camera techniques you need to be able to do in order to achieve Optimum Exposures.

  • Histogram
  • “Blinkies”
  • Aperture Priority (and other exposure modes)
  • Exposure Compensation
  • ISO
  • Automatic Exposure Bracketing (AEB)

If you’re not familiar with any of these I suggest you pull out your camera’s manual and look them up.  Then go out and practice them until they become second nature to you.  This way you can focus on the creative rather than the technical when out in the field.

There’s more work to be done regarding exposure (and the broader subject of tonality) in the darkroom.  But, particularly in the digital age, capturing a RAW image that provides the optimum information with which to work in the darkroom is the first and absolutely essential step.  And by mastering these techniques you will avoid the disappointment of having to discard what would have been a great photograph because you didn’t nail the exposure.


If you like this post please feel free to share it on Facebook or with your friends.

We always enjoy hearing from you so please leave a comment and share your experiences and insights with the rest of us.

We do photography workshops.  Come on out and join us.  Click here to check us out.

You can also check out our photography.  Click here.

(2008)

File Naming Strategies

Having an effective file naming convention may not be the most exciting thing but it can sure make your life a lot easier.

OK, so this isn’t a very sexy topic but having a strategy for naming your image files can save you a lot of grief down the road.  Let me run through what I’ve worked out over the years (and believe me, it’s taken several years to perfect this).

So it starts in Lightroom which gives you the option of renaming your files when you import them.  I’m following Scott Kelby’s recommendation here.  Let’s start with a file name as it is created in the camera.  It’s going to look something like this – _SM35116.CR2.  By the way, here’s the photograph that that goes with.

hidden_valley_130119

Hidden Valley (2013)

Continue reading “File Naming Strategies”

(2792)

Mastering Light – Dawn

Read about the key to capturing spectacular sunrise photographs.

Not long ago I was photographing dawn in Joshua Tree National Park.  I must confess, dawn is my favorite time of day.  And I have thrilled to more spectacular dawns in Joshua Tree than anywhere else.  There are ;often clouds that ignite as the sun approaches.  And the other morning was no exception.

I’d like to share with you three photographs taken that morning.  The alarm went off at 4:30 and we left the motel in Twentynine Palms a 5:30, an hour and a half before sunrise.  There were clouds in the morning sky, the first ingredient for a spectacular sunrise but by no means a guarantee.  I selected Sheep Pass at the west end of Queen Valley because it offered both Joshua Trees and some impressive granite outcrops for an interesting foreground.  We arrived about 45 minutes before sunrise.  It was still dark with the barest glimmer of light in the east.

Continue reading “Mastering Light – Dawn”

(2171)

Exciting Nighttime Photography – Exposure

Nighttime photography – photographing the moon

There are many techniques involved in nighttime photography.  Star trail photographs are a traditional approach dating back to the film days.  If you think about it, that makes sense.  With the ISOs commercially available to most of us photographers, shooting the nighttime sky was not an option.  We simply didn’t have fast enough film.

With the advent of digital photography we can now push ISOs into the thousands and the noise levels are constantly improving.  And we can modify our cameras’ sensors to sensitize them to infrared light, something that the serious and most accomplished nighttime photographers do.  This provides us the opportunity to photograph both star trails and the night sky.

In previous articles I’ve discussed techniques for both types of nighttime photography.  In the most recent one I describe a technique that can provide both star trails and night sky photographs from a single session.  Here’s the link.

Exciting Nighttime Photography in 10 Easy Steps

One aspect I haven’t covered in detail yet is exposure.

Earlier this week there was a beautiful conjunction of the crescent moon and Venus in the early evening sky.  So I grabbed my camera, got permission from my neighbor and used their front yard to photograph the moon and Venus over the Los Angeles basin here in Southern California.

Continue reading “Exciting Nighttime Photography – Exposure”

(3138)