Mastering Your Camera

There are only 12 skills you need to learn to master your camera. Check out what they are.

I’m not the only one that contends that mastering your camera is an important first step in mastering photography. You’ll see it in blog posts, articles and videos.

Let’s take a deeper, more detailed look at what it means to master your camera and show that it’s not an impossible task, as intimidating as it may seem when you first start.

It starts with the question, “What does a camera do?” The hundreds of pages in the camera’s user manual and a similar number of options in its menus make it look like mastering it is a massive if not impossible task.  It appears daunting, especially if you are not technically inclined.  But in reality, what you need the camera to do comes down to just two things – control the exposure and control sharpness. Let’s see what core skills are required to master these two things.

Control Exposure

The purpose of exposure control is to ensure the right amount of light enters the camera so that the sensor can record the image you are photographing.  You and the camera need to respond to both bright and dark scenes.  The exposure controls are what makes it possible to match the exposure to the kinds of lighting conditions you encounter.

Tell Me More About Exposure….

There are three variables that can be adjusted to respond to the amount of light in the scene – ISO, aperture and shutter speed. These three variables form the famous exposure triangle.

Tell Me More About the Exposure Triangle….

Continue reading “Mastering Your Camera”

(389)

Why Do I Need an HDR App when Lightroom Has It?

Lightroom is good for basic HDR but for full creative control, HDR applications have an important role to play.

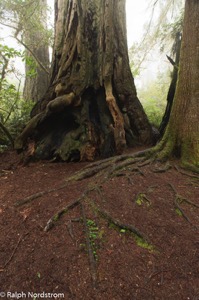
I was recently in the redwoods of Northern California.  One of the groves I love is the Lady Bird Johnson Grove in Prairie Creek State Park.  In it is a Western hemlock growing next to a massive redwood.  The hemlock’s roots spread out across the ground, making an interesting and photo-worthy pattern.  I’ve photographed it a number of times in the past but never liked what I got.

This year was different.  I finally saw a composition that excited me.  The sky was overcast and a bright mist hung in the forest.  I knew I was going to have a dynamic range problem so I shot HDR – 5 shots bracketed 1 1/3 stops.

I knew I was going to have a dynamic range problem so I shot HDR….

I was eager to see what it looked like so when I got back to my hotel room I ran it through the Lightroom HDR.  One thing about the Lightroom HDR feature is that it is convenient, quick and creates a DNG file.  But its drawback is that you don’t have a lot of control.  Besides alignment and de-ghosting, you have the Auto function, the same Auto found in the Basic group in Lightroom.  That’s it.

I ran my five files through Lightroom HDR, but the results were disappointing.  The foreground was rendered well but the forest in the background was blown out.   I tried my best to recover what I could, but it was too far gone.  Another year gone by and I still don’t have this photograph.

Redwoods 180522 SM37414 HDR

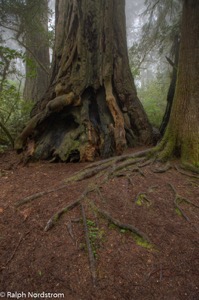
It wasn’t until sometime later that I was browsing my redwood images and came across this shot.  I decided to have another go at it but this time using my tried and true Photomatix Pro 6.0.  I’ve been using Photomatix Pro since version 1 and it has always produced for me.  Photomatix Pro is extremely versatile, giving the photographer a wide range of expressions from natural to surreal.  And with over 40 presets, it’s easy to find one that is very close to what you’re looking for.  I always prefer the more natural look.

An image that I thought was lost came back to life with Photomatix Pro.

I imported the five files, selected one of the more natural presents and what a difference.  An image that I thought was lost came back to life with Photomatix Pro.  Not only was the foreground beautifully rendered but so was the background.  A few small tweaks and the photograph was ready for the rest of the workflow.

Redwoods 180522 SM37414 5 6 7 8 Enhancer

I finished my normal workflow by completing the Lightroom adjustments once Photomatix Pro had imported the TIFF file back into the Lightroom catalog.  That was followed by the fine tuning I always do in Photoshop.

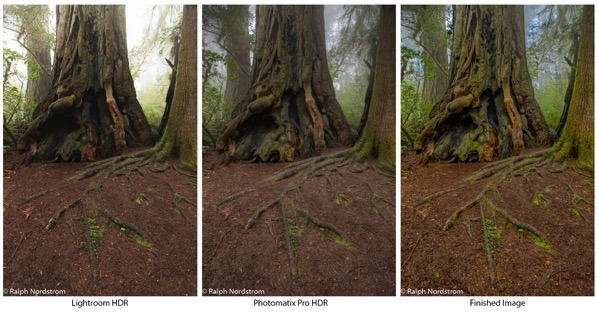
I thought you might like to see the HDR outputs from Lightroom and Photomatix Pro along with the finished photograph side-by-side.

Redwoods hdr comparison

Lightroom HDR still has a role to play for me.  When I’ve just uploaded my files from a shoot and am browsing through them to select the ones I want to work on, I find the Lightroom HDR very handy to get a sense of if I’ve captured the dynamic range or not.  But if I later decide I want to print the image and add it to my portfolio I’ll redo the HDR blending in Photomatix Pro where I have so much more control.  Lightroom HDR doesn’t come close to providing the artistic control that I need.  Photomatix Pro continues to fill that gap and remains an essential tool in my HDR workflow.

You can see for yourself and give Photomatix Pro a spin by downloading a trial version from their website.

(34)

Mastering Light – Sunrise and Sunset

Getting the most out of sunrises and sunsets.

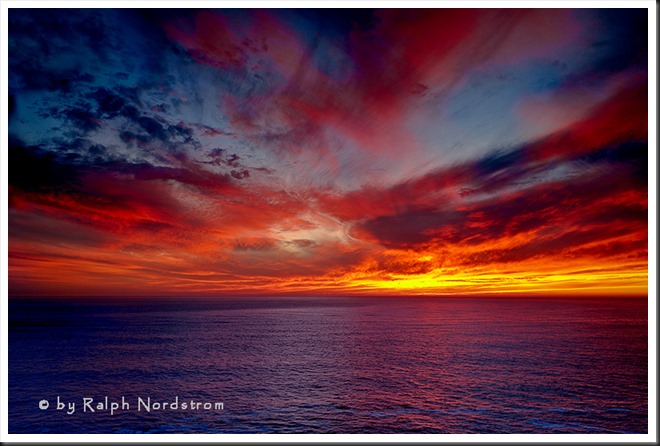
We all love a beautiful sunset, especially when the clouds glow with color. The same happens with sunrise although there may not be as many of us up to enjoy it. There’s something special about sunsets and sunrises that bring joy and wonder to our hearts.

sunset_marin_headlands_2010

My personal favorite is sunrise. I like to arrive while it’s still dark and set up my camera in the cold, crisp morning air. I like standing under the fading stars waiting for the sun to come. I like the stillness of the earth at that time of day. For me, it’s magical.

To get the most out of sunrises and sunsets, it’s helpful to know what’s going on in the sky. (I’ll talk just about sunrises now but much of the same things apply to sunsets.) A lot depends on the clouds. If the sky is completely overcast then you’re not likely to have much of a sunrise or sunset. If the sky is clear then you’ll have a totally different experience. But if the sky is strewn with scattered clouds you may be in for a wonderful experience.  And yet it’s hard to predict.

Continue reading “Mastering Light – Sunrise and Sunset”

(4871)

How to Photograph the Coastal Redwoods

The Coastal Redwoods of Northern California have a beauty that is inspiring. But capturing them in a photograph is much harder than it may seem. Come with me to explore ways to capture their grandeur.

California is blessed with two species of redwoods, the Giant Sequoia (Sequoia giganteum) of the Sierra Nevada Mountains and the Coastal Redwoods (Sequoia semperverins) along the California coast from the Oregon border to 150 miles south of San Francisco.  These awe-inspiring trees are both a joy and a challenge to photograph.  I recently spent a week in Crescent City in Northern California photographing the Coastal Redwoods and leading a photography workshop there.  I’d like to pass along some of the techniques we employed to capture photographs that do these majestic trees justice in breathtaking but often very difficult light.

Continue reading “How to Photograph the Coastal Redwoods”

(7901)

Making a Photograph – The Four Pillars

Explore the four things that make a great landscape photograph – Fantastic Light, Strong Composition, Appropriate Sharpness and Optimum Exposure.

I’ve been giving a lot of thought recently to what goes in to making a great landscape photograph. It turns out there are four things, four pillars if you will.  Four, that’s a good number.  There are the four legs of a table or the four wheels of a car.  And not to forget the four sacred directions of the Native Americans.

In landscape photography the four pillars are evenly divided between the aesthetics and the technical.  So what are they?  The two aesthetic pillars are Fantastic Light and Strong Composition.  No surprise there.  The two technical pillars are Appropriate Sharpness and Optimum Exposure.  No surprise there either.  If just one of those pillars is missing, well, the table collapses, the image suffers.

Let’s look at them one by one….

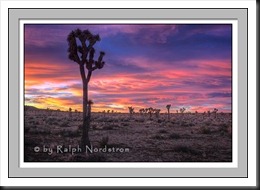
joshua_tree_spring_sunrise_2011
Joshua Tree Spring Sunrise (2011)
(click on the images to enlarge them)

Continue reading “Making a Photograph – The Four Pillars”

(7203)

HDR Tip #3

On exporting images from Lightroom to PhotoMatix.

In the previous tip we discussed adjustments you want to make to your images in Lightroom to prepare them for the HDR process to come.

This next tips covers the step where we get the images out of Lightroom.

Lightroom is a RAW image converter (among other things).  It does RAW image conversions extremely well.  Other great RAW image converters are available to us – Capture One, Aperture, and DxO to name a just few.  These are all highly sophisticated products that do an extraordinary job.

Continue reading “HDR Tip #3”

(861)

HDR Tip #2

The second in a series of tips on how to process HDR images.

These HDR tips resulted from a conversation with my good friend Andreas Waldeck, an HDR expert who happens to work with HDRSoft, the publisher of the premier HDR software Photomatix Pro.

In Tip #1 we talked about the correct way to capture multiple images HDR images in the field.  See HDR Tip #1.

Now I want to start discussing the processing of these image files.  The software tools we’ll discuss are Lightroom, Photomatix and, to a much lesser extent, Photoshop.  So let’s get started.

Continue reading “HDR Tip #2”

(2619)

HDR Tip #1

Announcing 2010 photography workshops

I shoot a lot of HDR.  That’s where you take multiple images at different exposures so that you capture the full dynamic range of the scene in front of you.  Many people consider HDR to be unnatural and you can definitely get a surreal effect.  But HDR is the only way you can capture certain challenging scenes and make the results look like what you see, not what your camera sees.

I had a talk with my good friend Andreas Waldeck who works for HDRsoft, the creators of Photomatix.  This is the premier software for doing HDR.  Andreas shared some things with me that were real eye-openers and I’d like to pass them along to you in a series of HDR Tips.  So let’s get started with the first tip.

Continue reading “HDR Tip #1”

(2437)

Shoot Till You Can’t Shoot Any More

There’s a lot of talk amongst photographers about shooting in the golden hours – around sunrise and sunset.  There’s no disagreement that the light is wonderful at those times of the day.  The low angle gives excitingly long shadows and the fact that the sunlight has to travel through more of our atmosphere means it’s a bit softer and a lot warmer.

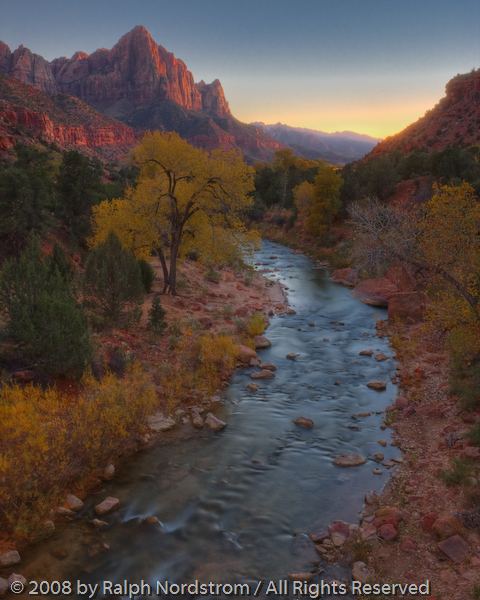
So you often find a lot of photographers lining up for sunset shoots at iconic locations.  The bridge over the Virgin River in Zion is a perfect example.  I’ve got to admit, I love to shoot sunsets from the bridge myself.  Most photographers will arrive early and stay about 20 minutes after the sun disappears below the horizon at which time the pack up and head off to dinner.

I like to stay till I can’t shoot any more.  The light show isn’t over by any means when the glow on the clouds fades.  It’s just a lot more subtle.  As the light fades exposure times increase and when you get up to 30 seconds then ISO starts to bump up.

Why do I like this light so much?  Well, because there is so much going on.  Many complex and intricate things are going on in the sky above.  You end up getting a delicate play of warm and cool light.  Everything is enveloped in a quiet, soft luminance.  It can be a magic unlike any other time of day.

I was shooting on that famous bridge in Zion back in November.  If it hadn’t been for my two friends shooting with me I would have been the only one on the bridge.  Everyone else had long gone.  I was shooting HDR, 5 bracketed shots, something I’ve found to be very effective (don’t forget, the sky stays bright long after the sun disappears).  Each shot was varied by 1 1/3 stop.  Post processing consisted of Photomatix and a little Light Room.  Here’s what I got.  (You can click on these images to enlarge them.)

Watchman at Twilight

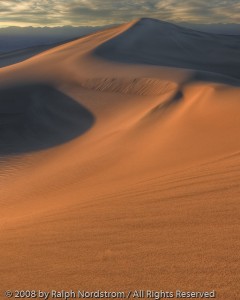
A few weeks before I took this Zion twilight shot I found myself in Death Valley on the Mesquite Flats Dunes, again at sunset.  I set up on this one composition and shot it for about an hour and a half.  Many people like the stark contrast created by the sun playing on the undulating surfaces of the dunes.  I like it too.

Mescuite Dunes Sunset
Mesquite Dunes Sunset

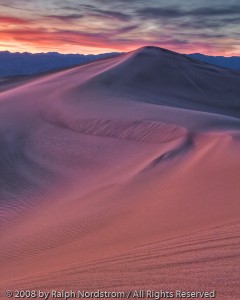
 But a while later comes the real show, at least for my money.  The play of colors becomes outrageous with reds, magentas, purples, oranges, yellows and blues.  And I love the forms and textures of the sand.  It’s truly amazing.

Mesquite Dunes Twilight

So for my money, you’ll see me out there (usually by myself) until I can’t shoot any more.  Hey, why don’t you join me and see for yourself.

Then and only then I’ll pack up my gear and head off for dinner.

Note:  All of the above photographs are HDR, not just Zion.

To see more of my work go to Ralph Nordstrom Photography.

(501)

High Dynamic Range Processing

High Dynamic Range or HDR has become a standard and often used tool when I’m in the field.  For example, a few weeks ago when I was shooting sunrises in Bryce Canyon we would arrive well before sunrise.  Generally I would start shooting when it was light enough to get a good exposure at 30 second, ISO 100 and f/16.  That’s a good 20 to 30 minutes before the sun peeks over the horizon.  In that wonderful pre-sunrise light the dynamic range is very low, maybe a total of four or five stops.  There is no need for HDR because under those circumstances I can get a good 8 and if I want 9 stops of dynamic range from my sensor.

But as soon as the sun is above the horizon all that changes.  The dynamic range jumps to at least 8 stops, probably more.  (I don’t take the time to scintifically measure the dynamic range because things happen so fast in those first few minutes.)  I don’t want to take any chances with that incredible light so I switch to HDR, just for insurance if nothing else.

Continue reading “High Dynamic Range Processing”

(565)