Photographic Gear – Lenses

The next stop on a tour through my camera bag – lenses

Continuing the tour through my camera bag, we come to the gear that takes up the most room – the lenses. The previous two articles discussed the bag itself and the camera body. Here are the links if you haven’t read them yet.

Photographic Gear – A Tour of a Photographer’s Camera Bag

Photographic Gear – the Camera Body

It’s interesting that most people when they think of a camera, think of both the body and the lens combined. And granted, one is not much good without the other. One day I was with friends at the horse races and was using my 70-200mm long lens. One of my friends said, “Wow, what a nice camera.” (Here’s a tip; it looks even nicer with the lens hood on.) I doubt she would have even noticed if I had a modest 50mm lens on.

But those of us that have camera bodies with interchangeable lenses know that the body and lenses are two separate components. Together they make up what I like to think of as my artistic instrument.

Before going over each of my lenses I want to revisit something I said in the first article and that is that all my gear is selected to support my creative vision. It’s not the technology that drives my buying decisions but rather a limitation in what I’m trying to achieve. If I want to do something and my gear restricts my vision, it’s time to start looking to either replace it or add to it.

With that in mind, when it comes to lenses my creative vision extends from the broad, all-encompassing landscapes at one end to the intimate landscapes at the other. That means I need a collection of lenses that range from extreme wide-angle to strong telephoto. So, let the tour begin.

clip_image002

Continue reading “Photographic Gear – Lenses”

(263)

Making a Photograph – A New Approach to Tonality Adjustments

Watch as a photograph of an icon of Zion National Park is made.

For some time now I’ve been using and teaching a process of working on photographs in Lightroom. It consists of basically four steps: manual adjustments, tonality adjustments, hue adjustments and finally saturation adjustments. Quite some time ago I had the brilliant idea of converting the image to black and white before doing the tonality adjustments. The technique I used was the B & W tab in Lightroom’s HSL group.  Once the tonality adjustments were done, the image would be converted back to color and the process continue.

It didn’t work out because when I converted the image back to color, the colors were so oversaturated and unnatural that the image looked horrible. It was just easier to do the tonality adjustments on the color image. So I quickly gave up on that technique. But the other day I was reading an article in Popular Photography magazine that rekindled this idea. It took a different approach. It turned the image to black and white by setting the Saturation adjustment to -100. Now the author did this in the middle of the process but I thought that if I applied this to my process and did that at the start it just might work. So I was eager to give it a try. Let’s try it with this image of the Watchman in Zion National Park.

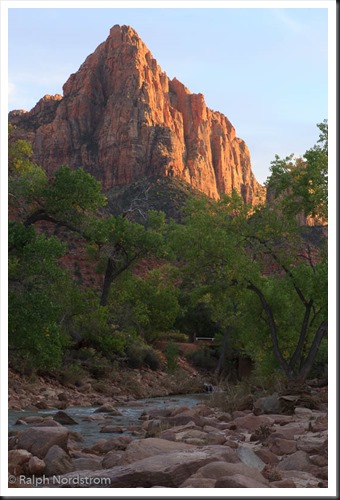
utah_141010__SM32783 This is the original raw file. I haven’t done anything to it yet. It doesn’t need any mechanical adjustments. These consist of removing spots, straightening the image, maybe some noise reduction and the final crop. But since none of these are required we can move on to the tonality adjustments.


Continue reading “Making a Photograph – A New Approach to Tonality Adjustments”

(4930)

Lightroom Tutorial – Workflow Made Easy

Simplify your Lightroom workflow with these easy steps.

Lightroom is a great tool. It’s quick and easy to use – once you get the hang of it. But sometimes mastering the workflow, the steps you go through to take a raw file to a ‘final’ image, can be a bit daunting.

Let me say up front that Lightroom is an important part of my workflow but it’s not the only part.  Every photograph I work on starts in Lightroom but is completed in Photoshop.  Nevertheless, Lightroom gets a photograph to about 80% of the final product.  I know many people who use Lightroom exclusively and Photoshop only in rare circumstances if at all.

So back to the workflow.  Can it really be made easy?  Yes it can.  There are four major steps (not counting import – see Lightroom Tutorial – Importing Photographs):

  1. Mechanical adjustments like dust spot removal and cropping
  2. Tonality adjustments
  3. Hue adjustments
  4. Saturation adjustments

Let’s skip the first step and start with the second.  The example will be in Lightroom 4.

Continue reading “Lightroom Tutorial – Workflow Made Easy”

(7135)