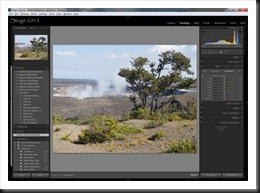
Lightroom Tutorial – Workflow Made Easy

Simplify your Lightroom workflow with these easy steps.

Lightroom is a great tool. It’s quick and easy to use – once you get the hang of it. But sometimes mastering the workflow, the steps you go through to take a raw file to a ‘final’ image, can be a bit daunting.

Let me say up front that Lightroom is an important part of my workflow but it’s not the only part.  Every photograph I work on starts in Lightroom but is completed in Photoshop.  Nevertheless, Lightroom gets a photograph to about 80% of the final product.  I know many people who use Lightroom exclusively and Photoshop only in rare circumstances if at all.

So back to the workflow.  Can it really be made easy?  Yes it can.  There are four major steps (not counting import – see Lightroom Tutorial – Importing Photographs):

  1. Mechanical adjustments like dust spot removal and cropping
  2. Tonality adjustments
  3. Hue adjustments
  4. Saturation adjustments

Let’s skip the first step and start with the second.  The example will be in Lightroom 4.

Continue reading “Lightroom Tutorial – Workflow Made Easy”

(7135)

Lightroom Tutorial – Polarizer Filter

How do simulate the effect of a polarizer filter in Lightroom.

A Polarizer filter is generally the first filter a landscape photographer buys.  It is so versatile.  It can darken blue skies, reduce harsh reflections and intensify colors.  Many photographers put polarizers on their lenses and never take them off.

But this is a Lightroom tutorial.  So why in the world am I talking about polarizer filters?  Well, it’s because I have a trick I’d like to share with you, one that I’ve never seen discussed anywhere else.  It’s what you can do in Lightroom to create the polarizer effect without a polarizer.  In fact, it can be better than the real thing, especially if you are shooting with a wide angle lens.  Because, the angle of view can be so great that part of the sky will be affected by the polarizer and the rest will not.  So it looks pretty unnatural when the sky in part of your image is dark and the rest is washed out.

So, what’s the trick?  Well, consider this image taken on a recent trip to Hawaii.  I shot it with my Canon G11 and I don’t even own a polarizer filter for it.  It’s a photograph of the ongoing eruption in a crater in the Kilauea caldera.  In the bottom of the crater is a lake of lava.  The smoke you see is a plume of noxious gas.

polarizer_1

(Click on the image for a larger view)

Continue reading “Lightroom Tutorial – Polarizer Filter”

(19878)